The latest updates in REcenterhub focus on the brand-new Broker Center. These enhancements will improve functionality, security, and user experience for Brokers.
Broker Center
Available to DB user IDs
Please note the Broker Center will give you access to the office associated with the Broker MLS ID you logged in with. If you have more than one Broker MLS ID, you will need to log in with the Broker MLS ID that corresponds to that office.
Configure messages to your team or office, such as event announcements, policy changes, or important deadlines.
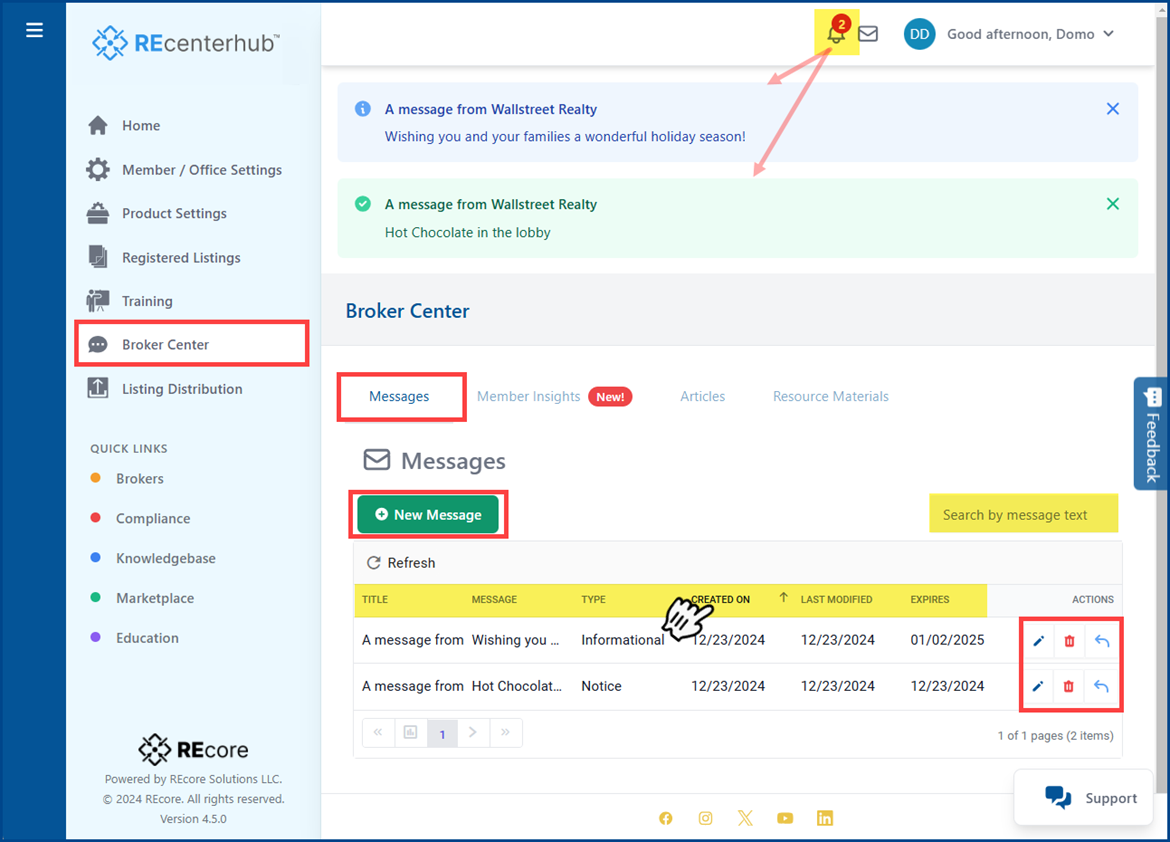
Go to the Broker Center > Messages tab to review, search, or sort your existing messages and create new ones.
- Go to the System Message Bell icon, located at the top right of the screen
- Click on the Bell to view all System Messages and/or Mark as Read
- New messages will display as a banner along the top
- Locate specific messages using the “Search by message text” box
- Click on the column headers to sort
- From the Actions column:
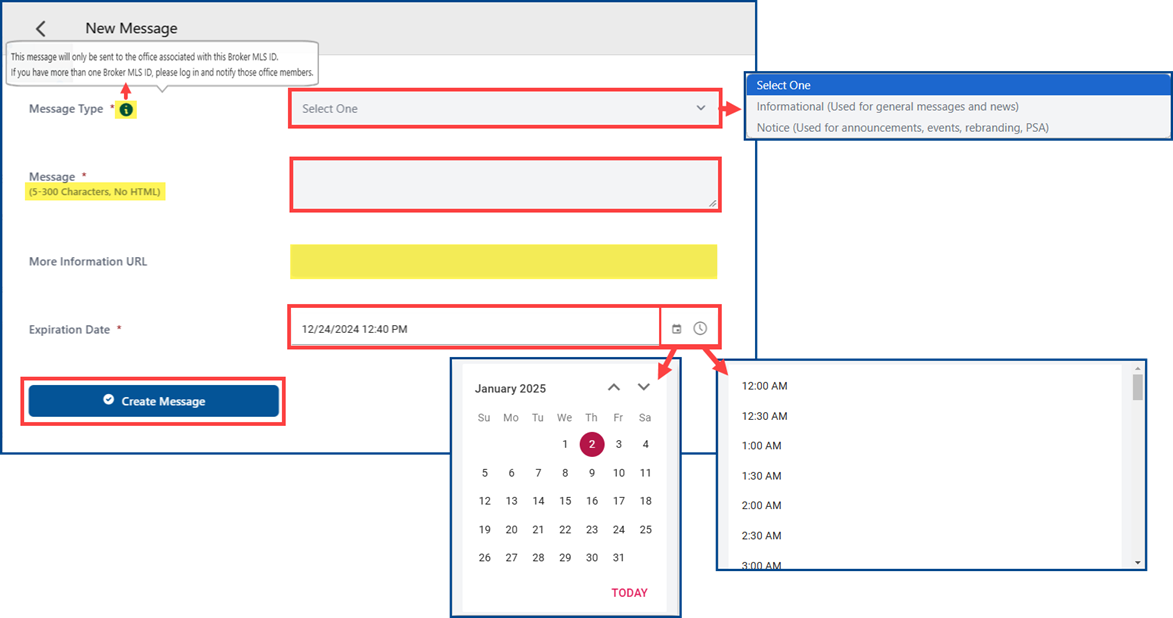
To create a new message, click New Message.
- Select the Message Type
- Informational messages (general messages and news) will be displayed with a blue banner
- Notice messages (announcements, events, rebranding, PSA, etc.) will be displayed with a green banner
Note: This message will only be sent to the office associated with the Broker MLS ID
- Enter your Message (5-300 characters, no HTML)
- Add an optional URL, if desired
- If included, a “More Information” button will appear in the banner
- Select the Expiration Date and Time
- Click Create Message
The new message banner will display until the expiration date. Members can dismiss the banner by clicking the X to close it or marking it as a read from the System Message view.
Quickly create, review, search, and sort support tickets or send messages to support departments, directly from the Broker Center.
Note: The New Support Ticket feature will not be available on the 1/7/2025 release date, but will be coming soon in a future update.
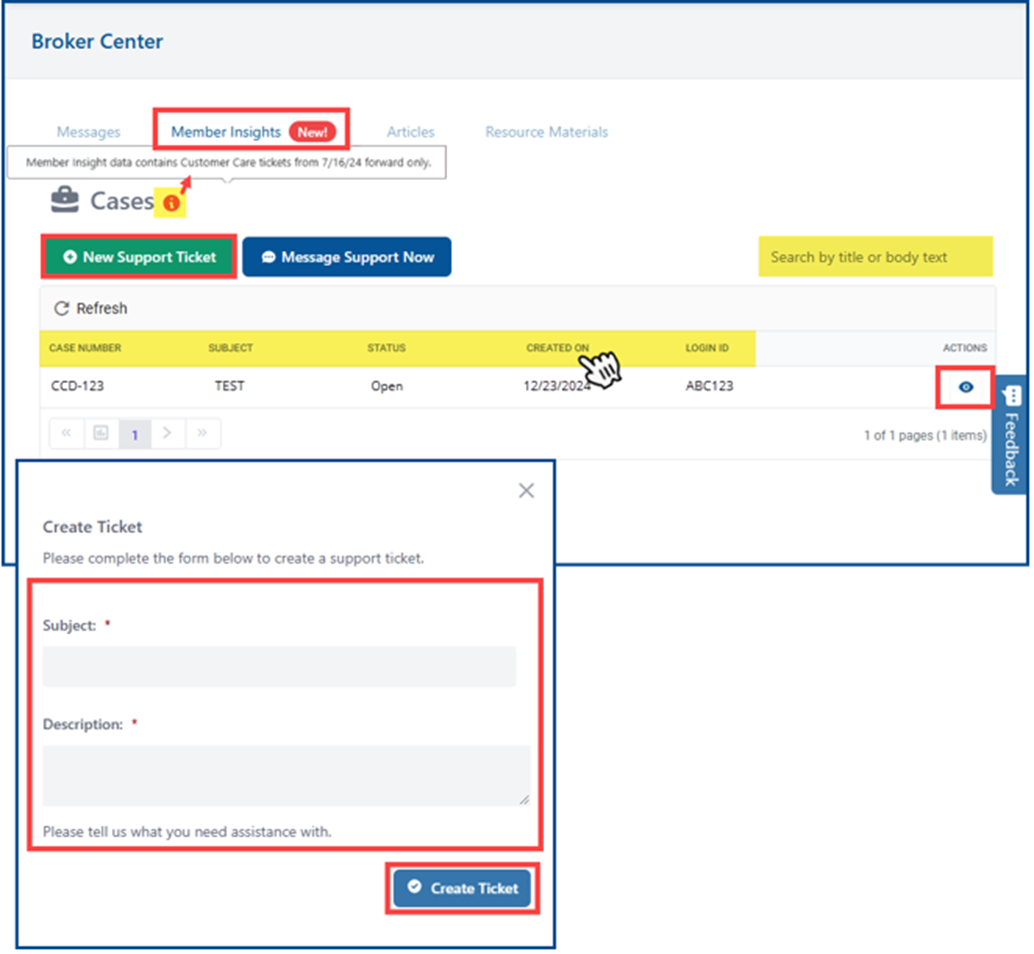
From the New! Member Insights tab, you can review your existing tickets and in a future update, can create new ones.
- Review Customer Care tickets going back to 7/16/2024
- Search for specific tickets using the “Search by title or body text” box
- Click on the column headers to sort
- From the Actions column, click on the eye icon to view the ticket details.
To create a new ticket, click on New Support Ticket.
Enter a Subject and Description (500 characters max) and click Create Ticket to submit.
You can also send a priority-flagged message to our Compliance or Customer Care Departments directly from the Broker Center without having to re-authenticate.
Select Message Support Now.
- Enter your first name, last name, and confirm your name is correct
- Enter your email address (associated with your MLS User ID) and then your User ID
- Select if your inquiry is for Compliance or Customer Support
- Answer any additional contextual prompts
- Enter your message
- Include an optional attachment
- When finished, click the arrow to send
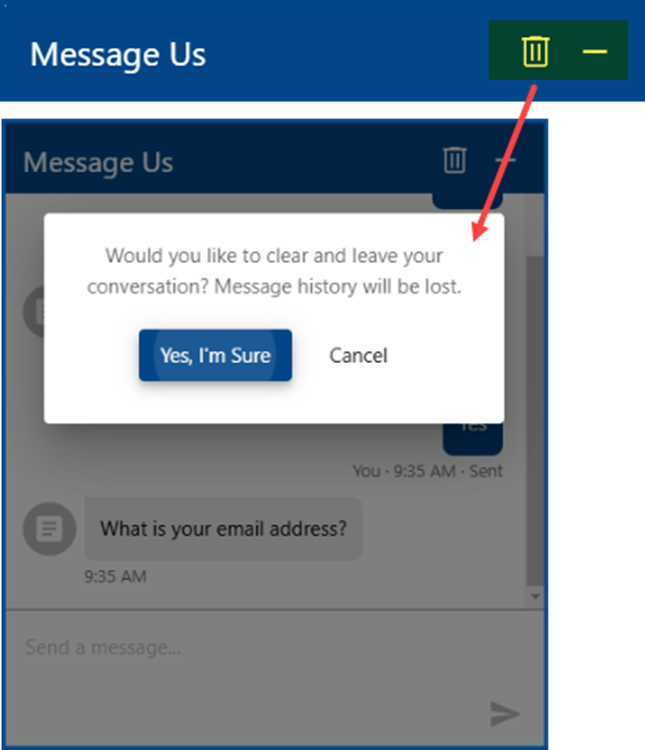
Click the trash icon to delete your message and/r click the dash icon to minimize the chat.
Note: The message history will be lost when the conversation is deleted.
Add articles to the REcenterhub Article Carousel to share updates, news, and important information.
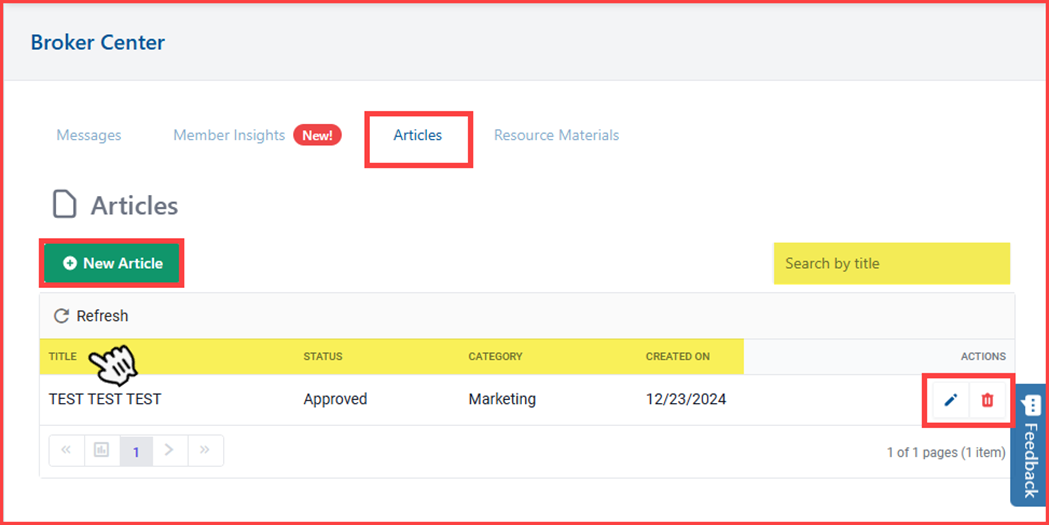
The Articles tab features current and former articles.
- Search for specific articles using the “Search by title” box
- Click on the column headers to sort
- From the Actions column, click the pencil icon to edit an article; click the trash icon to delete it.
To create a new article, select New Article.
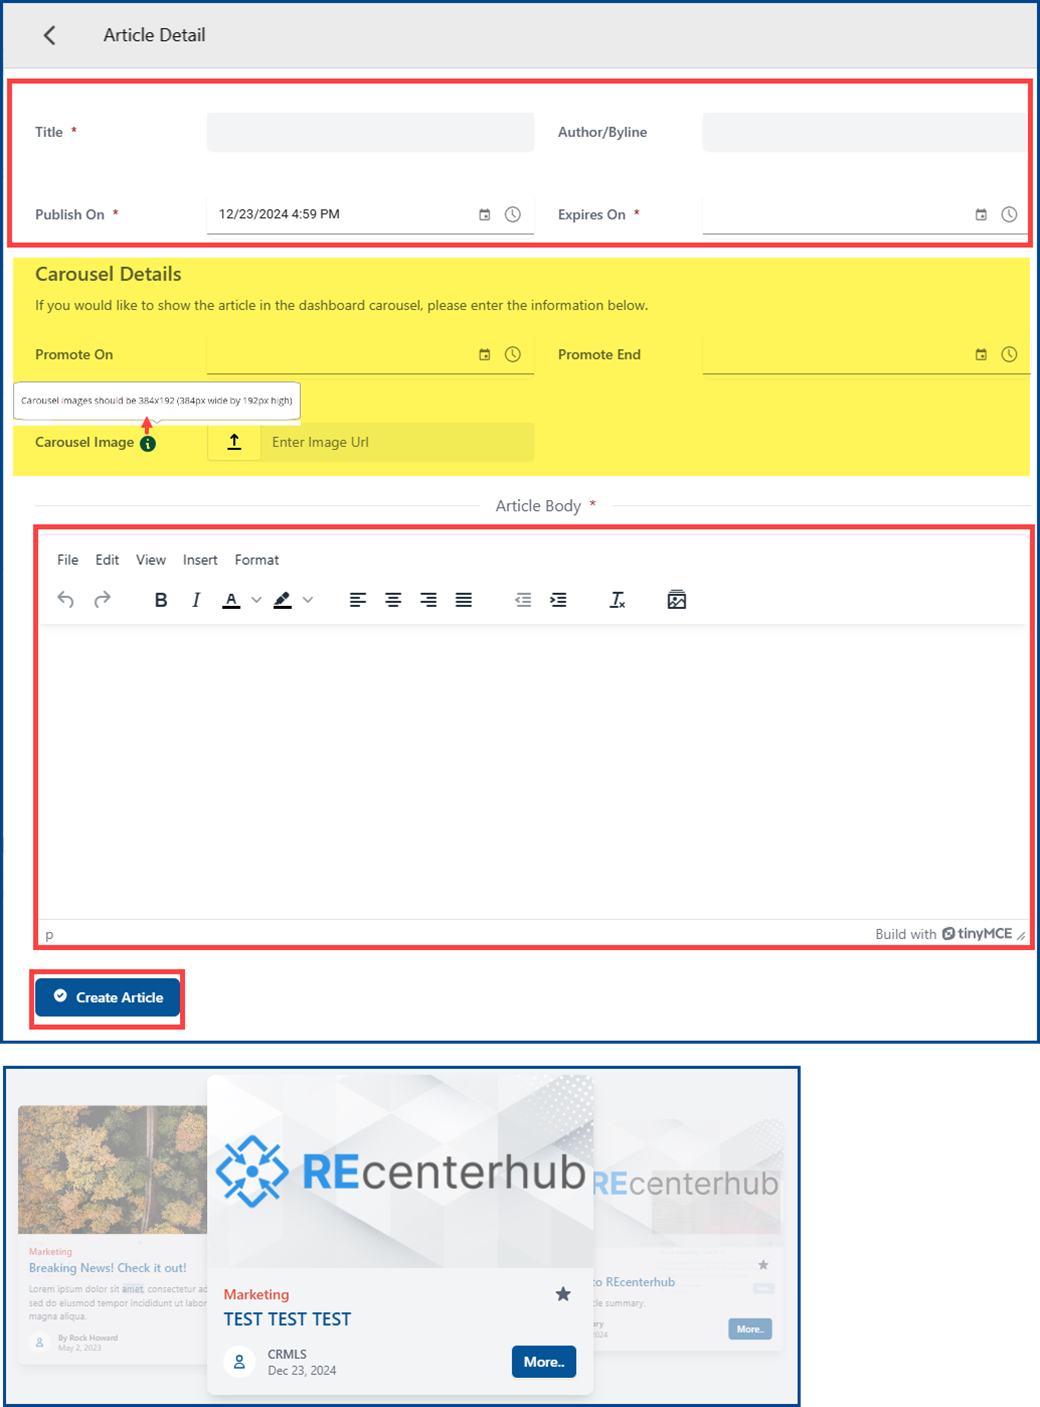
- Add the Title, Author/Byline, Publish On Date/Time and Expires On Date/Time
- Titles must contain a minimum of 5 characters
- To add the article to the REcenterhub Article Carousel:
- Enter the Publish On Date/Time and Expires On Date/Time
- Upload a Carousel Image
Note: The optimal image file types are .jpg or .png with a resolution size of 384×192)
- Enter the information in the Article Body (limit 1000 characters)
When finished, select Create Article to schedule or publish on the REcenterhub article carousel
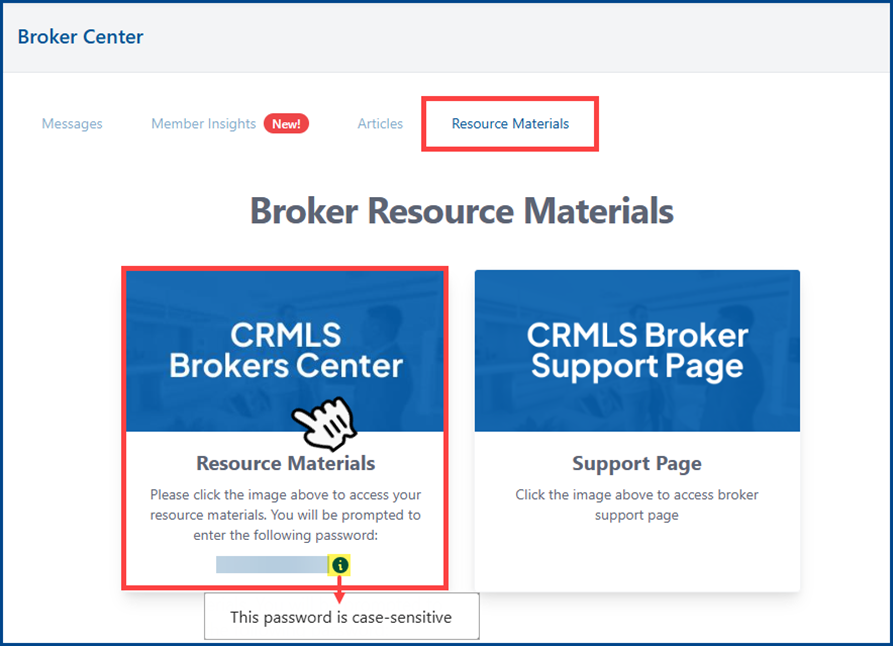
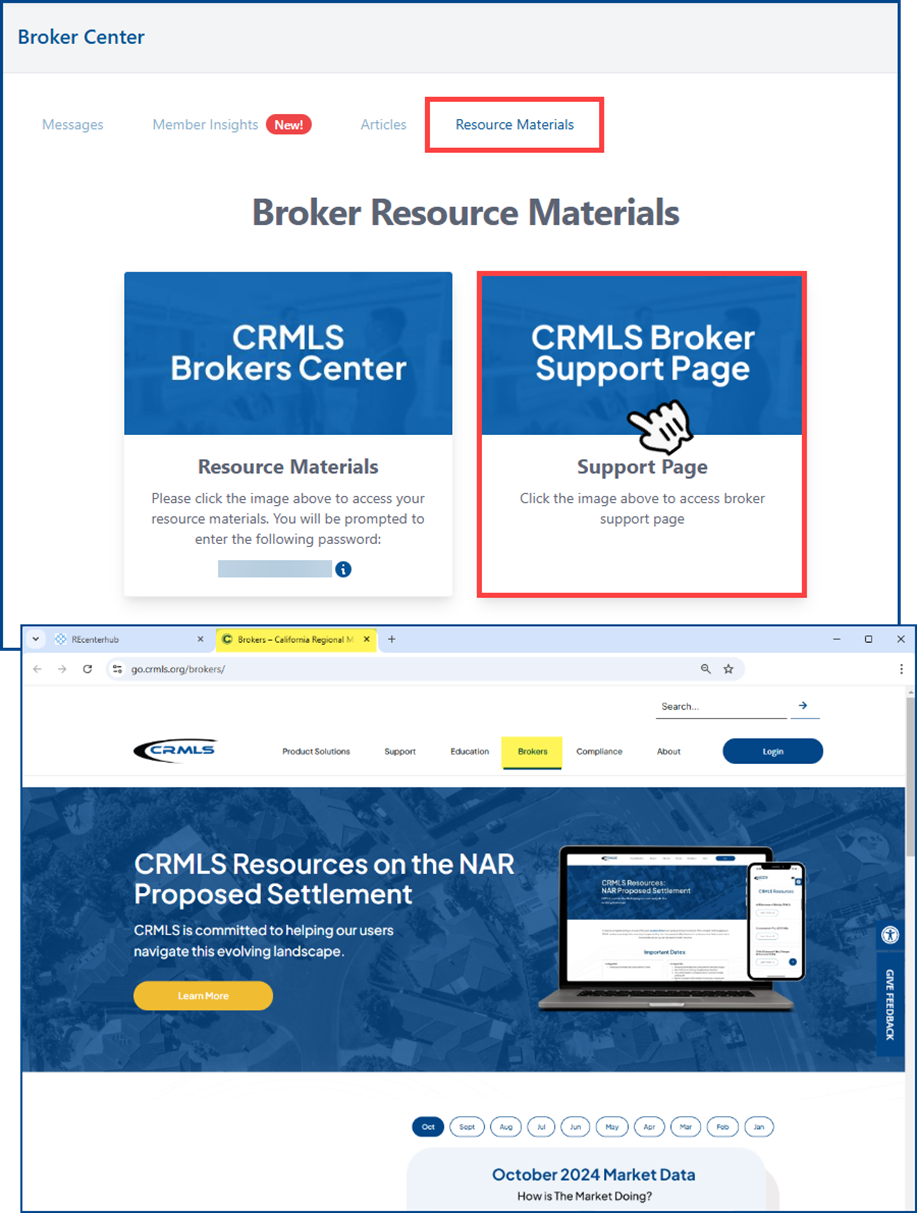
Access your password-protected CRMLS Brokers Center and the CRMLS Broker Support Page directly from the Broker Center.
From the Resource Material tab, click on the CRMLS Brokers Center, and enter the password when prompted.
Note: This password is case-sensitive and will change periodically.
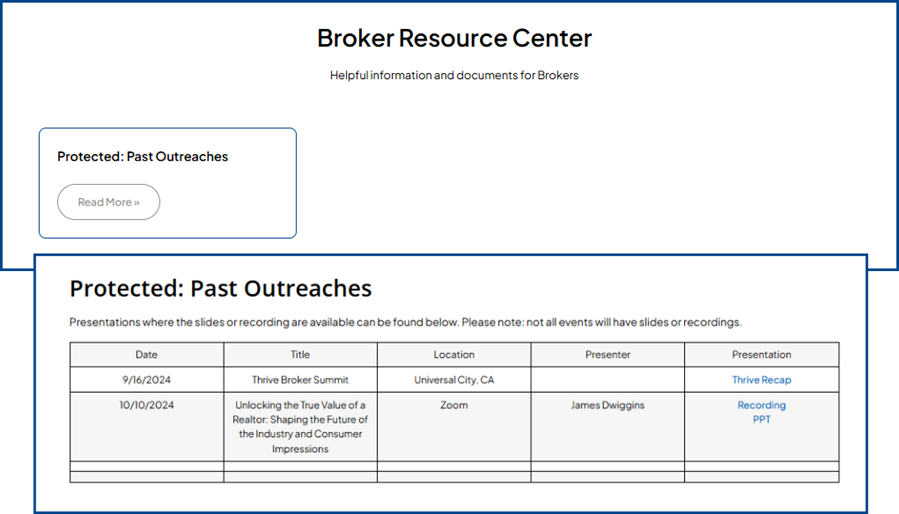
Click Read More on any section to open it in a new browser tab.
To return to the Resource Materials page, simply click browser’s back arrow or select the REcenterhub tab, when applicable.
Click on the Broker Support Page to access the Broker Support Page in a new tab on go.CRMLS.org.
