REimagineHome AI is the AI-enhanced virtual staging tool for redesigning any room in a snap. Below are the steps for how to get started generating images.
Click to jump to:
How to Access REimagineHome AI
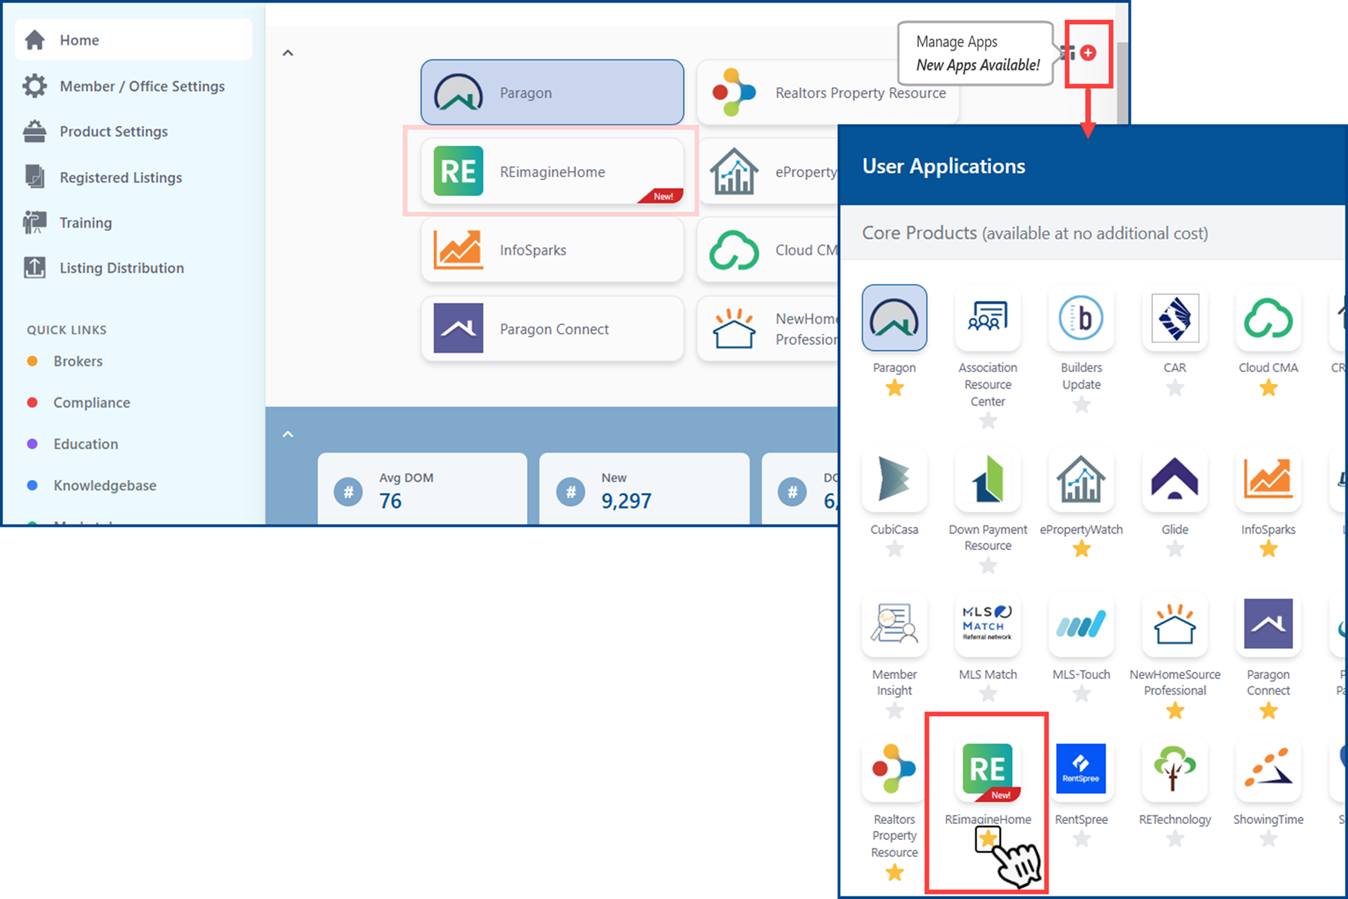
From your REcenterhub dashboard, click on the Manage Apps + icon and select the REimagineHome tile.
Tip: Click the star below the tile to mark it as a favorite and display it on your dashboard home page.
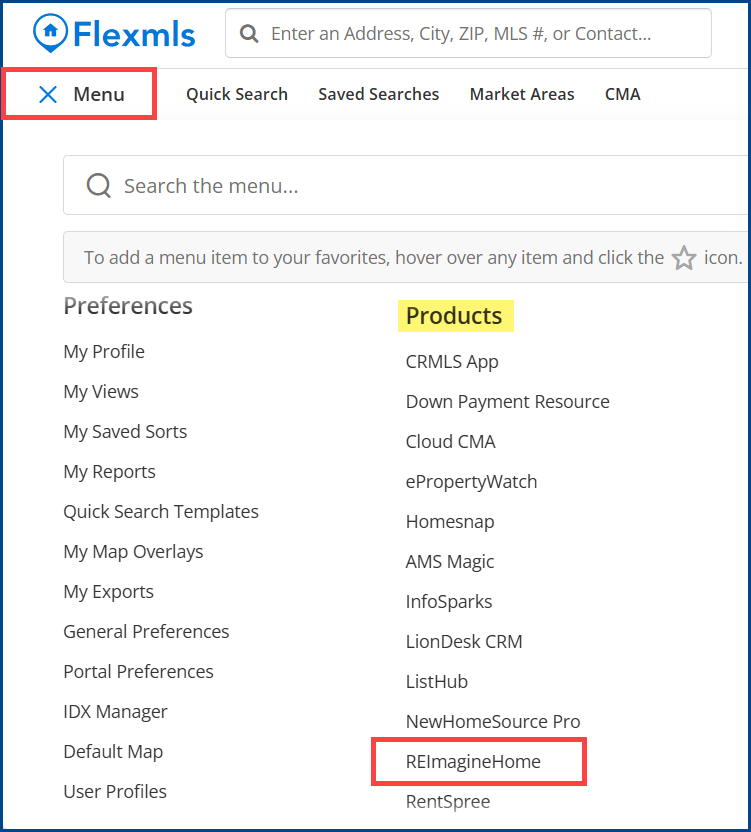
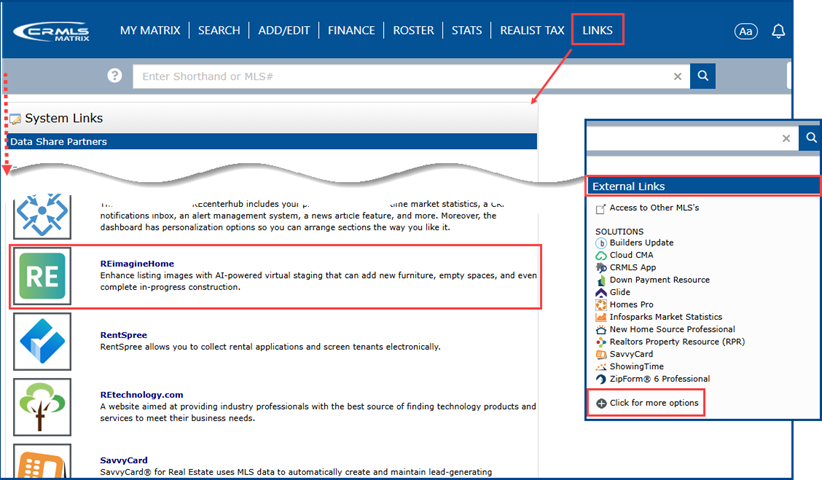
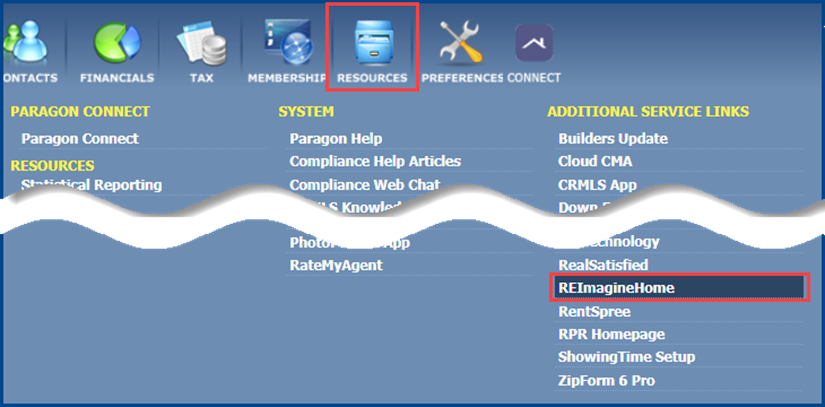
Additional Ways to Access REimagineHome AI
Flexmls – Menu > Products
Matrix – Links and External Links
Paragon – Resources
Signing Up
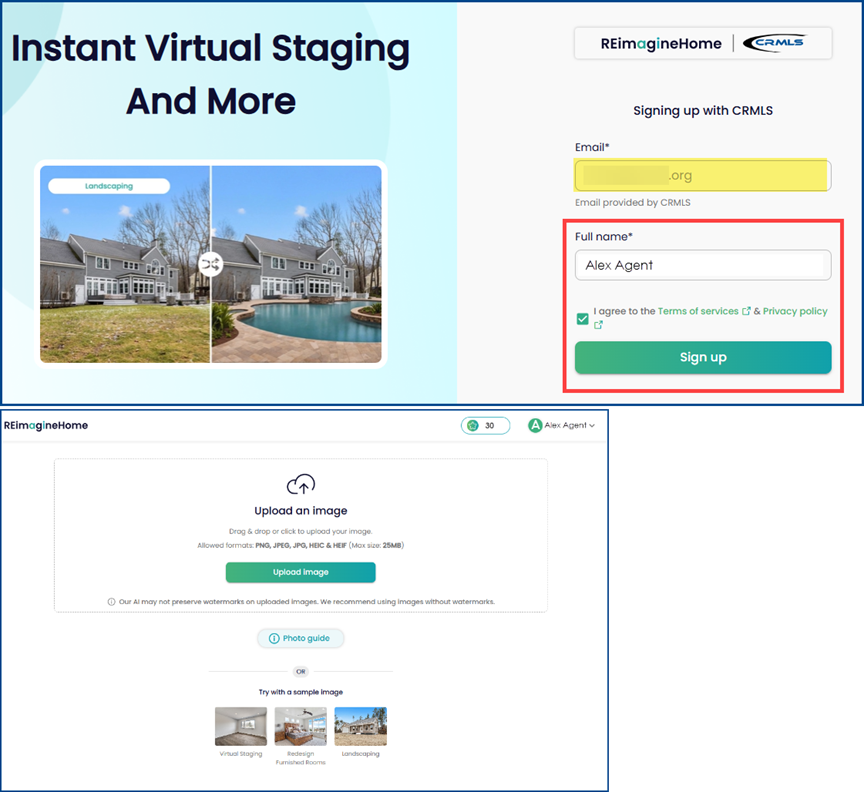
The first time you access REimagineHome AI, you will be directed to a “Signing up with CRMLS” page. Your MLS email address will auto-populate in the first field. To continue signing up:
- Enter your full name
- Check the box to agree to the terms of service & privacy policy
- Click Sign up
The system will then automatically send you a “Welcome to REimagineHome” email.
Note: This is a one-time sign up, so any future access to REimagineHome AI will send you directly to the product.
REimagineHome AI Home Page
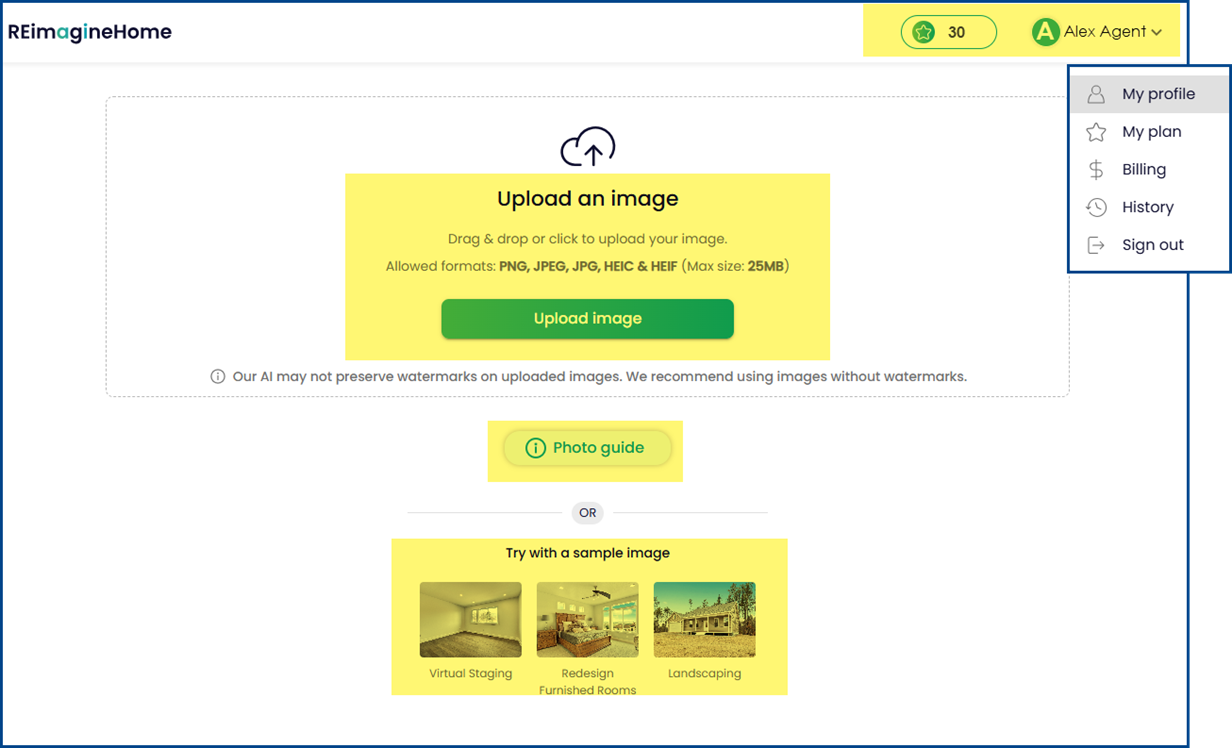
Your available monthly credits are displayed with a star icon at the top right of the home page, next to your name.
Note: CRMLS users receive an Essential Plan which grants 30 credits per month. The 30 credits renew each month on the date you first signed up. Credits do not roll over each month.
Click on your name to access account info, such as:
- My profile
- My plan
- Billing
- History
- Sign out
In the center of the home page, you can upload an image to begin altering it.
The photo guide provides helpful examples of which photos work best. You can try with a sample image to experiment with different preloaded photos.
Note: A credit will be deducted if you generate a new AI-enhanced image with a sample image.
Altering an Image
Drag & drop an image into the space or click the upload image button to select one from your files.
Note: Images must be in PNG, JPEG, JPG, HEIC, or HEIF format (Max size: 25MB)
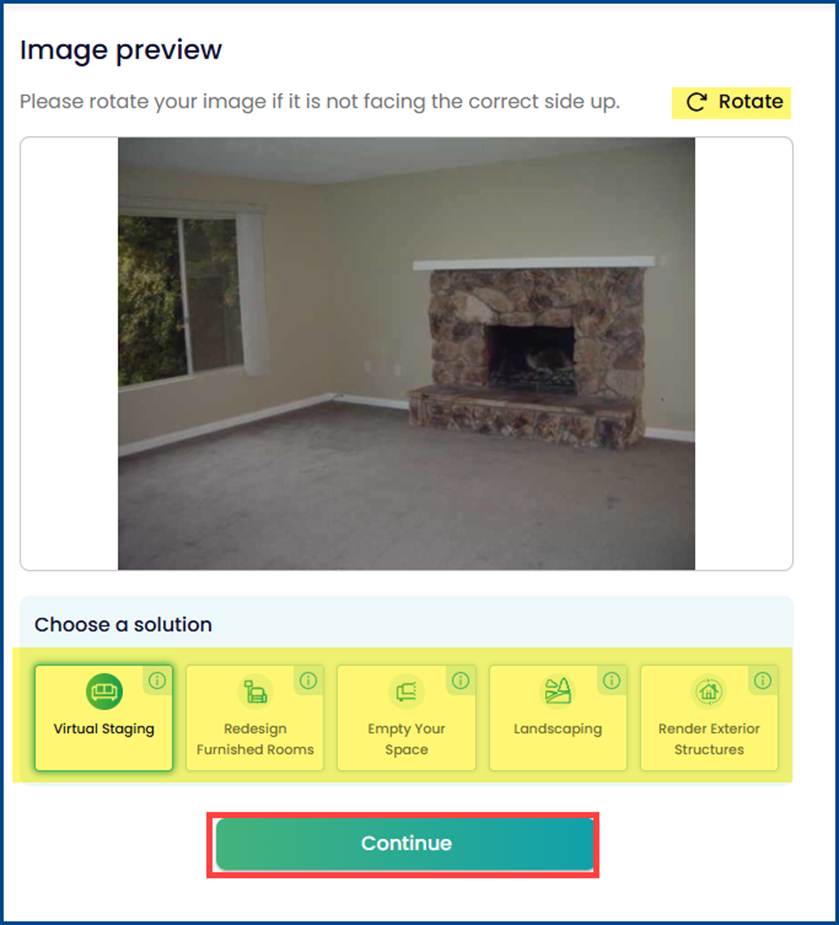
Preview the image and rotate it, if needed.
Choose a solution from one of the following:
- Virtual Staging
- Redesign Furnished Rooms
- Empty Your Space
- Landscaping
- Render Exterior Structures
Click Continue.
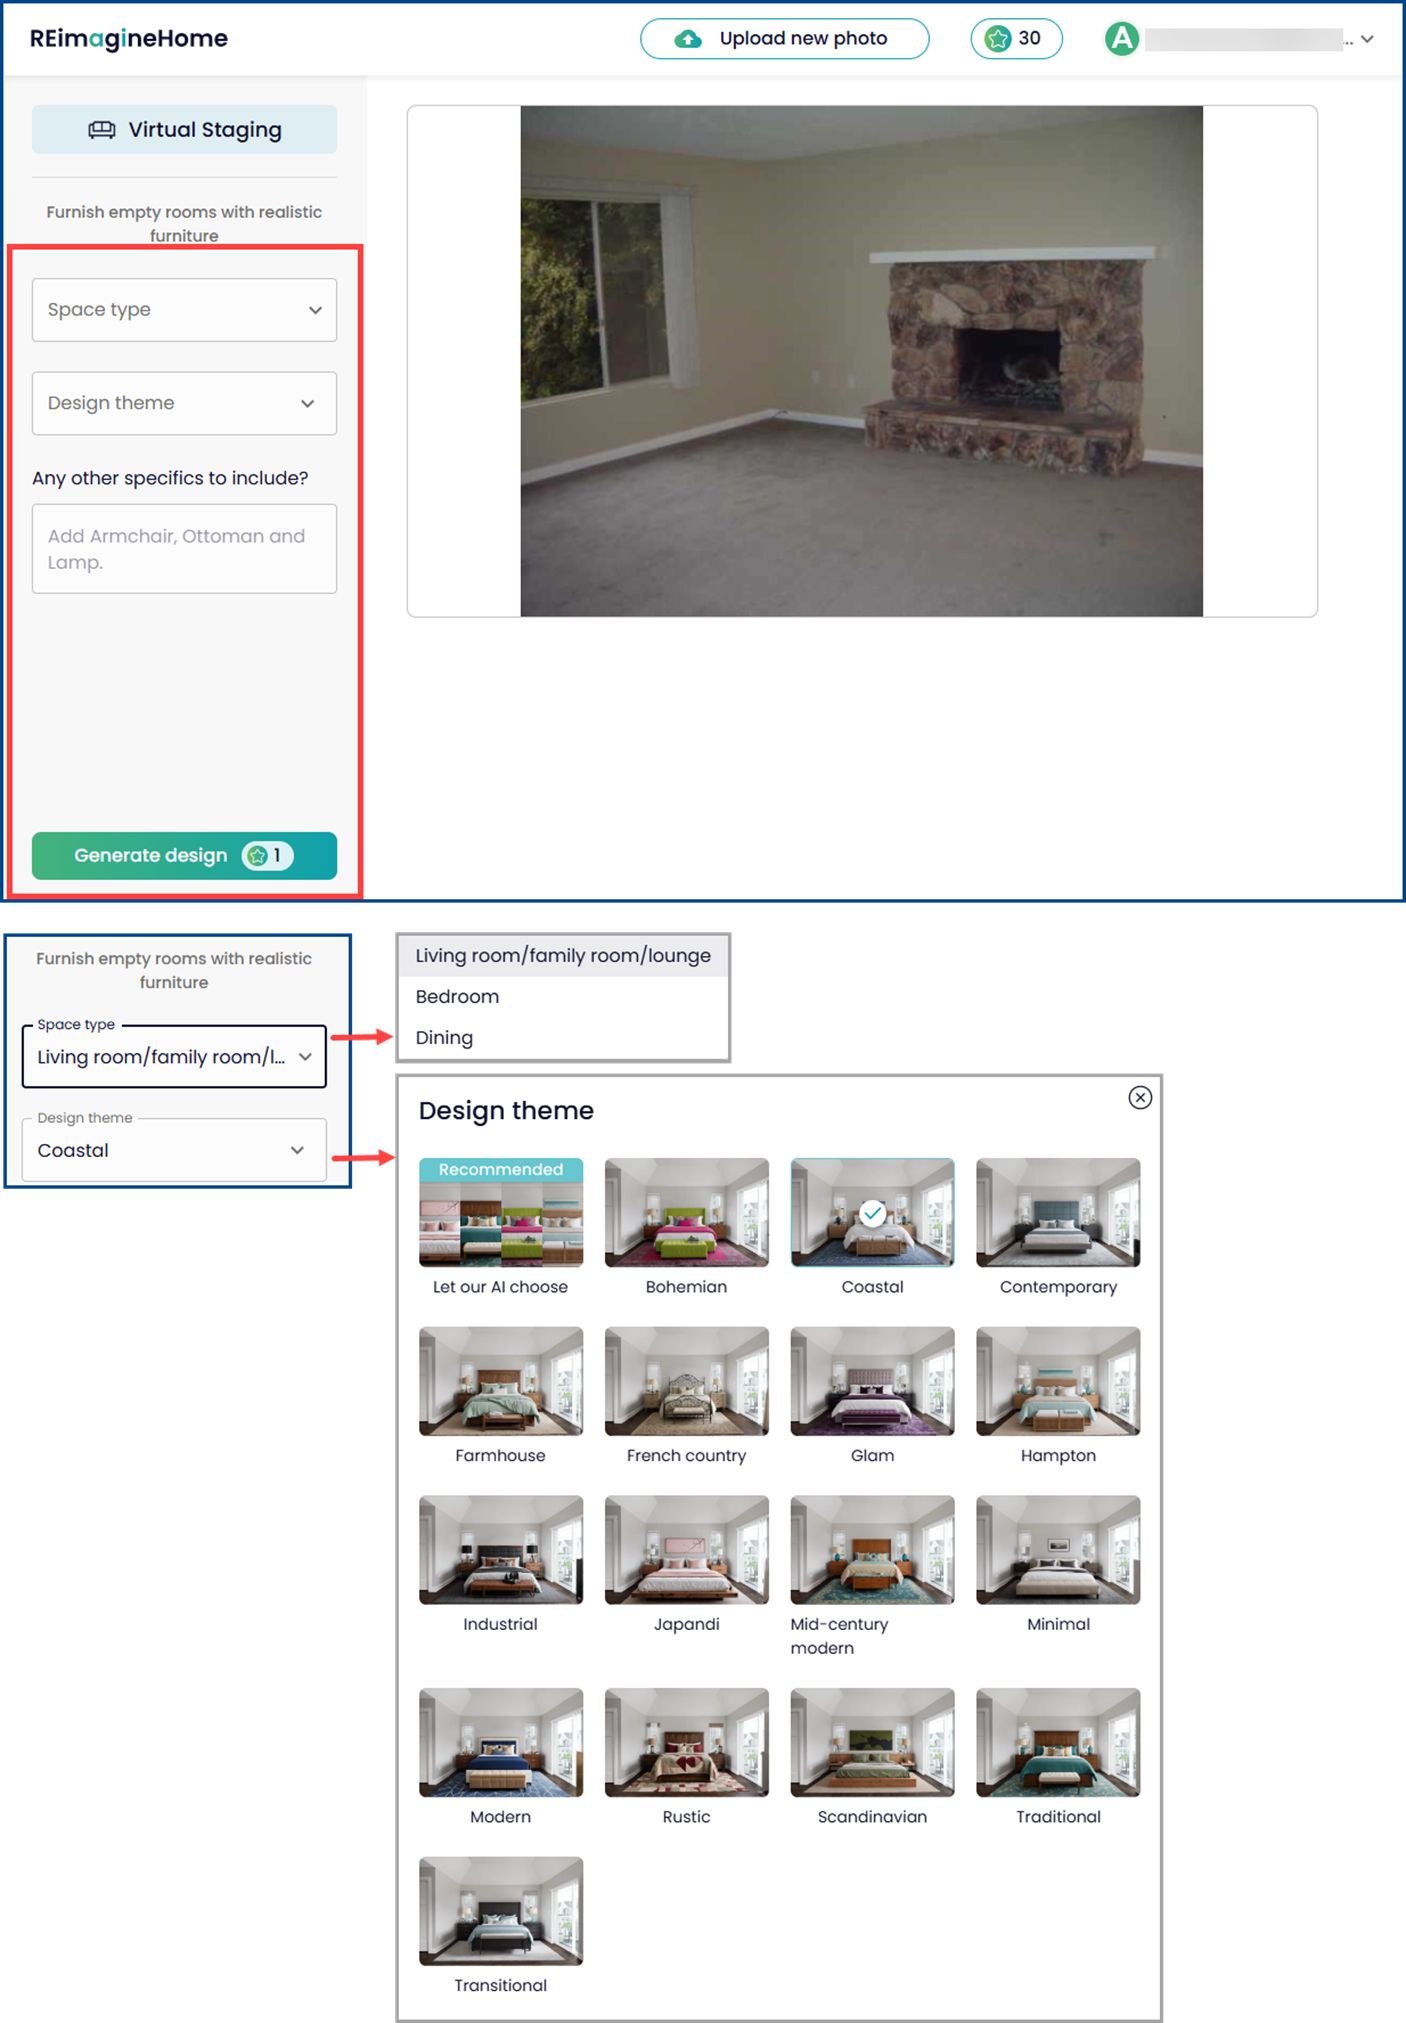
Click the drop-down menus to select your desired Space type and Design theme.
In the “Any other specifics to include?” field, enter in any particular design elements you want for your image.
Click Generate design.
Note: Each time you click Generate design, a credit will be deducted from your account.
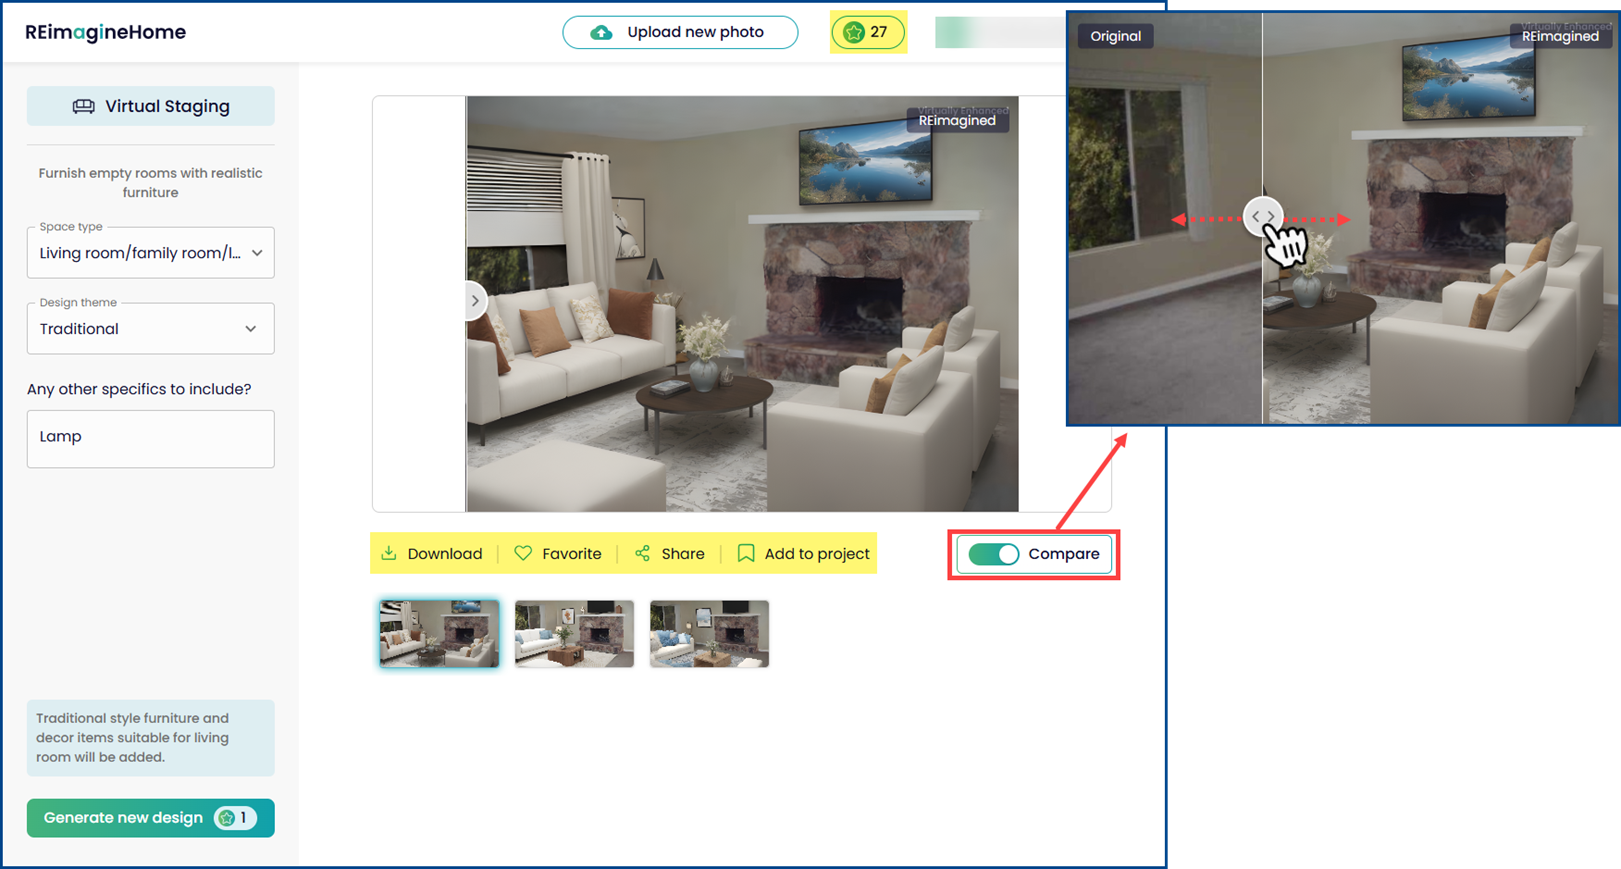
The new REimagined image will generate after a short processing period (usually less than 30 seconds). Toggle Compare to view the original and REimagined image.
To save the image, either download it, mark it as a favorite, share it, or add it to a project.
You can change the space type and/or design theme and generate a new design, but this will cost you another credit. Thumbnail images of generated designs are displayed below the main image.
Account Info
My Profile
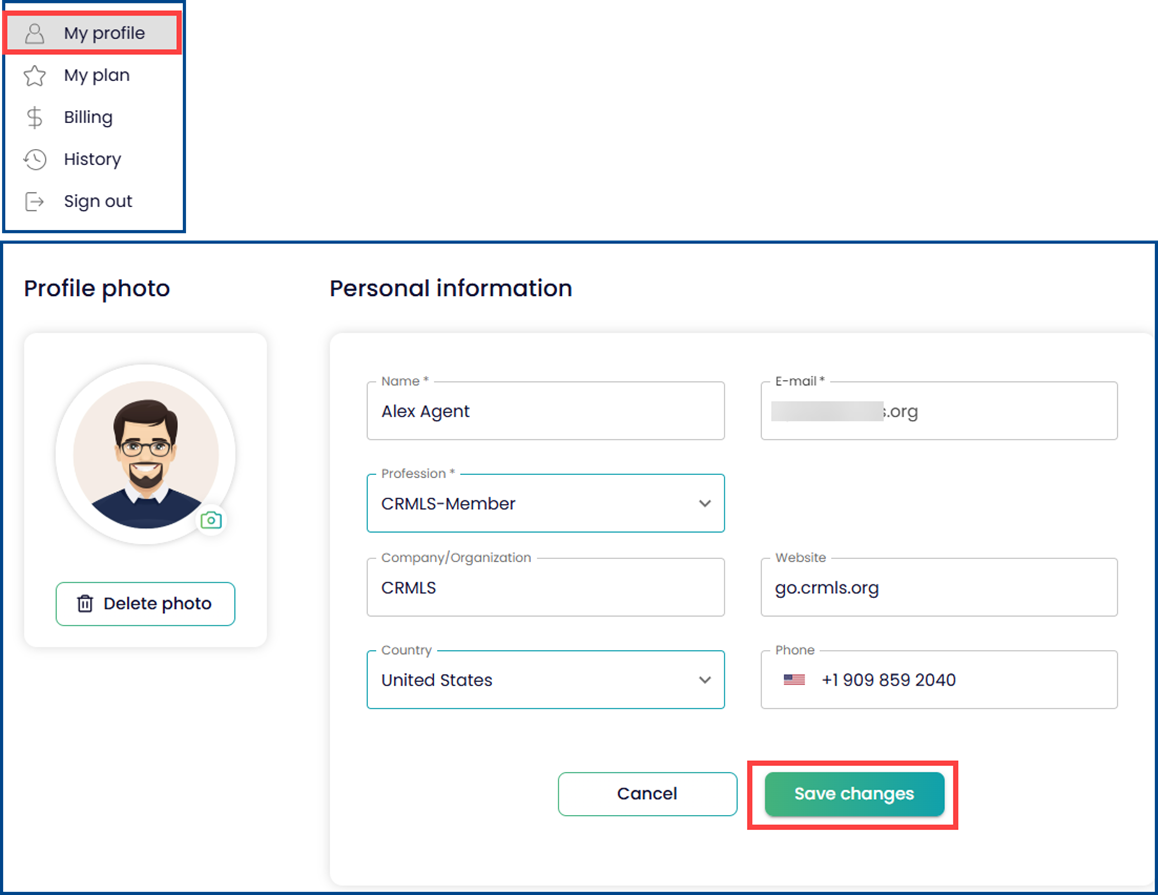
Update your personal information and/or profile photo and click save changes.
My Plan
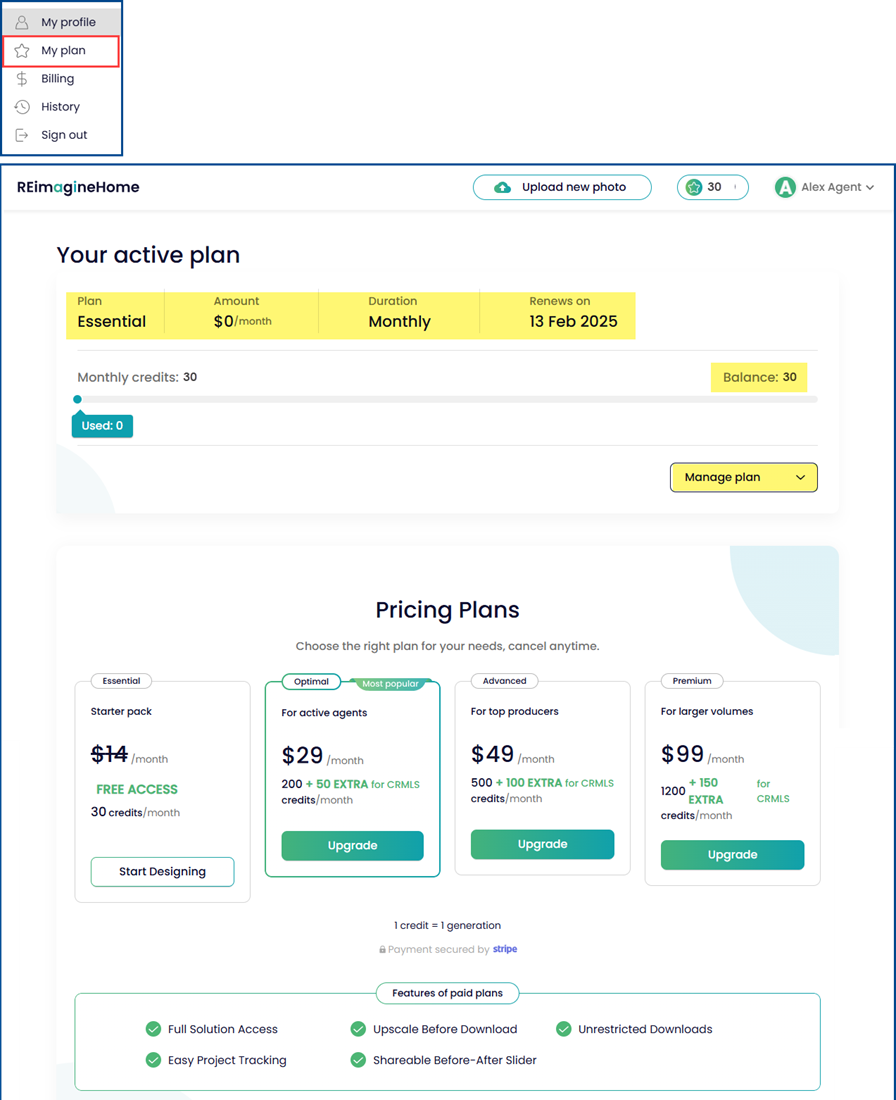
View your plan, credit renewal date, and additional plans for purchase. If you upgrade your plan, you can downgrade it at any time from manage plan.
Note: Unused credits do not carry over to the next month.
Billing
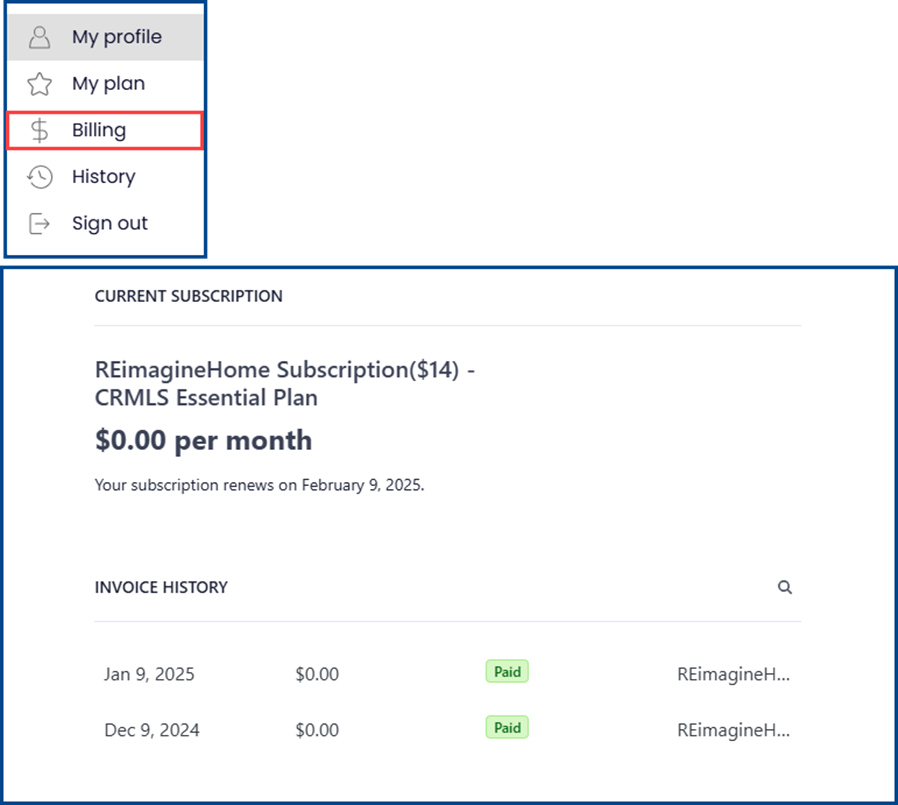
View and manage your subscription and payment if you purchased an upgraded plan.
To revert your plan back to the no-cost Essential Plan, select the option in My Plan at any time. The change in plan will begin on that date, and the complimentary 30 credits will renew each month on the same date.
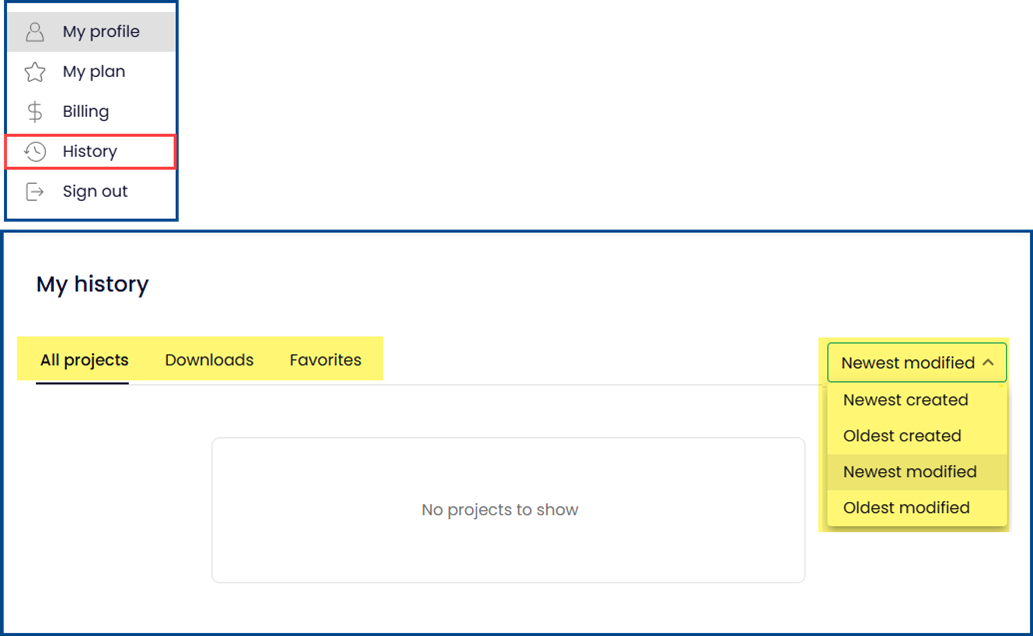
History
View all your projects, downloads, and favorites. You may sort them by newest/oldest modified/created.
