This guide will walk you through the steps agents and brokers can take to update the way their listings display on Internet Data Exchange (IDX) websites. IDX is the term the real estate industry uses for the portions of agent and broker websites devoted to searching MLS data.
As of September 1, 2021, CRMLS will update the current Listing Credit rule to read as follows:
12.16.5 Listing Credit. All Listing Brokers grant permission for any Advertising Broker to display any listings submitted to the service by the Listing Broker only if the listing display or advertisement is clear so that a reasonable real estate consumer understands:
a) Who is the Listing Agent & Broker,
b) Who is the Advertising Broker and
c) How to contact that Listing Agent or Broker.
Here are two before and after examples of IDX websites with and without the listing agent’s contact information.

Brokers – Listing Credit Setup
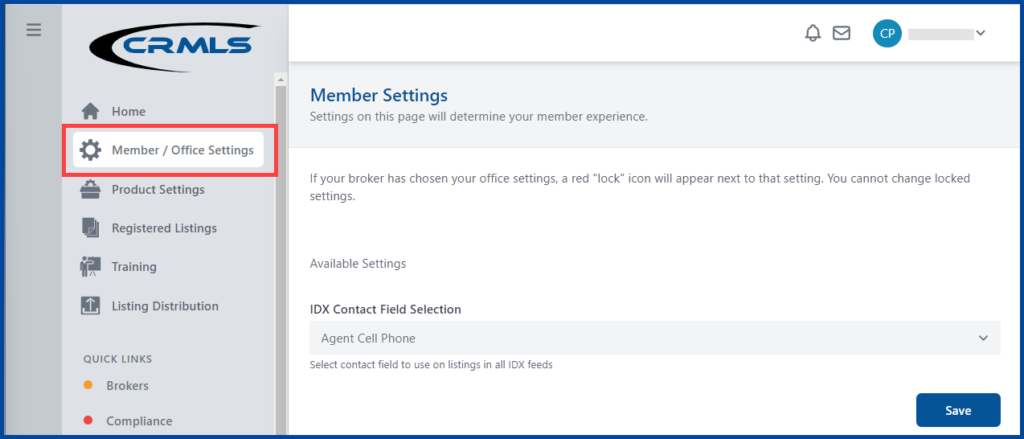
Login to your REcore dashboard and click on Member / Office Settings from the left navigation panel.
You can edit both member and office settings.
Member settings apply to individuals in your brokerage, including yourself; office settings apply to your entire office.
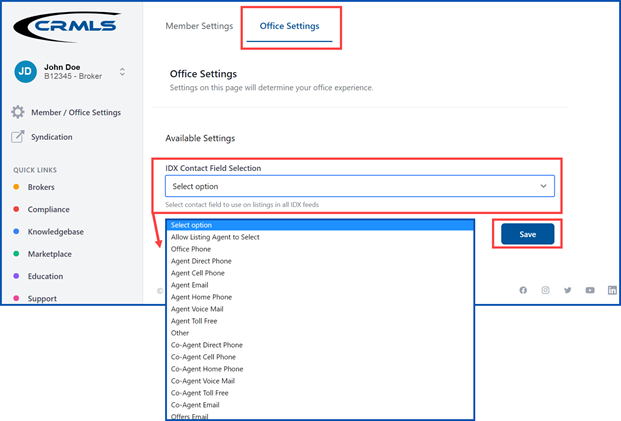
Click on Office Settings. Your main office will display.
Under “Your IDX Contact Information,” click the drop-down arrow to choose which contact information IDX websites will display for your office.
When finished, click Save.
Setting your information preference this way will result in all listings connected to that office having the same contact information appear in IDX displays.
Note: Most of these options pull from the member roster. A few of the options come from individual listings. For example, if you select co-agent email, the IDX display will populate with the co-list agent for that specific listing.
If you don’t want to use the global approach for your entire office, you can allow each of your agents to control what contact information will appear on their listings by choosing “Allow Listing Agent to Select,” and then clicking “Save.”
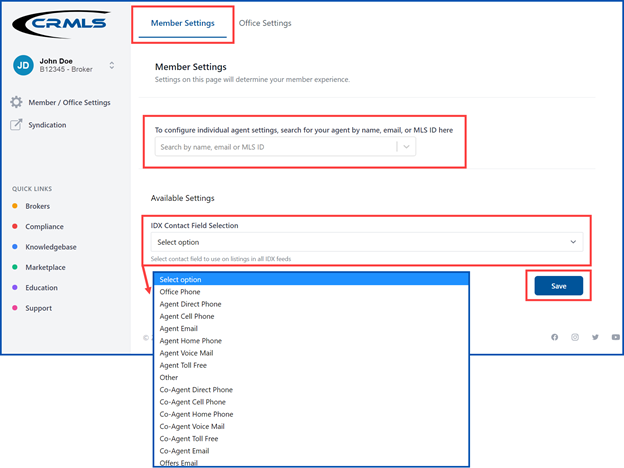
If, as the broker, you would like to control the IDX contact information for your agents, click on Member Settings.
Search for your agent in the “To configure individual agent settings, search for your agent by name, email, or MLS ID here” field.
Note: You may only control settings for agents under your brokerage license.
In the “IDX Contact Field Selection” field, select the contact information you want to display for this agent.
When finished, click Save
Agents – Listing Credit Setup
The set up is similar to the broker instructions, with some limitations.
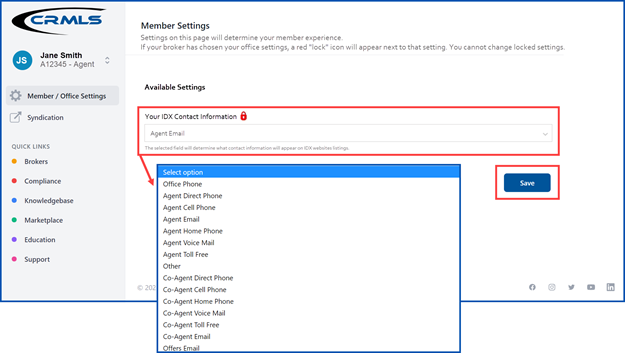
Login to your REcenterhub dashboard and click on Member / Office Settings from the left navigation panel.
Member Settings.
You can edit your contact information, but only if your broker has elected to allow you to do so.
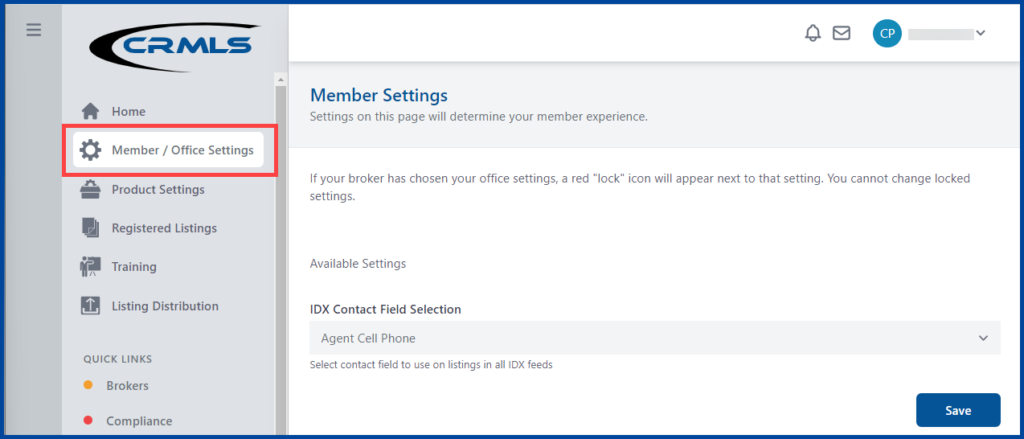
If your broker has chosen your options for you, a red “lock” icon will display next to the settings field and you cannot make any changes.
Click the drop-down arrow in the “Your IDX Contact Information” field and choose the contact information you would like your IDX listings to display.
When finished, click Save.
