Your brand says a lot about you and your business, so take the time to upload your Office Logo and Agent Image. These images can appear on reports, in a CMA Presentation, the membership roster, and the client Collaboration Center. It’s your brand – make it visible.
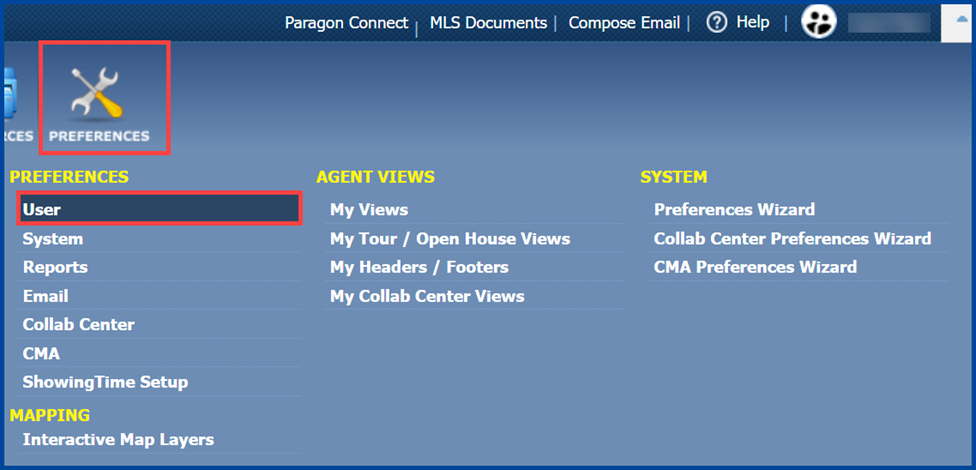
Start by clicking on the Preferences icon and select User from the “Preferences” list on the left.
Add Office Logo
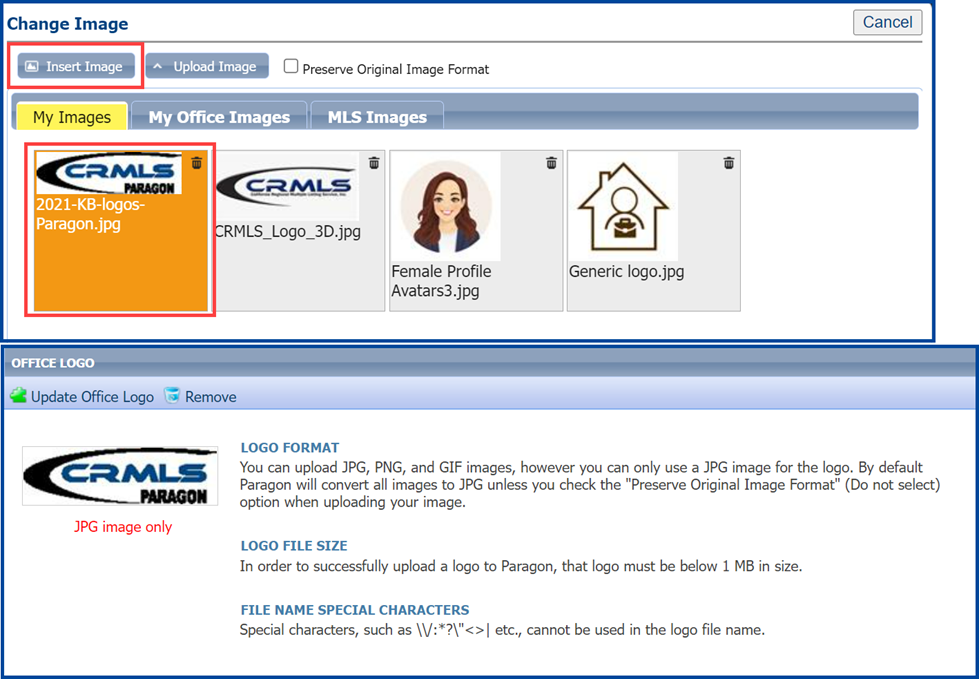
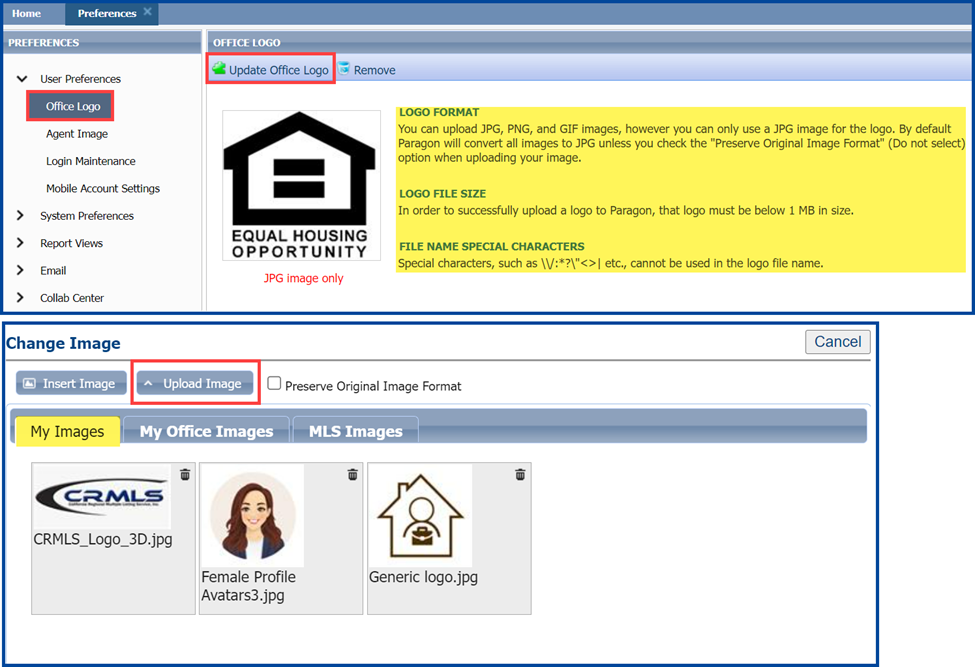
- Select Office Logo from the left navigation pane
- Click the Update Office Logo Make sure your image meets the required size and formatting listed on the right.
- From the “My Images” tab, click Upload Image (skip to Insert Image if you have previously uploaded your logo)
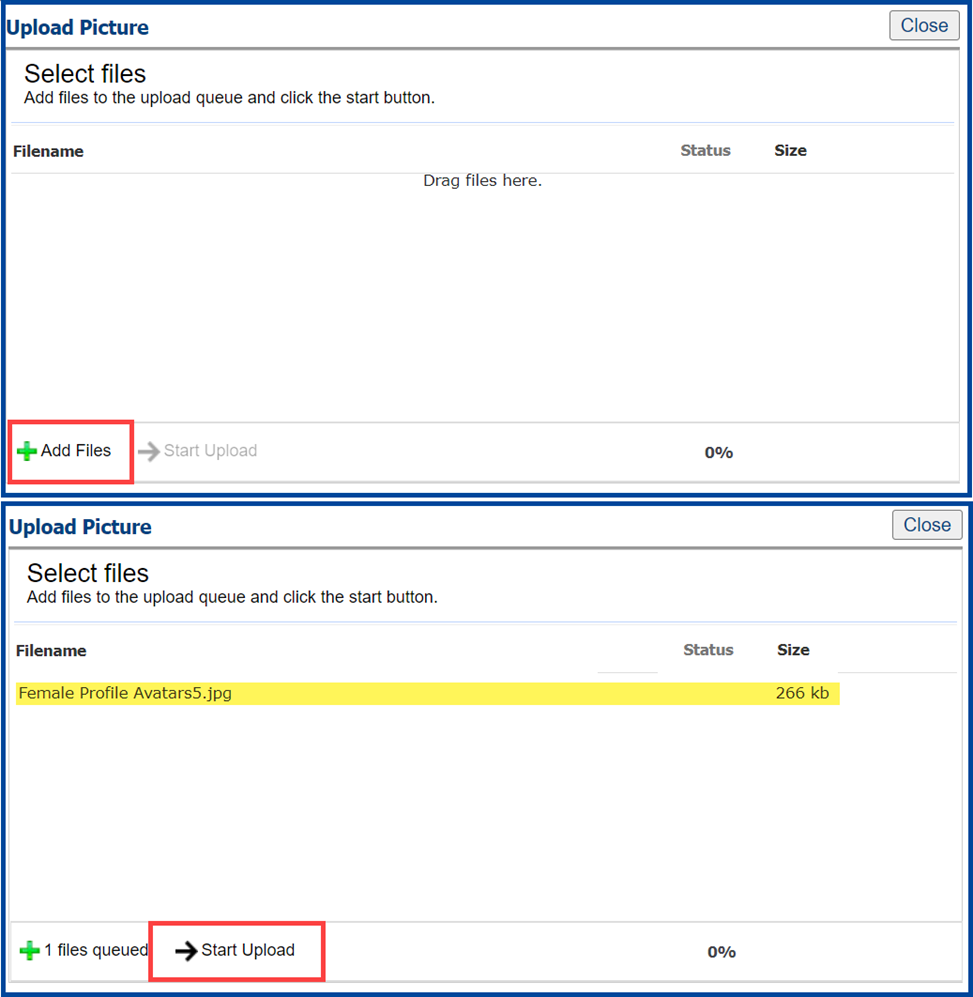
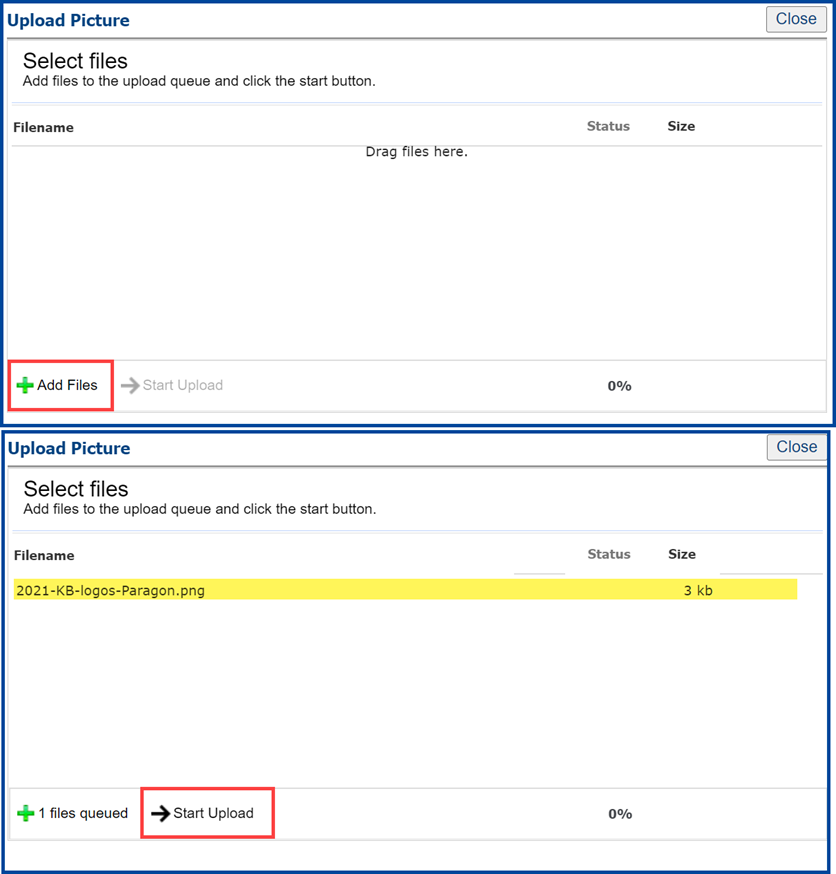
- Click + Add Files
- Select the image from your computer.
- The “Select files” dialog box will display your file. Click Start Upload. Repeat these steps to add additional logos and/or agent images.
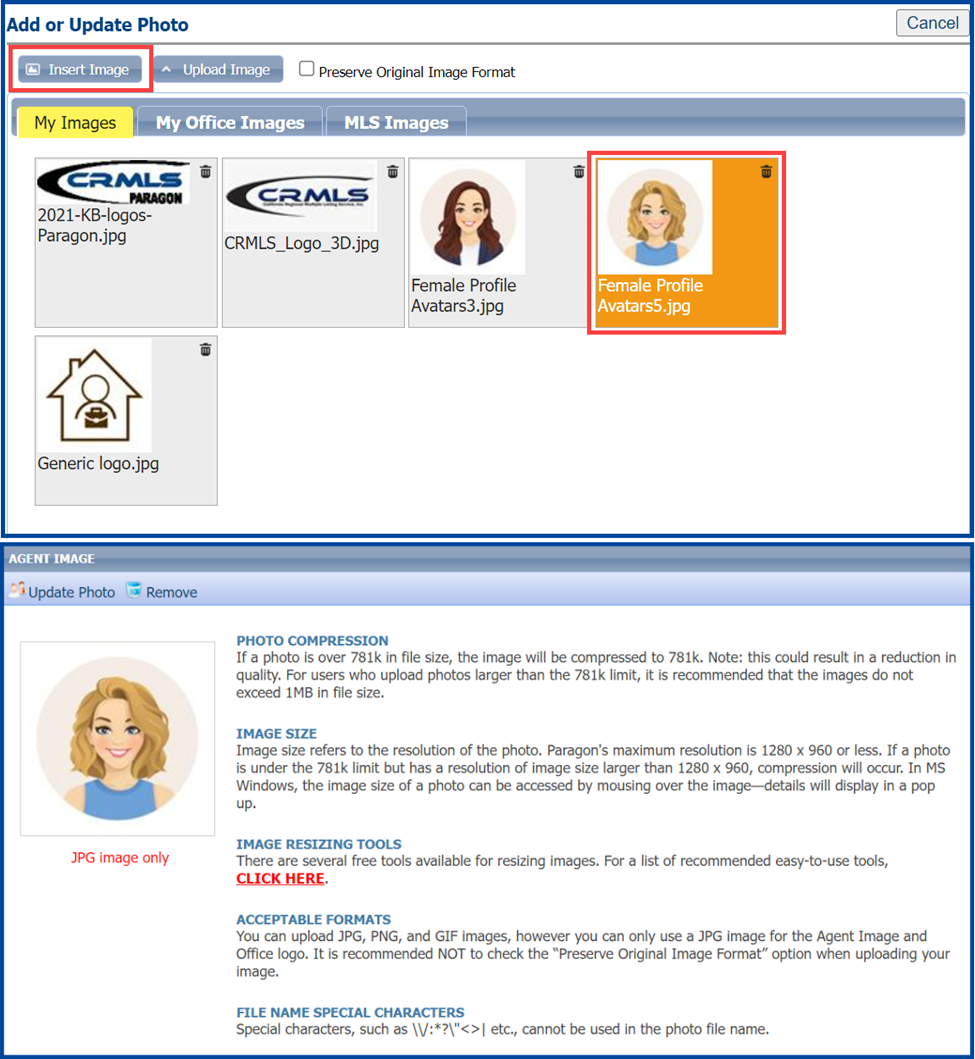
- Click to highlight the image and select Insert Image.
Note, you can both upload and insert images from your “My Images” tab. You can only insert images from the “My Office” tab when your broker or office manager has uploaded them.
Add Agent Image
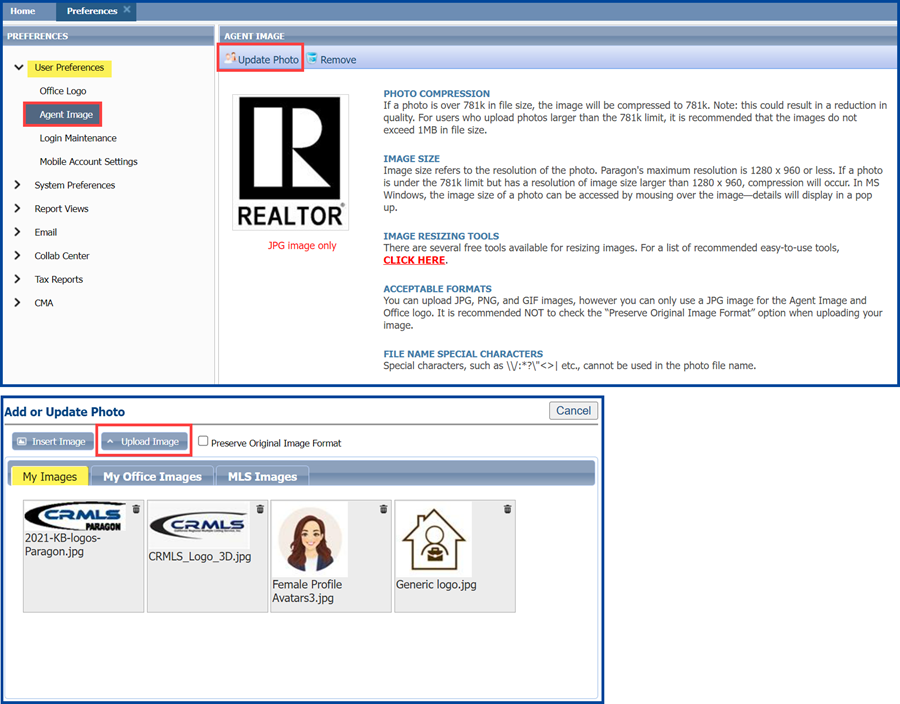
- From “User Preferences,” select Agent Image from the left navigation pane
- Click Update Photo
- Select the My Images tab
- Click Upload Image (skip to Insert Image if your image is available from a previous upload)
- Click + Add Files
- Select the image from your computer. It will appear in the “Select files” dialog box. Click Start Upload. Repeat these steps to add additional agent images and/or logos.
Tip: Here you can also upload custom-designed signatures if they meet size and format requirements.
- Click to highlight the image file name and select Insert Image.
Note, you can both upload and insert images from your “My Images” tab. You can only insert images from the “My Office” tab when your broker or office manager has uploaded them.
