Follow these steps to add photos and descriptions to a listing, after listings have been submitted or saved as a partial.
Step 1
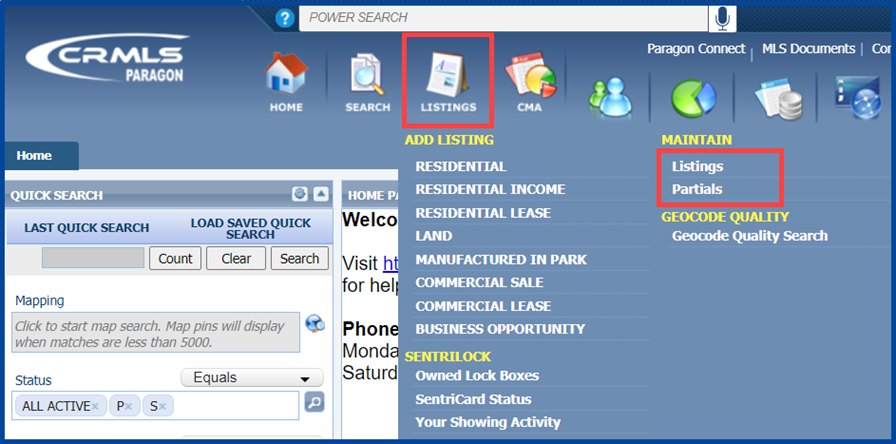
Click on the Listings icon and select Listings or Partials from the “Maintain” section.
- Listing: A submitted listing that is live on the MLS
- Partial: An incomplete listing not published on the MLS
Step 2
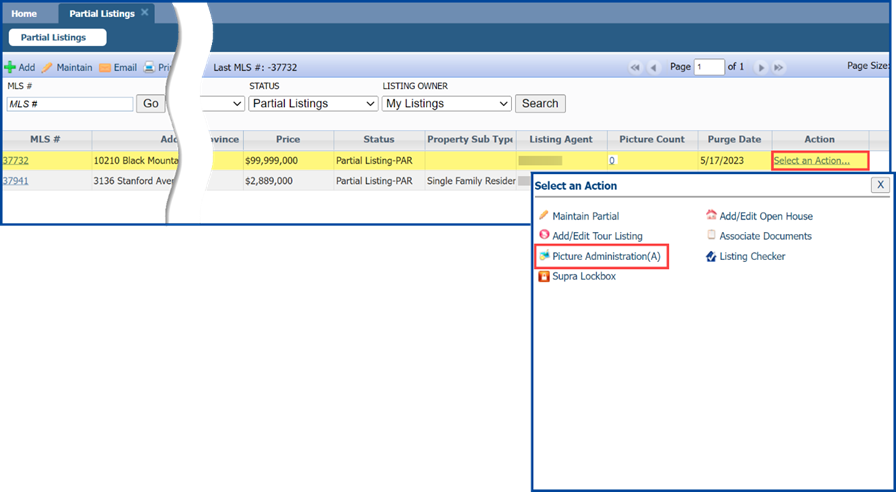
Under “Action” column (seen below), click Select an Action, and then Picture Administration. For this example, we are using a partial listing.
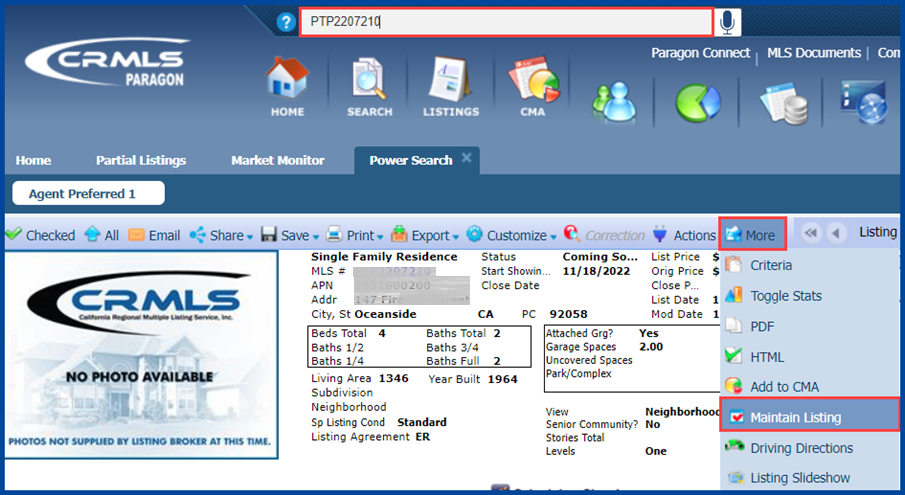
Note: To edit listings that are live on the MLS, you can also type the MLS number in the “Power Search” box, click the More button, and then select Maintain Listing.
Step 3
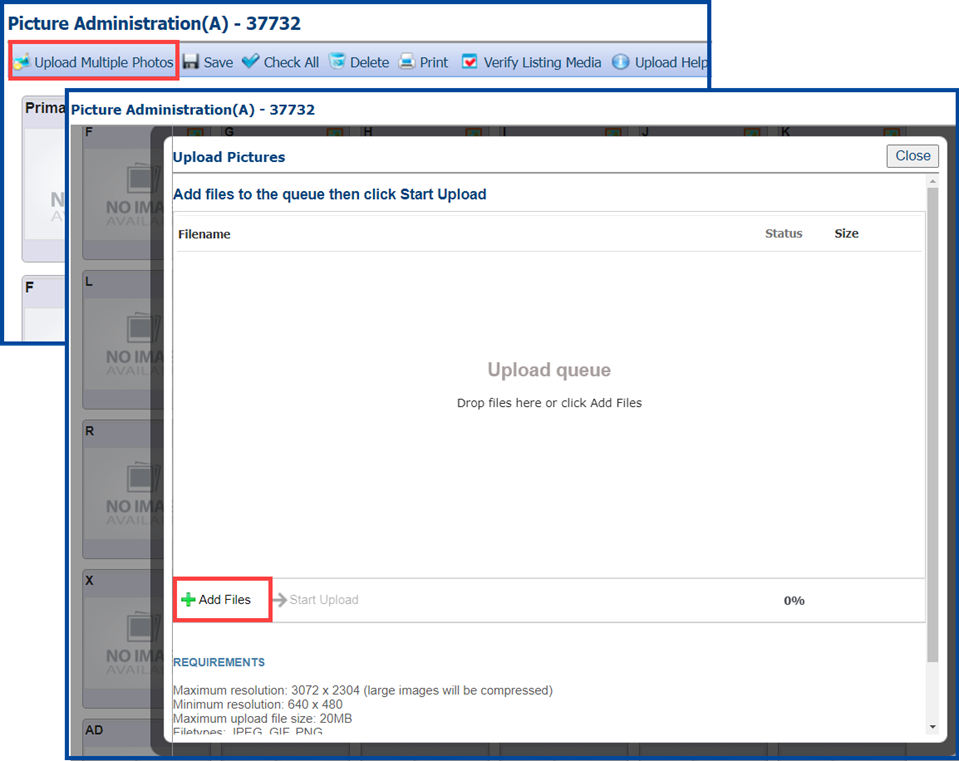
Click Upload Multiple Photos and then select Add Files.
Step 4
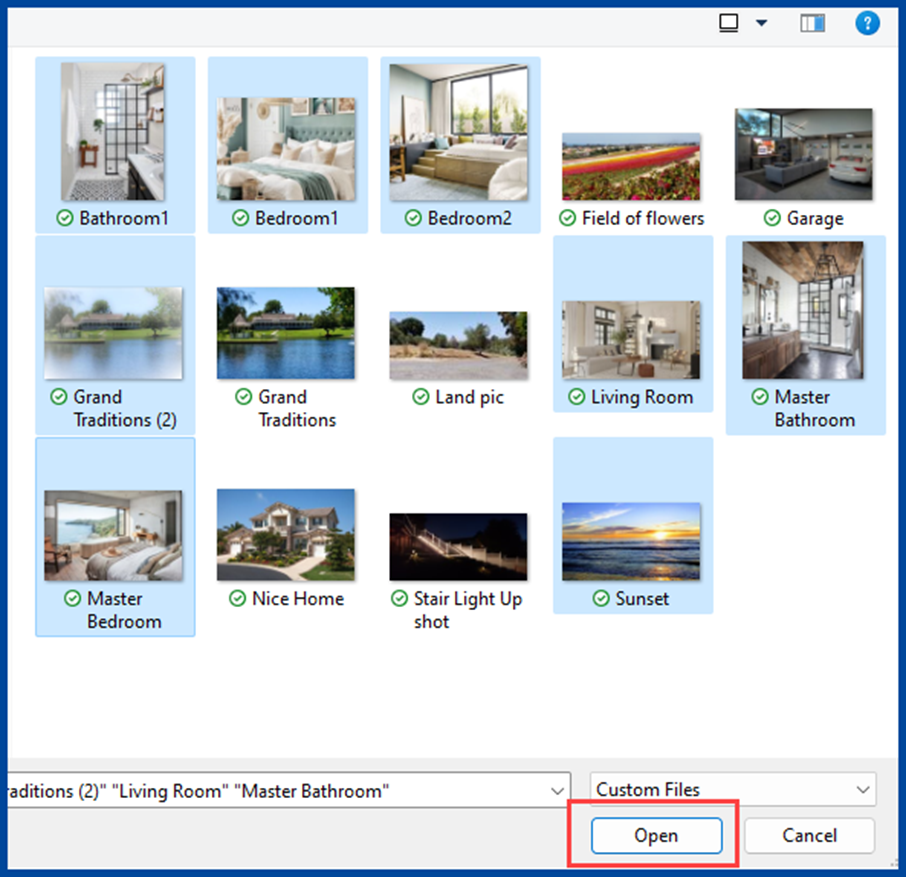
Select the photo(s) you want to add to your listing and click Open. You can add up to 75 photos to your listing.
Step 5
Once the photos are queued up, select Start Upload. Please make note of the photo requirements at the bottom of the screen before uploading.

Step 6
Click, hold, drag, and drop photos to rearrange their order. Click Add Label and then the magnifying glass to search for an appropriate label from the provided list. Add a Description of up to 100 characters for the picture.
Photos that are not an accurate depiction of the property, such as staging, or any HOA amenities must be captioned as such.
When you’ve finished adding the label and description, click Save.
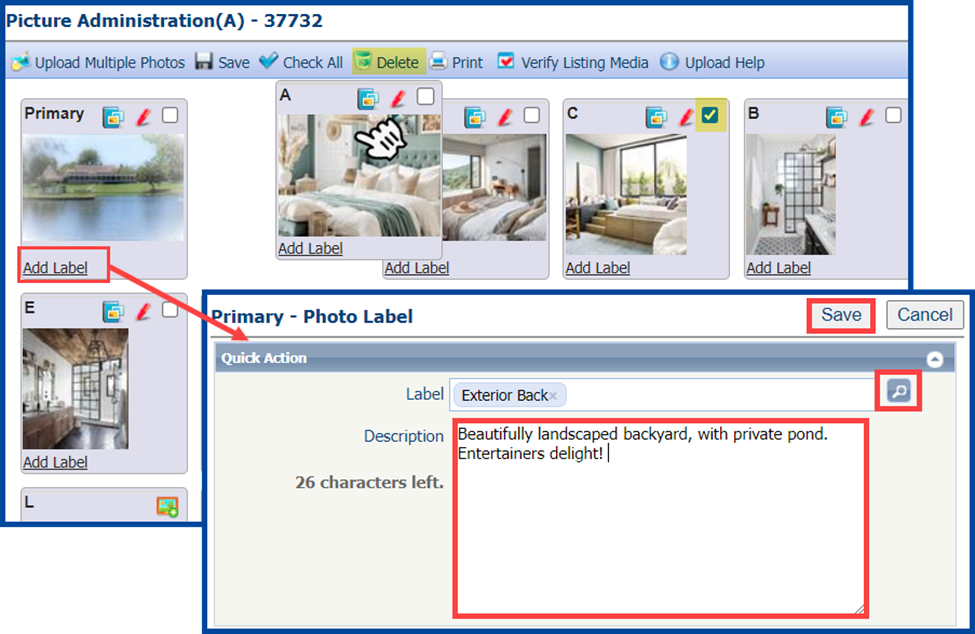
Additional photo tools include:
- Replace image
- Edit image, rotate left or right, and crop
- Delete the image

Step 7
When you’re finished adding, editing, and arranging your photos, click Save and then Close to complete the process.

Click on the links below for additional listing guides:
- Paragon: Twin Home Listing Input
- Paragon: How to Clone Listings & Save
- Paragon: How to Cancel a Listing
- Paragon: Listing Activity Definitions
- Paragon: How to Use the Syndication Remarks Field
- Paragon: Neighborhood Market Report Seller Participant Opt-in field
- Access the CRMLS Coming Soon Form in zipForms