After you have submitted your listing in the CRMLS Matrix platform, follow the steps below to add photos to your listing.
Step 1: Click the Add/Edit tab, then select the listing you want to modify in the Quick Modify drop-down menu.
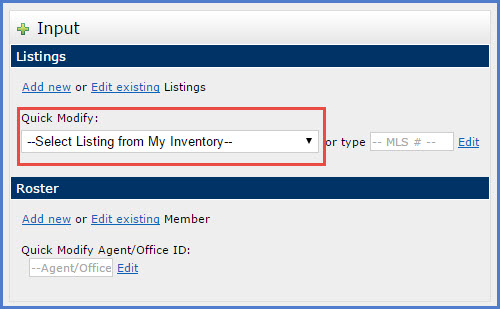
Note: You can also type the Multiple Listing Number in the MLS# field and click Edit.
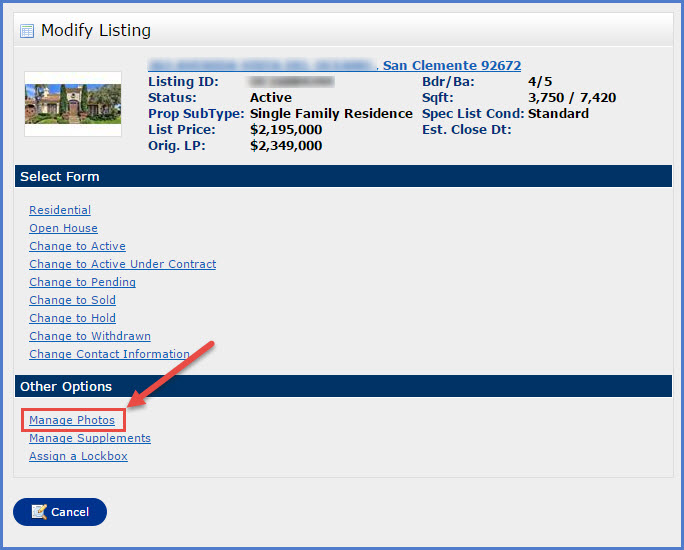
Step 2: Click the Manage Photos link on the Modify Listing screen.
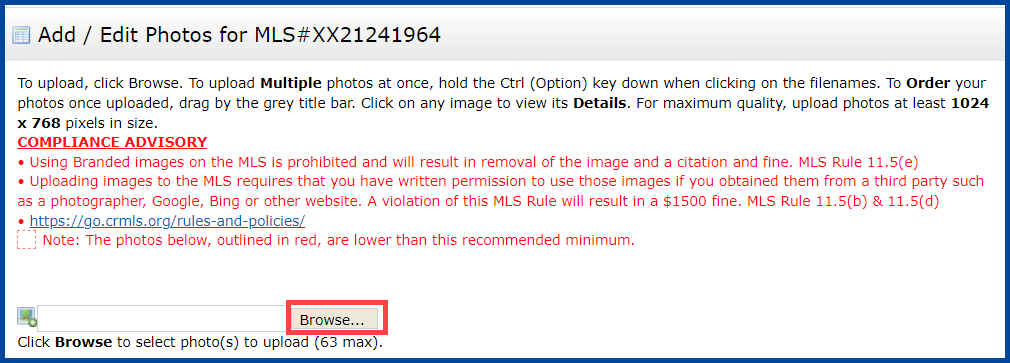
Step 3: Click Browse to navigate to the folder your photos are located in.
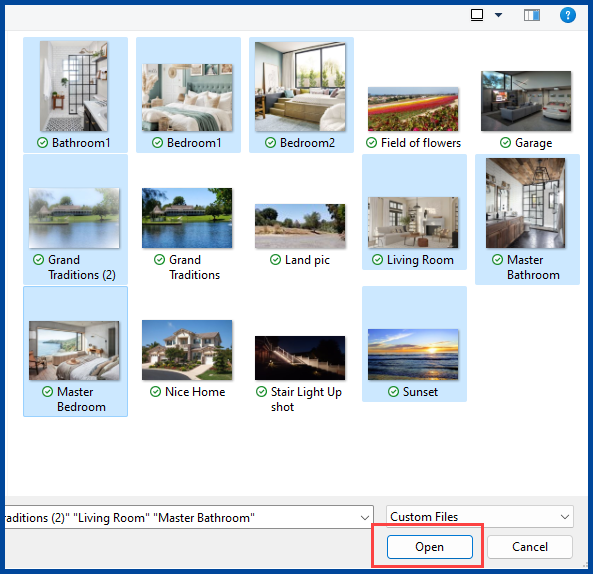
Step 4: Select the photo(s) you want to add to your listing and click Open.
Note: You can add up to 75 photos to your listing.
Photos that are not an accurate depiction of the property, such as staging, or any HOA amenities must be captioned as such.
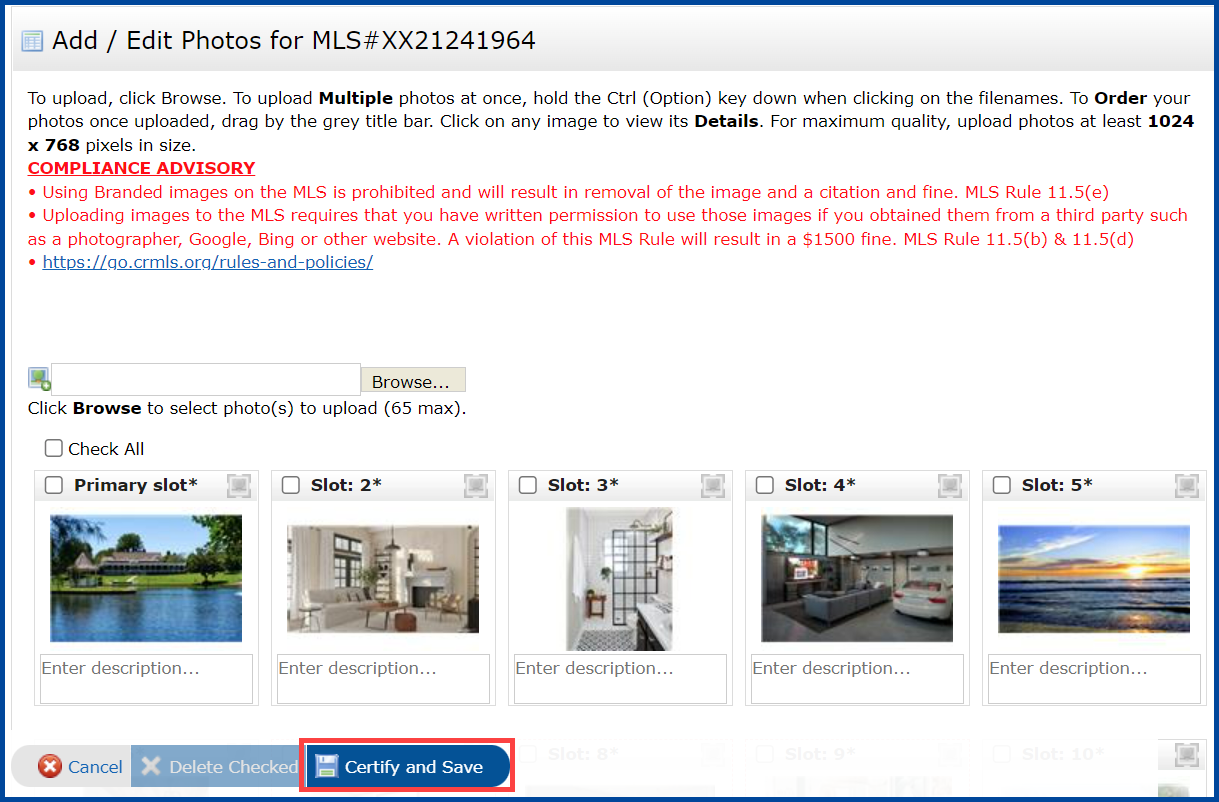
Step 5: When you’re finished adding and arranging your photos, click Certify and Save.

