Matrix: How to Create a Custom Export
The Custom Export feature in CRMLS Matrix enables you to download specific listing data. The following instructions will help you create your own Custom Export.
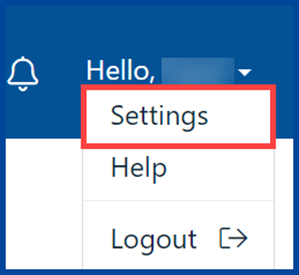
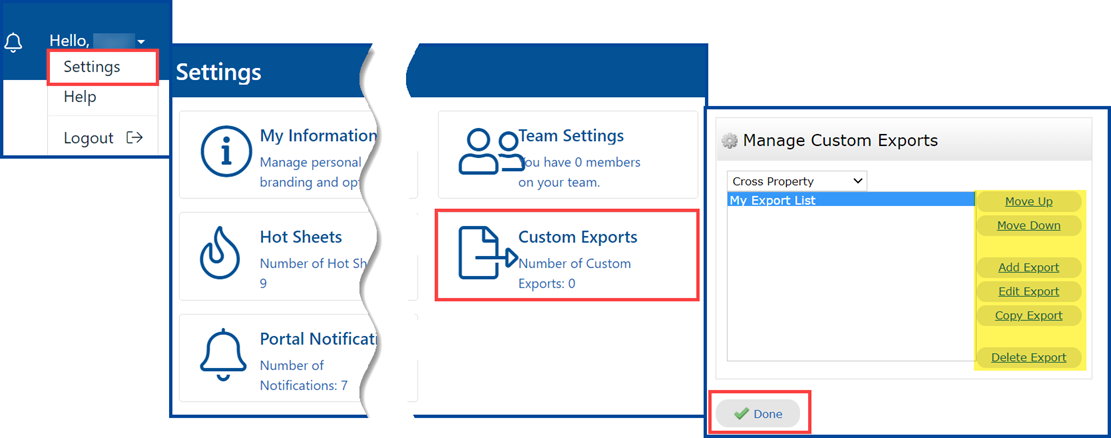
Step 1: Click on your name in the upper right corner to open the Utility Menu, then click on Settings.
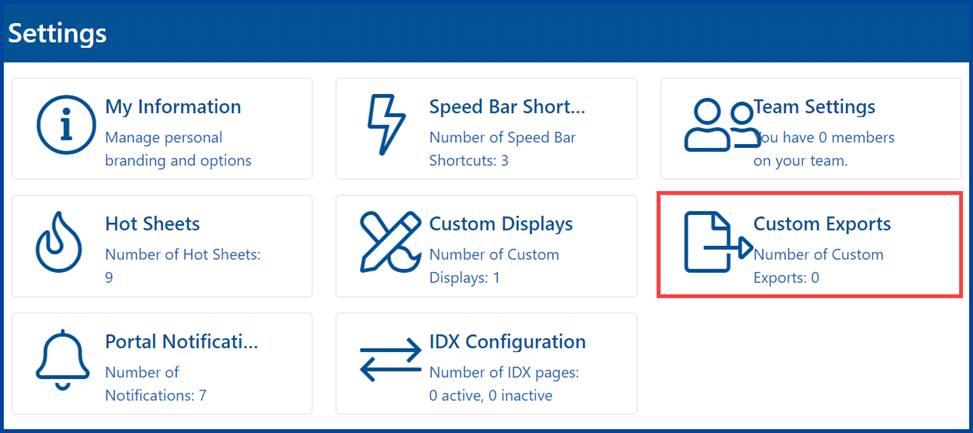
Step 2: Click on Custom Exports.
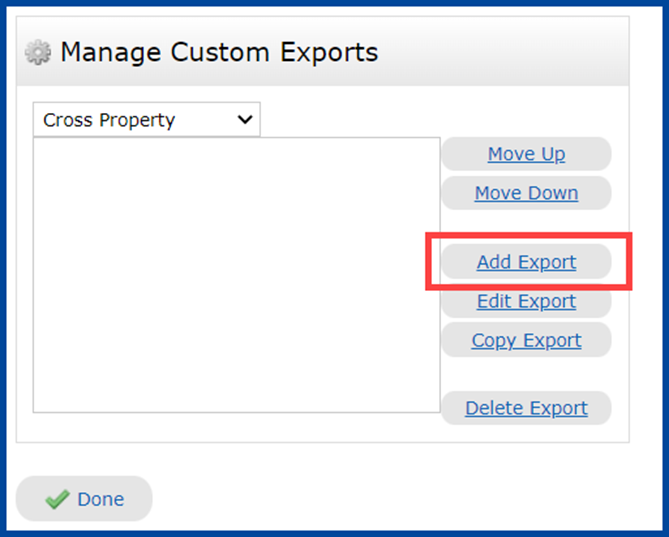
Step 3: Select Add Export.
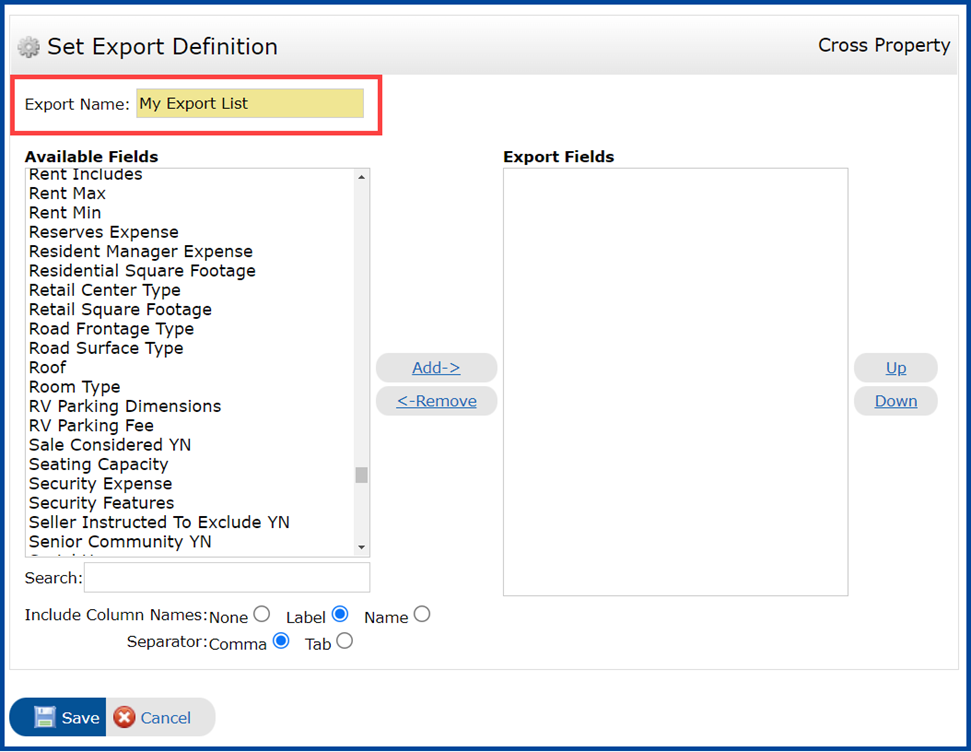
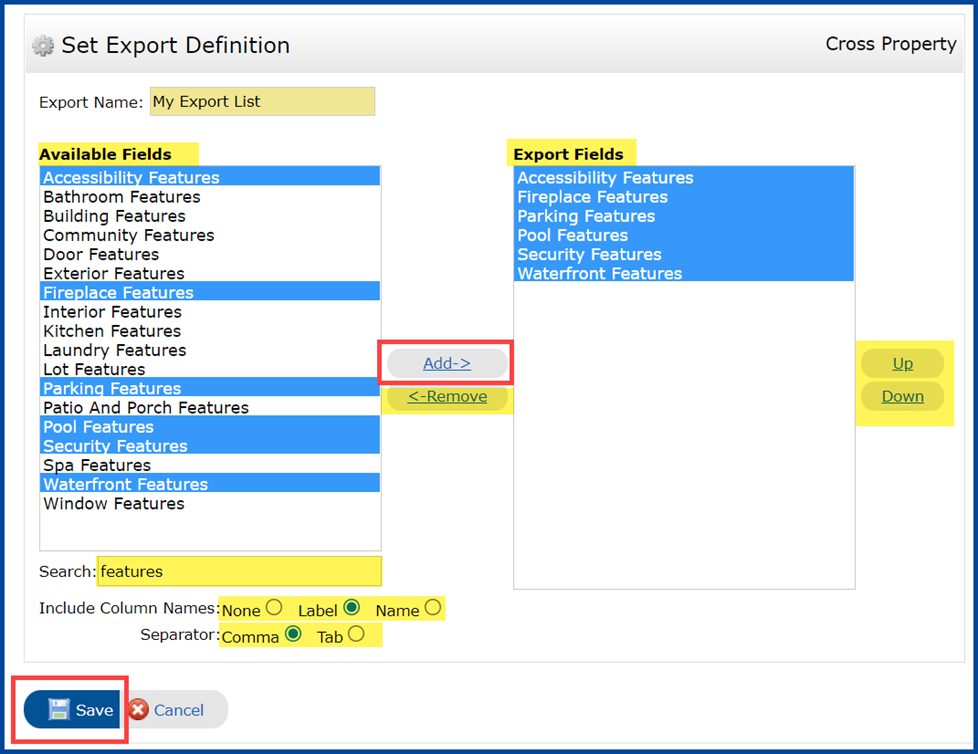
Step 4: Enter the Export Name of your choice.
Step 5: From the Available Fields list, select the fields you want in your custom export and click the Add button. To select more than one field at the same time, hold the Ctrl key while selecting.
- Use the Search box at the bottom left to find and select the fields to add
- Use the Up or Down button to change the order of your Exported Fields. Select a field name, then click the buttons to move that name up or down the list.
- Include Column Names: By default, the label that appears at the top of the column in your display is the field’s name. You can change this in the column headers of your custom report. (See the Excel spreadsheet image below for reference.) For example, you can shorten “Bedrooms” to “Beds.”
- Separator: Matrix will create your Custom Export as a .csv file. This radio button lets you choose to use either commas or “Tabs” to separate the information in this file.
When you finish making your selections, click the Save button.
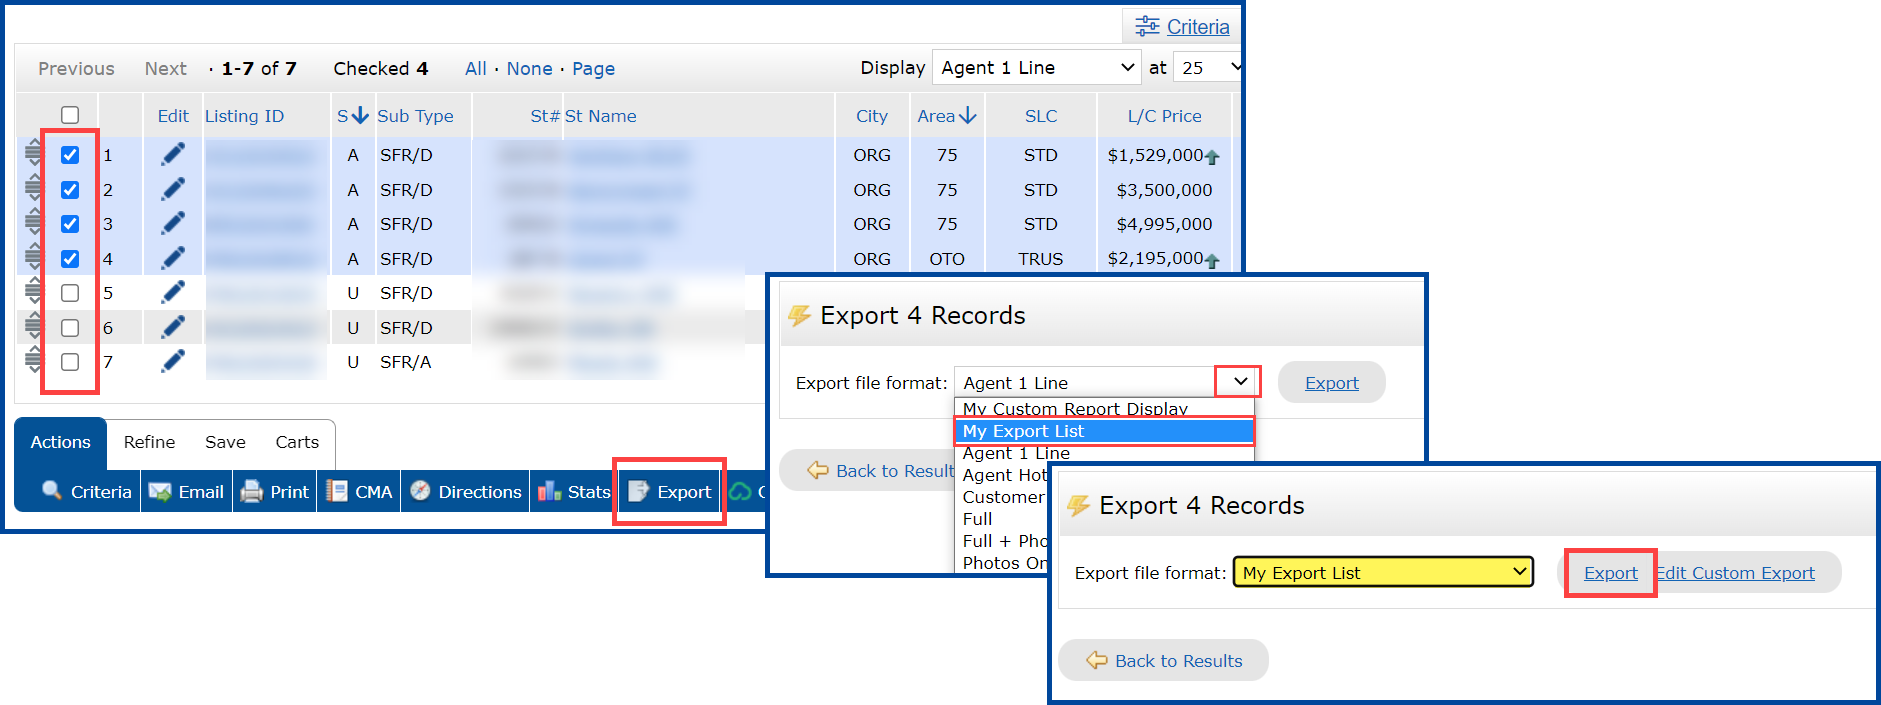
Step 6: To use your Custom Export, start by running a search. In the results page, select the listings that you want to export and click Export.
From the export page, select the name of your Custom Export from the drop-down display menu and click Export.
Your computer will download the file in .csv format. Click the file to open it.
Click the column header in your Excel file to rename the “label.” Make sure to save your changes in Excel when finished.
To update the parameters of your Custom Export, return to Settings, click on Custom Exports, select the name of your custom export, and then click Edit Export. Make any necessary changes and then click Save or Done to exit.

Trying to export a saved search with 2,899 results, but the Export button is greyed out/not available. My client wants a condo, but is very HOA-fee sensitive, and I need to figure out which HOAs in Long Beach have the lowest fees. Please help. Screenshot for your reference here: https://static.wixstatic.com/media/f1d81f_a9b33517f1ff471aa57c1689c47f3d4f~mv2.jpg
July 5, 2025 at 10:23 AMHi Inna, thank you for reaching out to us. To better assist you with exporting a saved search, please contact our Customer Care Department to connect with a dedicated Customer Care Specialist. They can be reached at 1-800-925-1525 or via live chat on your REcore dashboard. They are open today from 8:30 AM – 9:00 PM PT.
July 8, 2025 at 2:39 PM