Profile & Settings Page
The Profile & Settings page is where you configure your saved criteria, saved results, default views, and maps in MLS Tax Suite. Set up your options for branding and customizing Property Reports. Update all your settings at once, or a few as needed.
To get started, set up your Branding, Default County Search, and Search Settings.
Branding
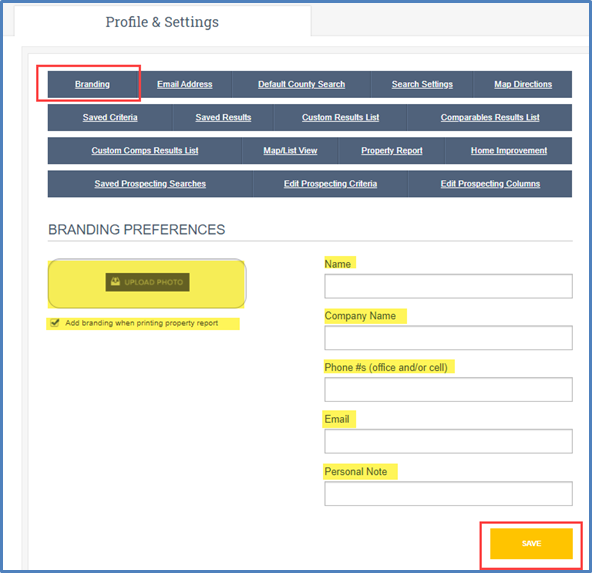
Customize your Property Reports with a logo or other image and your name and address. Check the box to add branding, fill in the appropriate fields, and click the Save button.
Select the Save button for each section, or one time when you’ve finished creating your profile and settings.
Email Address
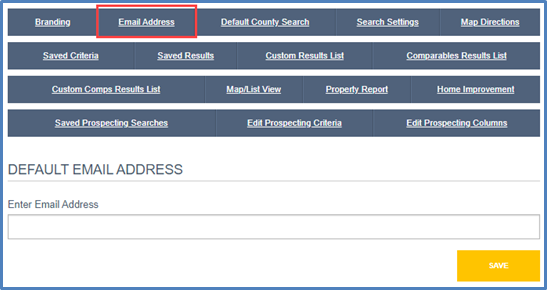
CRS Tax will automatically use your MLS profile email. If you’d like to use a different email, enter it in the Default Email Address section. This will be used when sending emails from within the program. Click the Save button. Note: You will have the ability to change on screen when sending an email.
Default County Search
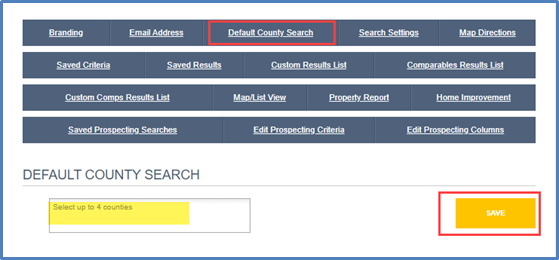
As a convenience, you can select up to 4 counties to search in your default settings. You can change these counties for individual searches. Click the Save button.
Search Settings
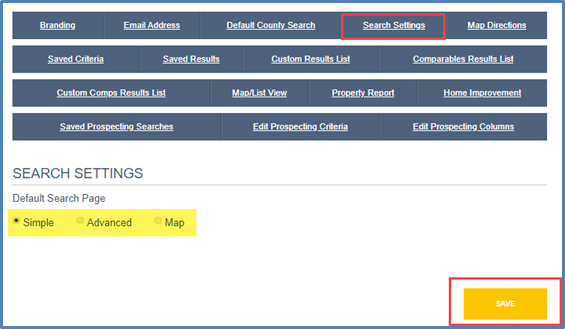
If you prefer to search using the Advanced or Map settings, select one as your default. You may also keep the default setting as Simple. Click the Save button.
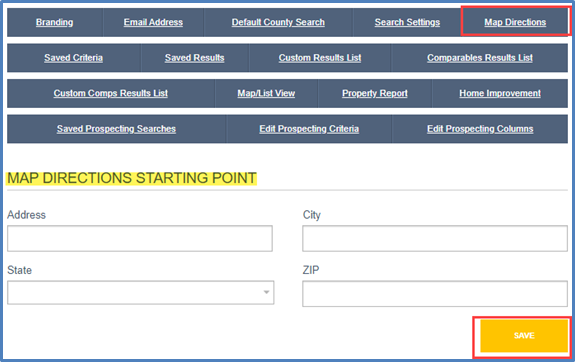
Map Directions
When viewing directions on a map, you can set a default starting point by entering an address here and clicking Save.
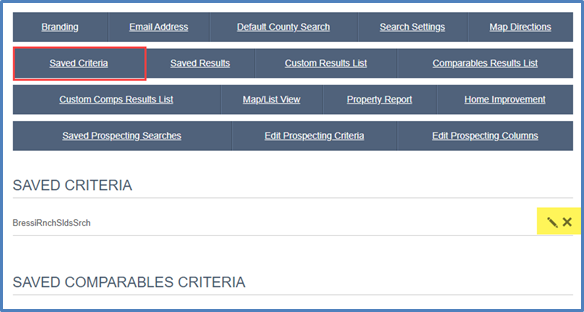
Saved Criteria
All your saved criteria are listed here. Click the pencil icon to edit the name of any search or click the X icon to delete it.
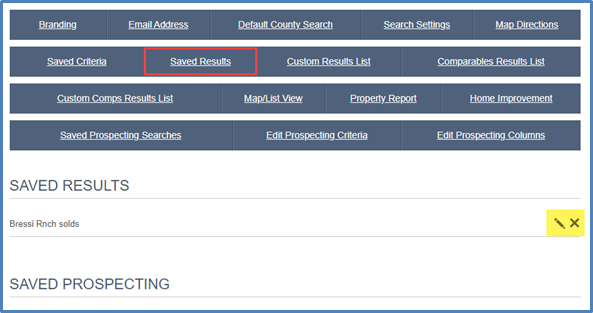
Saved Results
Like the saved criteria above, you can change the name of or delete any of your saved search results.
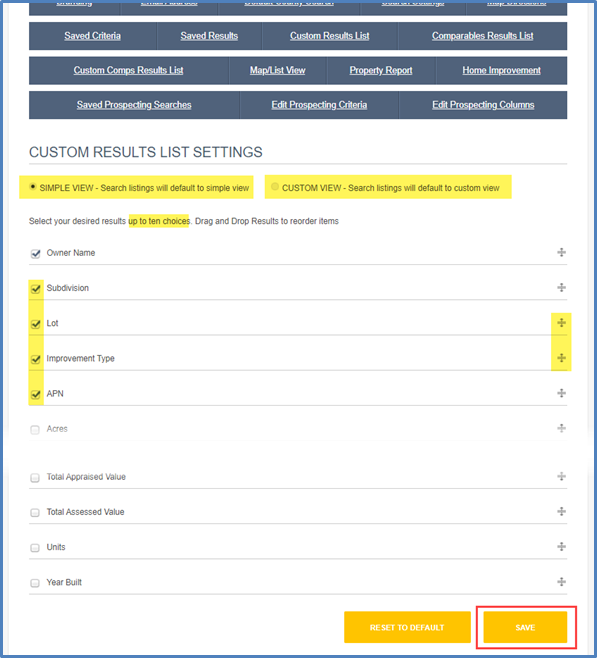
Custom Results List
To specify the default view for your search results, select Simple View or Custom View. Simple View will show you the property address, listing status, parcel ID, and owner’s name.
Custom View allows you to choose which criteria you’d like to see on the results page. Check the box on the left next to each item you’d like to include and uncheck those you’d like to hide. Click the icon on the right to drag and reorder. You can choose up to 10 items. Click the Save button.
Comparables Results List
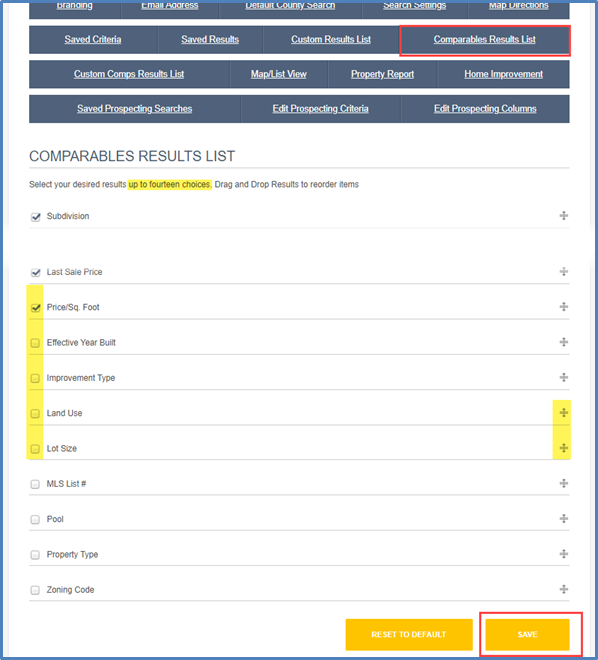
Customize your comparables results list by selecting the criteria you’d like to see on the results page. Check the box next to each item on the left to include and uncheck those you’d like to hide. Click the icon on the right to drag and reorder. You can select up to 14 items. Click the Save button.
Custom Comps Results List
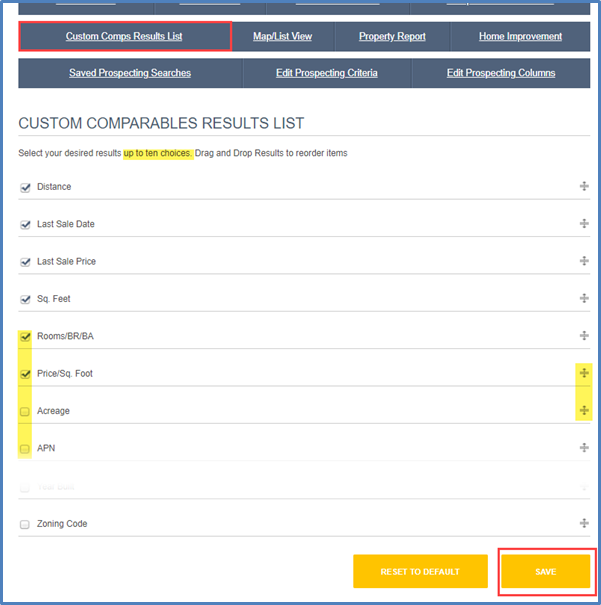
You can create a custom comparables results list by selecting the criteria you’d like to see on the results page. Check the box next to each item on the left to include and uncheck those you’d like to hide. Click the icon on the right to drag and reorder. You can select up to 10 items. Click the Save button.
Map/List View
Choose whether CRS Tax shows your search results in Map View or List View by default. If selecting Map View, you can choose Road or Aerial view. Click the Save button.
Property Report
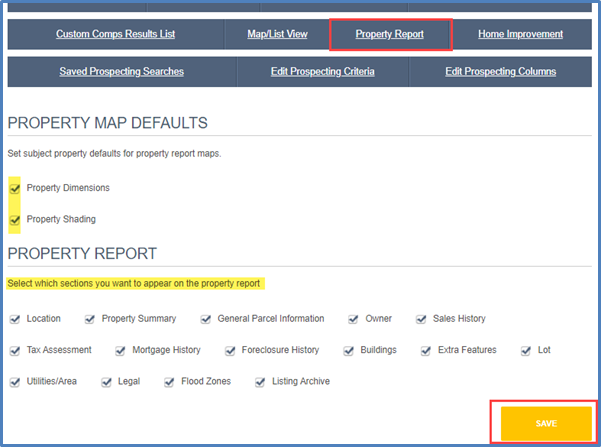
Set the subject property display for property report maps. Show or hide specific sections on the Property Report by checking or unchecking those sections and clicking the Save button.
Home Improvement
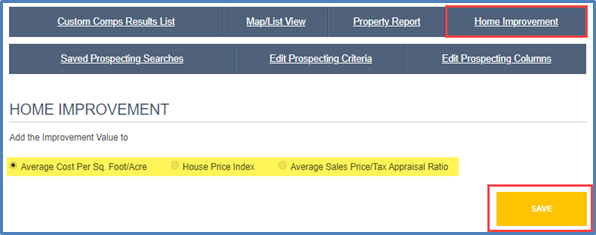
When adding improvements to the Refined Values page of your Property Report, you can decide which property value will be increased by the value of those improvements. Just choose one of the three options shown below and click Save.
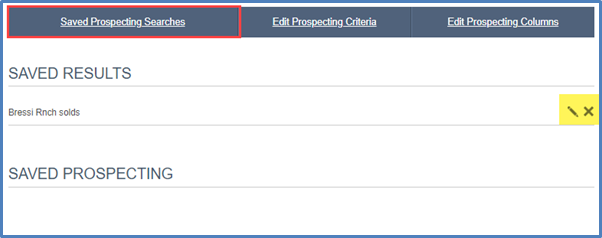
Saved Prospecting Searches
All your saved prospecting searches are listed here. Click the pencil icon to edit the search name or click the X icon to delete it.
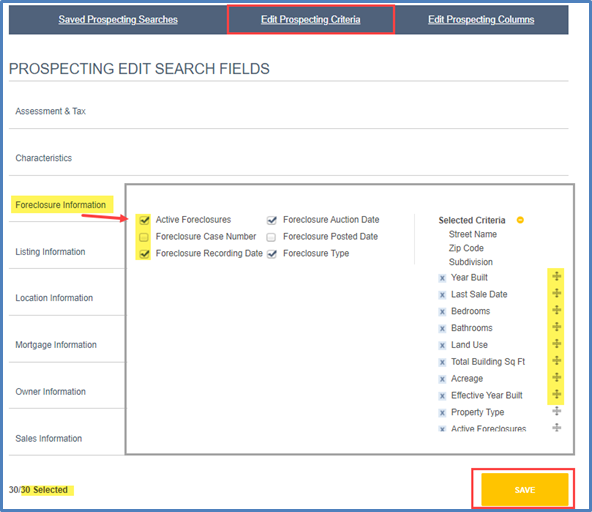
Edit Prospecting Criteria
Customize your prospecting search template with up to 30 fields. Click the category on the left to display and select fields to be added to your template. Click the icon on the right to drag and reorder. When finished, click the Save button.
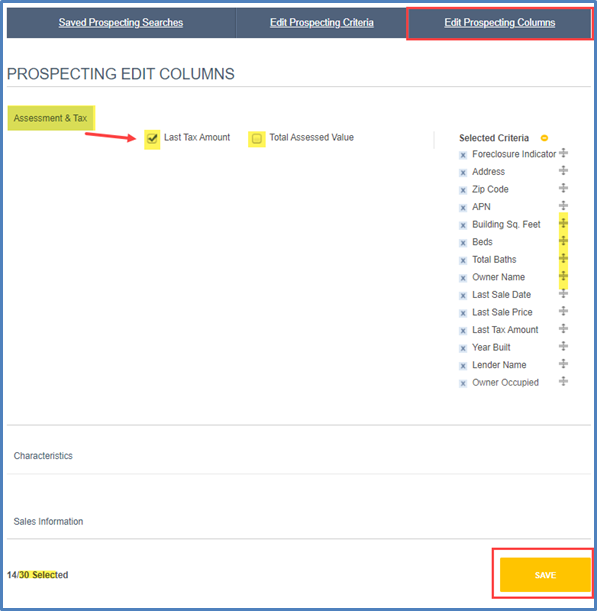
Edit Prospecting Columns
Customize your prospecting search columns to display the results. Click the category on the left to display and select fields to be added to your template. Click the icon on the right to drag and reorder. When finished selecting up to 30 fields, click the Save button.
Updated Sept 2020
