New & Enhanced Features in Paragon – December 7, 2022
Updated description text for Expiring Notifications
The Expiring Notification pop-up has been corrected and will now note the renewal period based on your preferences.
Previous text: “Extend will renew the notifications for 1 year.”
Updated text: “Extend will renew the notifications for up to 1 year, based on your notification settings in Preferences.”
To update your settings, go to Preferences > Email > Default Notification Recurrence > Expiration.
Paragon Connect
Contact List Updates
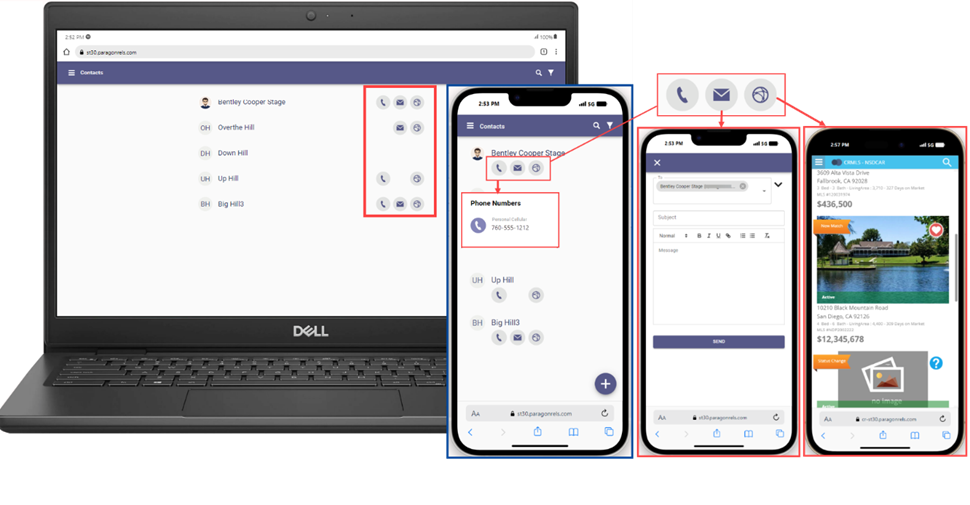
The contact list for Paragon Connect now includes three shortcut icons that help you quickly access your client’s information. These icons include the ability to view all phone numbers, email addresses, and a link to the client’s Collaboration Center site.
- Phone: Select the phone icon to open a list of all phone numbers associated with a contact. You can then select either the phone number to instantly call the contact or the SMS icon to text your client.
- Email: Select the email icon to open a list of all email addresses associated with a contact. You can then compose an email and send it to one or more email addresses.
- Collaboration Center: If your contact has a notification setup, you will find a web icon that, when selected, will take you to your contact’s Collaboration Center site.
Hotsheet Alert Save
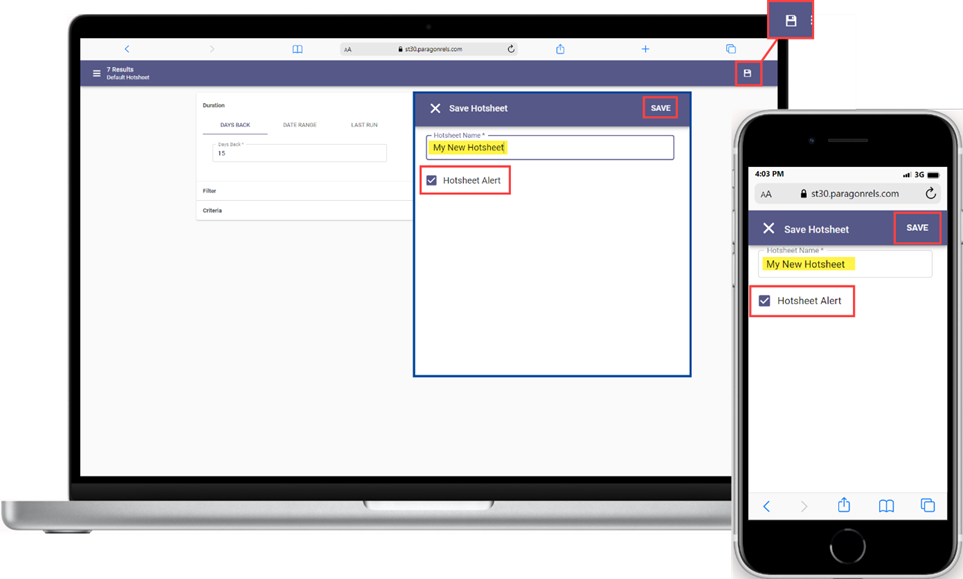
It is no longer necessary to go to your saved Hotsheet searches to set a Hotsheet alert. You can now set a Hotsheet alert while you save a new search.
Note: You can save a maximum of 5 alerts. Once this threshold is met, the option to save a new alert will be disabled. You will need to go into your saved Hotsheet to set the alert.
Rich Text Editor
The Compose Email message body has been upgraded to include a rich text editor, allowing you to format your emails. This feature is being integrated into all devices. Below is a list of formatting options that are included in this update:
- Font type
- Bold
- Italics
- Underline
- Add a link
- Unordered bullets
- Numbered bullets
- Stroke
Listing Input and Maintenance
Purge Date
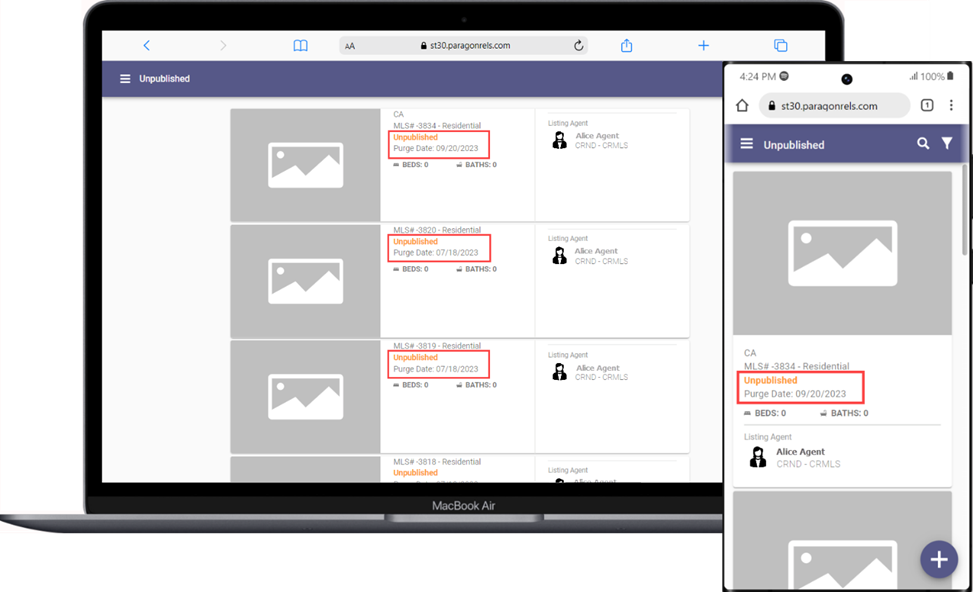
The listings results now include a purge date. This purge date warns when the unpublished (partial) listing will be removed from the system if it is not converted to a published (live) listing.
Co-Agent
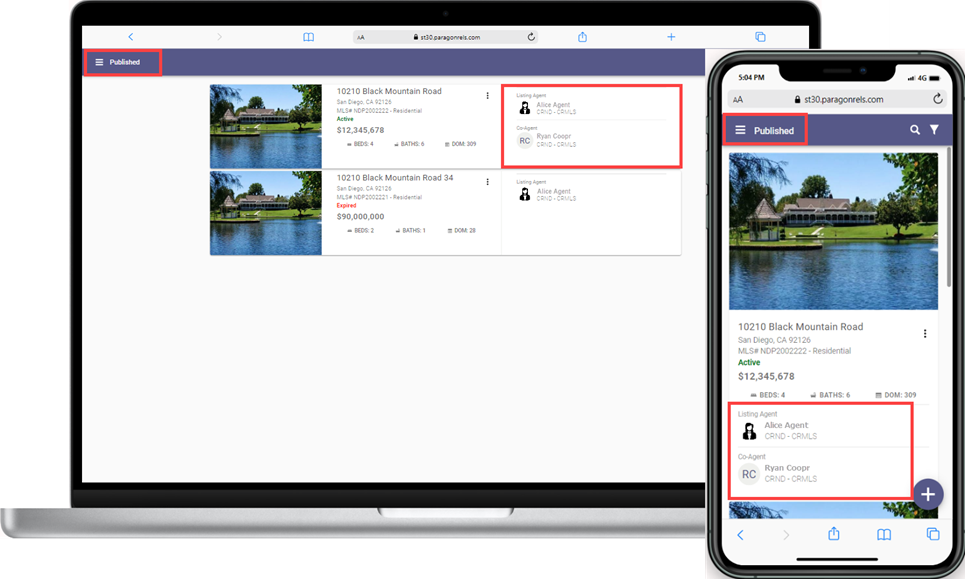
The Co-Agent (if applicable) can now be seen while viewing a list of your published or unpublished listings.
Select the agent or co-agent to view additional agent and office information.
Lookup Sort
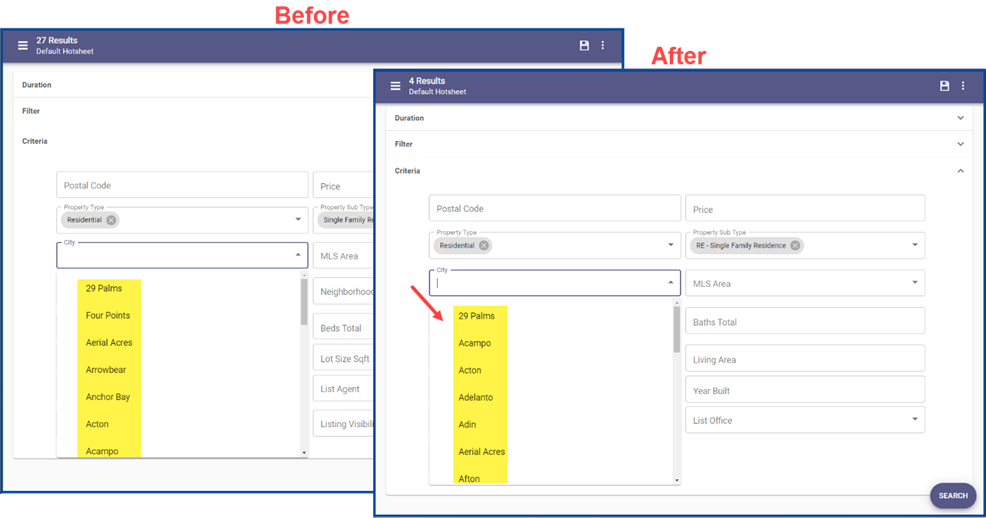
The lookup list is now sorted in the same order as in Paragon Desktop.
Tour Calendar and Delete
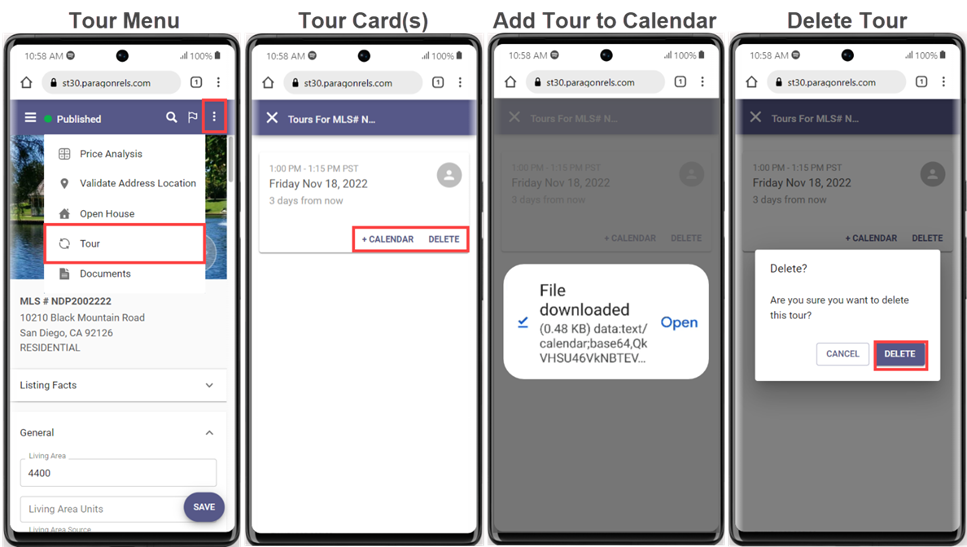
There are two new links on the Tour card:
- The +Calendar link allows you to add an event to your native calendar.
- The Delete option will allow you to delete a tour from the listing. This will sync with your Paragon Desktop system.
The Tour Cards can be accessed by navigating to the Edit Listing screen in the Listing Input Maintenance module. Select the Overflow menu, and then click on the Tours link.
Associated Documents
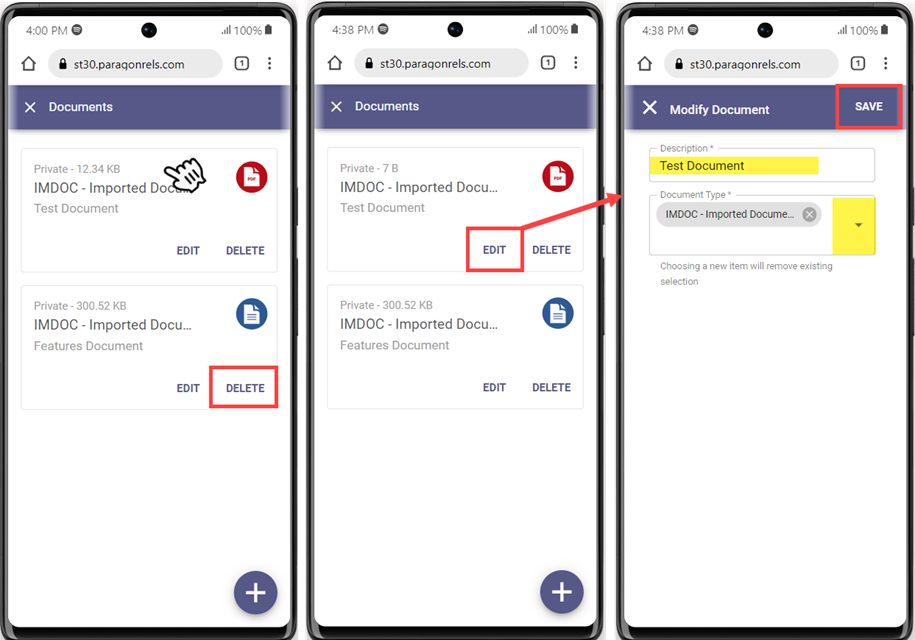
You can now upload or manage documents for your listings in Paragon Connect. Paragon Connect Associated Documents follows the same guidelines as Paragon Desktop for document size, the number of documents, document type, etc.
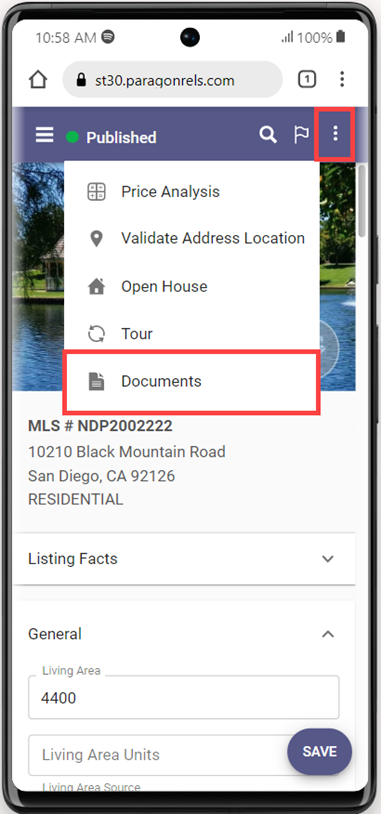
To access Associated Documents, open the listing, click on the Overflow menu, and then click on the Documents link. The key features include:
- Add documents
- Manage documents
- Edit
- Delete
- View documents
Add a Document
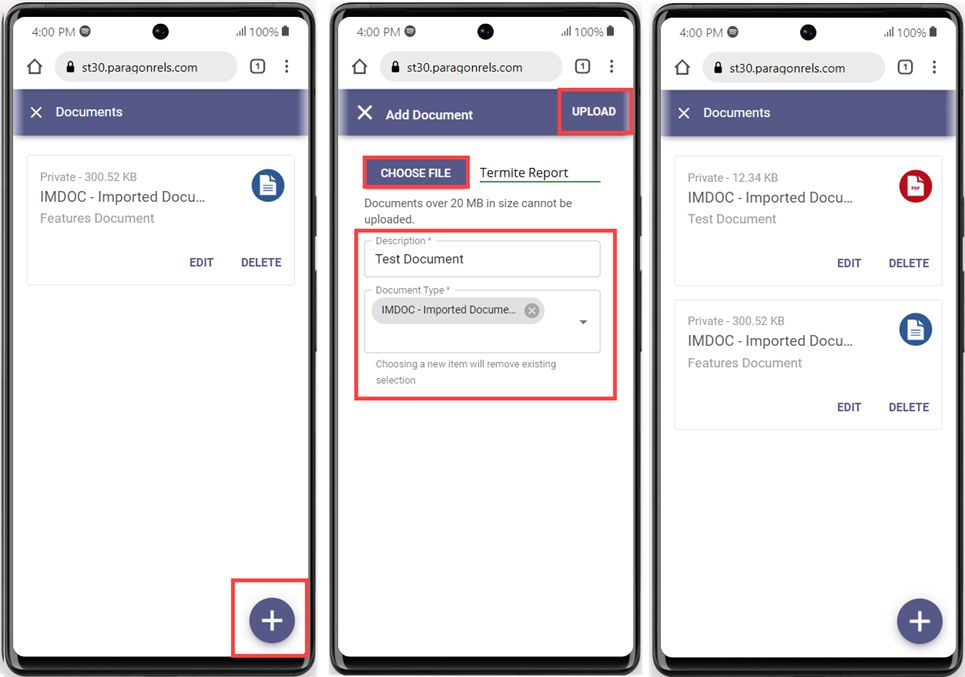
Click on the + button to display the “Add Document” upload page. The following options include:
- Choose File – Click Choose File to open the native file selection option for your device.
- Description – Enter a brief description of the document.
- Document Type – Will display a drop-down menu.
- Upload – Click the Upload button to upload the document.
Manage Documents
- Click the Document Card to open the document.
- Click the Delete option to delete the document.
- Click the Edit option to edit the description and the document When you are finished, click Save.
New Functions: Add New Listing and CRS Data Tax Autofill
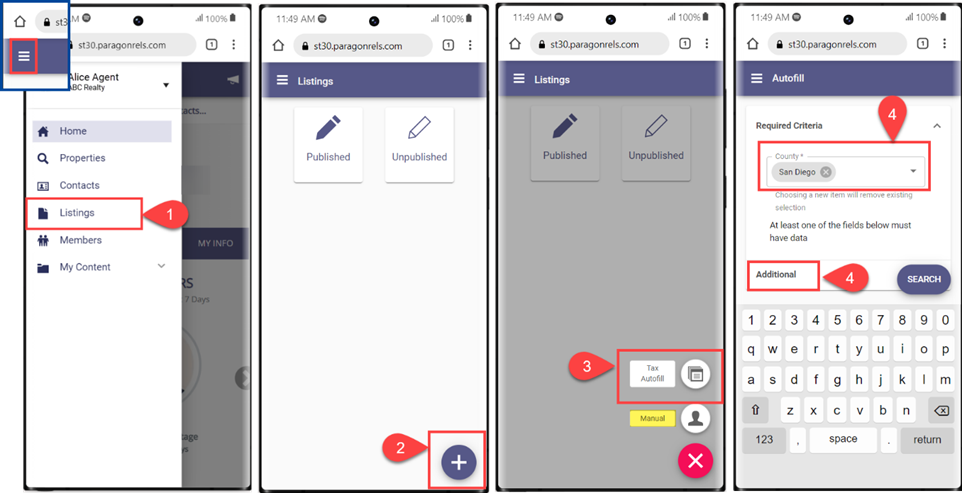
You can now use the new Tax Autofill feature when adding a new listing in Paragon Connect by following these steps:
- Select Listings from the menu in the upper left corner
- Click the plus sign icon
- Add the information manually or select Tax Autofill, as shown below
- Enter the County
Note: At least one Additional field must be entered.
- Click the Search button
- Select Autofill next to the property. Depending on your criteria, several properties may be displayed in the results list.
- Select the Property Class and click For this example, we have selected Residential.
Note: A new “unpublished” (partial) listing is created and will be available in the unpublished list until the listing is completed and published or is automatically removed on the partial purge date.
- Continue entering the listing information to publish the listing as “Live” or click Save to save as “Unpublished/Partial” and complete it later.
Note: Any listing created in Paragon Connect is also available within Paragon Desktop.

