The latest Flexmls update features a new Auto Assistant to help enter listings faster and more accurately.
The Auto Assistant is a multistep Add Listing form to complete before proceeding to the full listing entry page. Auto Assistant collects data such as property type, property address, location, and tax data. It then uses that information to prepopulate the listing entry form, saving time and improving accuracy.
With the Auto Assistant, agents maintain control of their listing data, choose autofill options, and can review and confirm all data before publishing the listing.
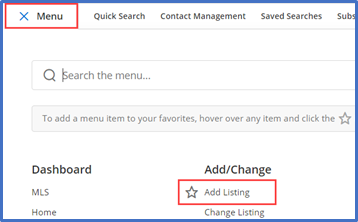
Launch the Add Listing Module
Go to Menu > Add/Change > Add Listing
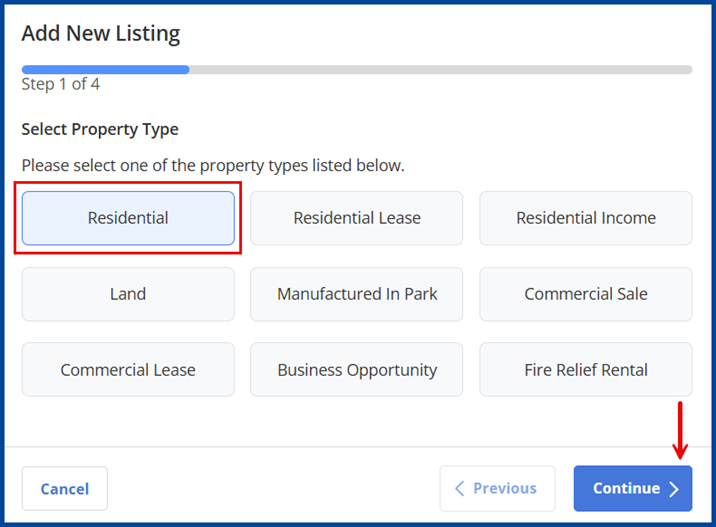
Complete the Auto Assistant
Select the Property Type, then click Continue on the bottom-right corner of the page.
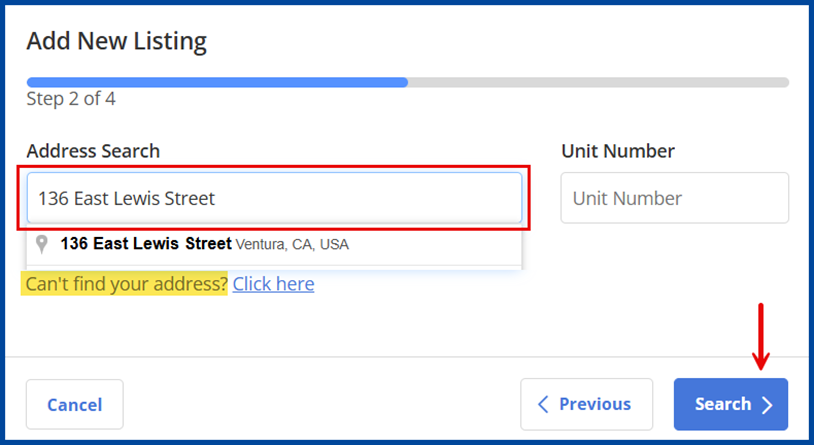
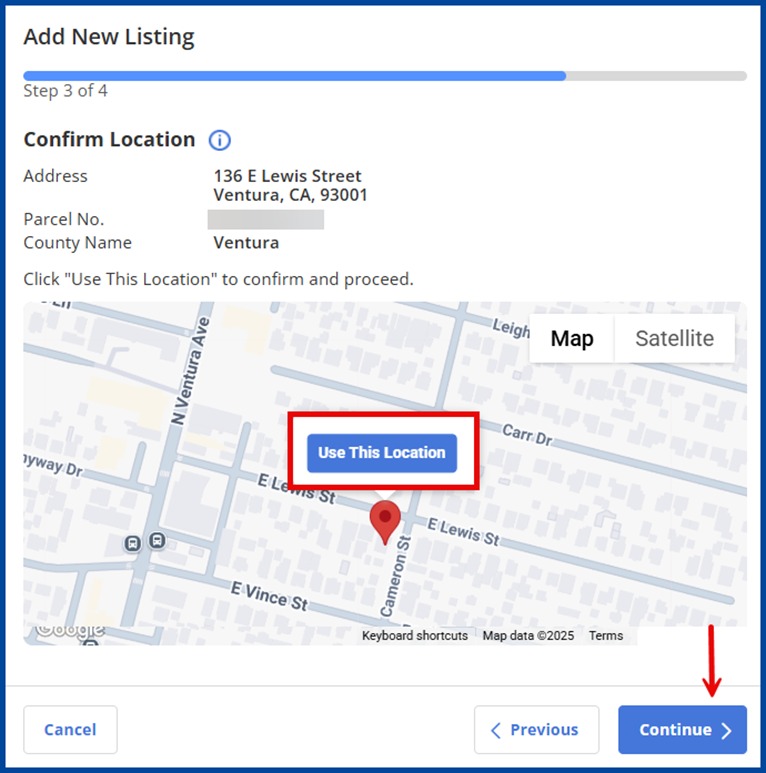
Search the Address, then click Search to continue.
Click Use This Location on the display map to confirm the listing’s geo location and verify its address, then click Continue.
Note: the pin’s location cannot be adjusted at this time. However, the pin can be updated after completing the Auto Assistant.
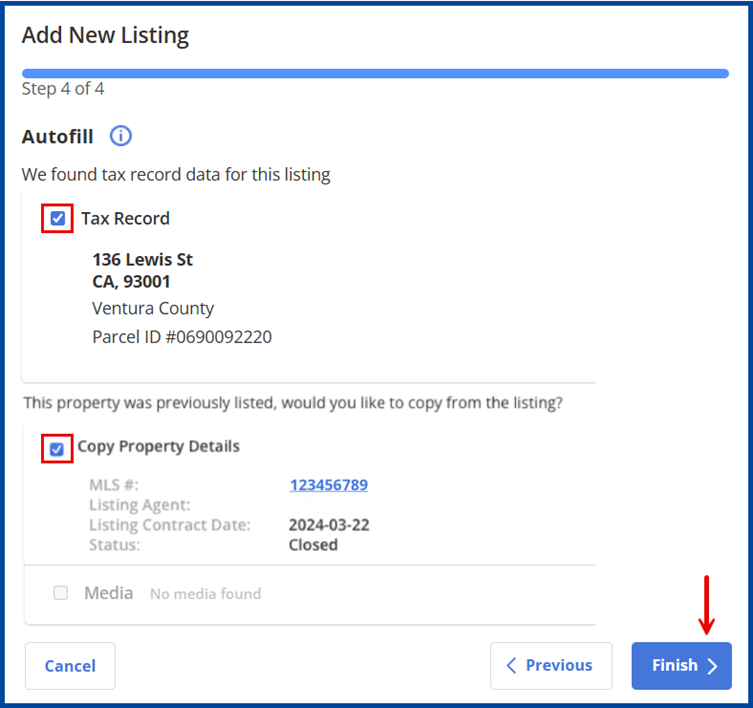
Select an AutoFill data option to locate tax data and previous listing data (if applicable) to automatically add any available data, then click Finish.
Note: only the primary listing agent for the previous listing may copy its details.
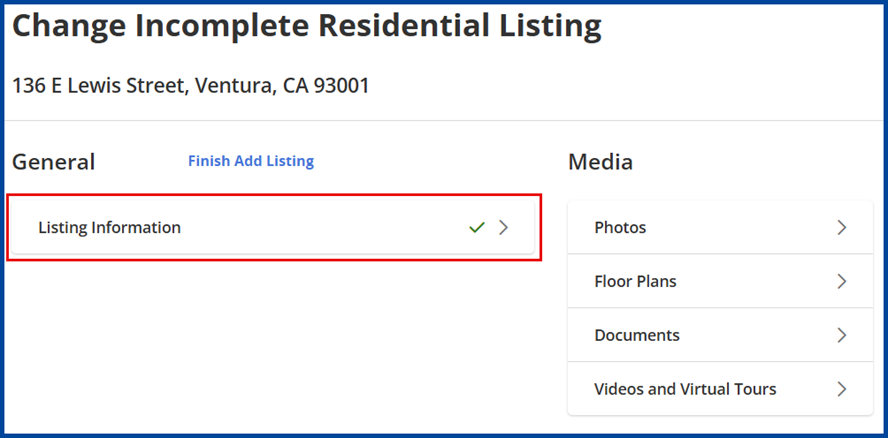
Your listing will save as incomplete. Select Listing Information to continue entering required listing details and verify auto-populated fields for accuracy.
Note: at this time you may also add any media.
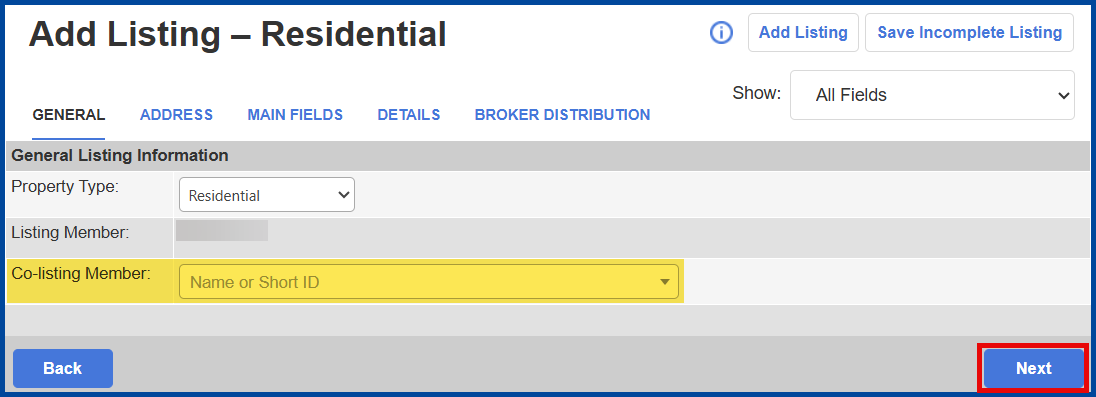
General Tab
Add a Co-listing Member (if applicable), otherwise click Next to continue.
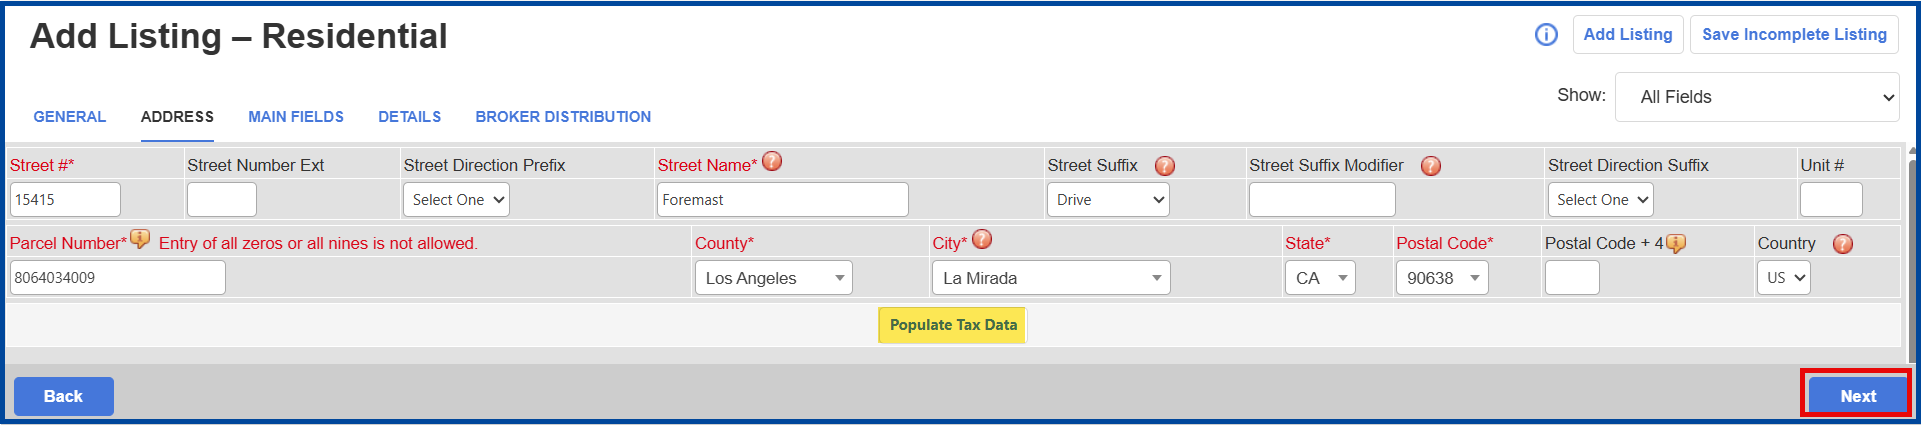
Address Tab
All required address fields are prepopulated thanks to the Auto Assistant, simply click Next to continue.
Note: if you need to adjust the pin location, select “Populate Tax Data.” Also, if duplicate addresses exist in the system, you may be prompted to confirm them.
Main Fields Tab
This section contains the basic information fields for a property, such as list price, beds, baths, etc. At minimum, you must complete all required fields which appear with red text. Although this guide will not go through each field, we’ve highlighted a few fields that agents frequently have questions on. However, you can click the question mark icon ( ) to view additional helpful information about the field or the info icon (
![]() ) next to a field name to view restrictions.
) next to a field name to view restrictions.
Note: to view only the required fields, select “Required Fields Only” in the Show drop-down list.
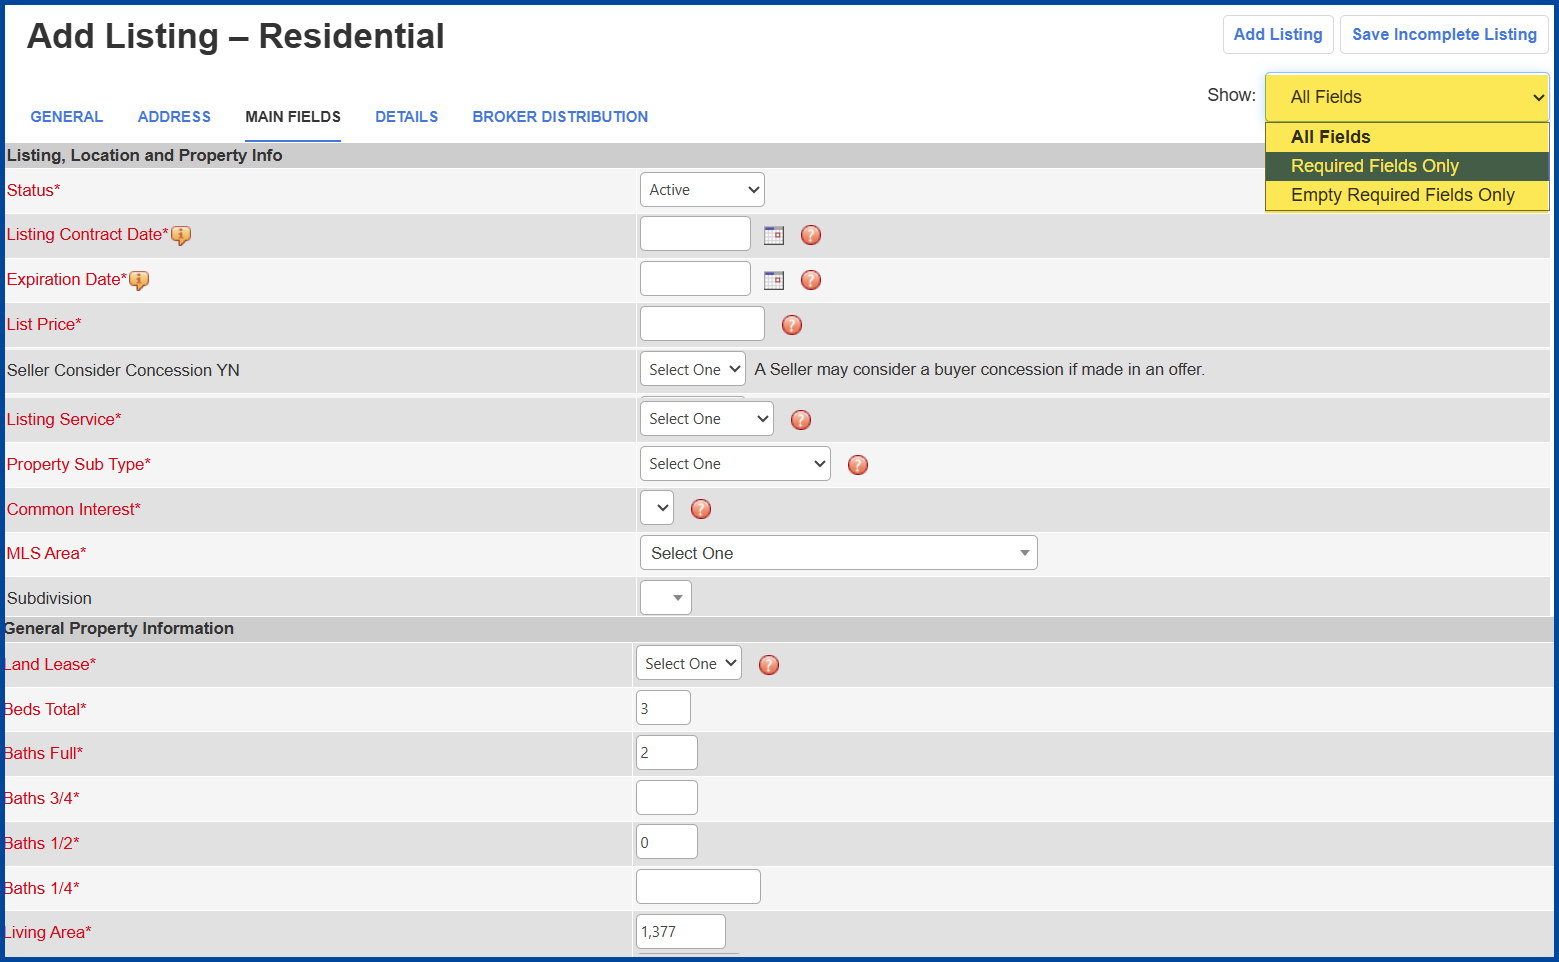
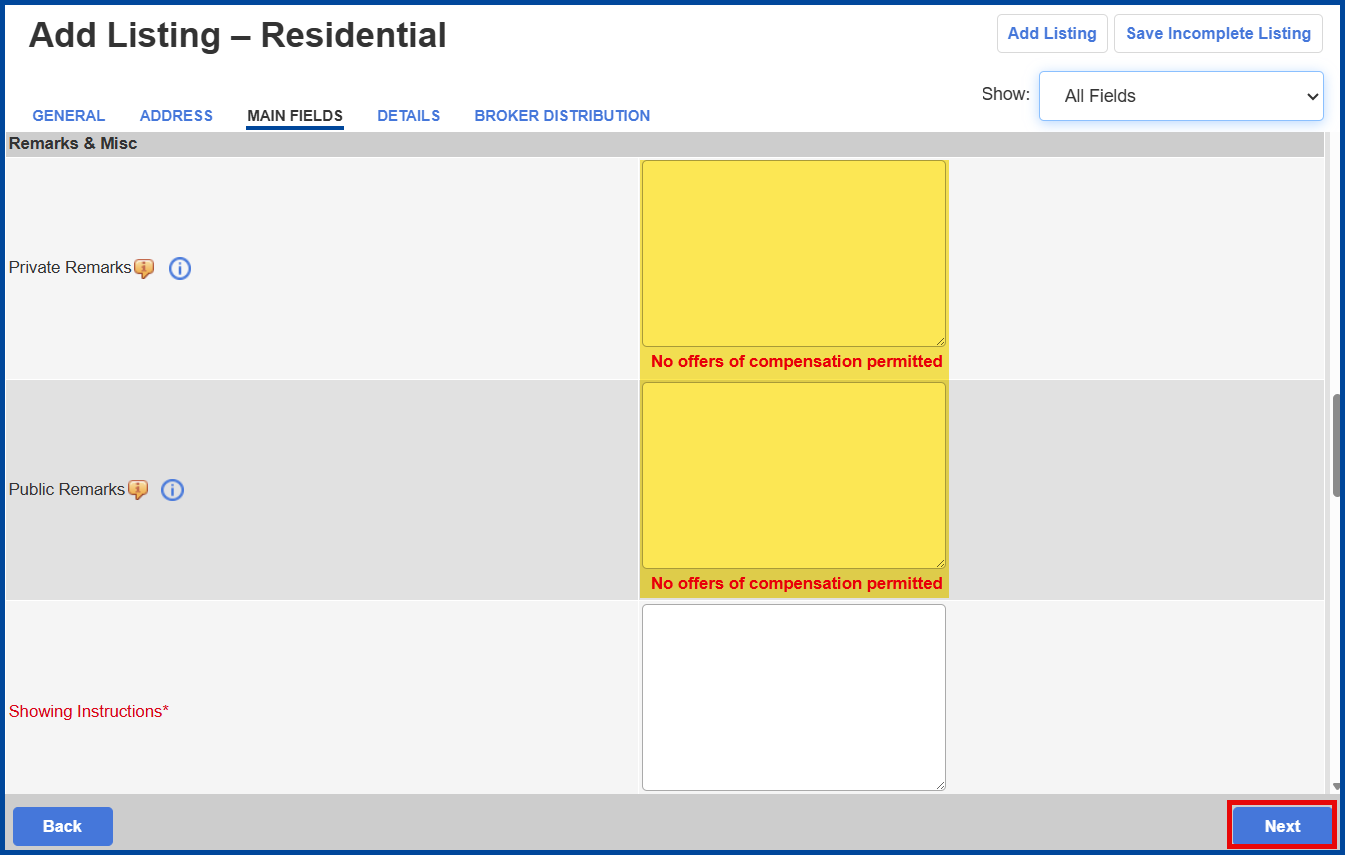
Private and Public Remarks fields are not required, keep that in mind if you are only showing required fields.
If you are finished in the Main Fields tab, click Next at the bottom right of the page to continue.
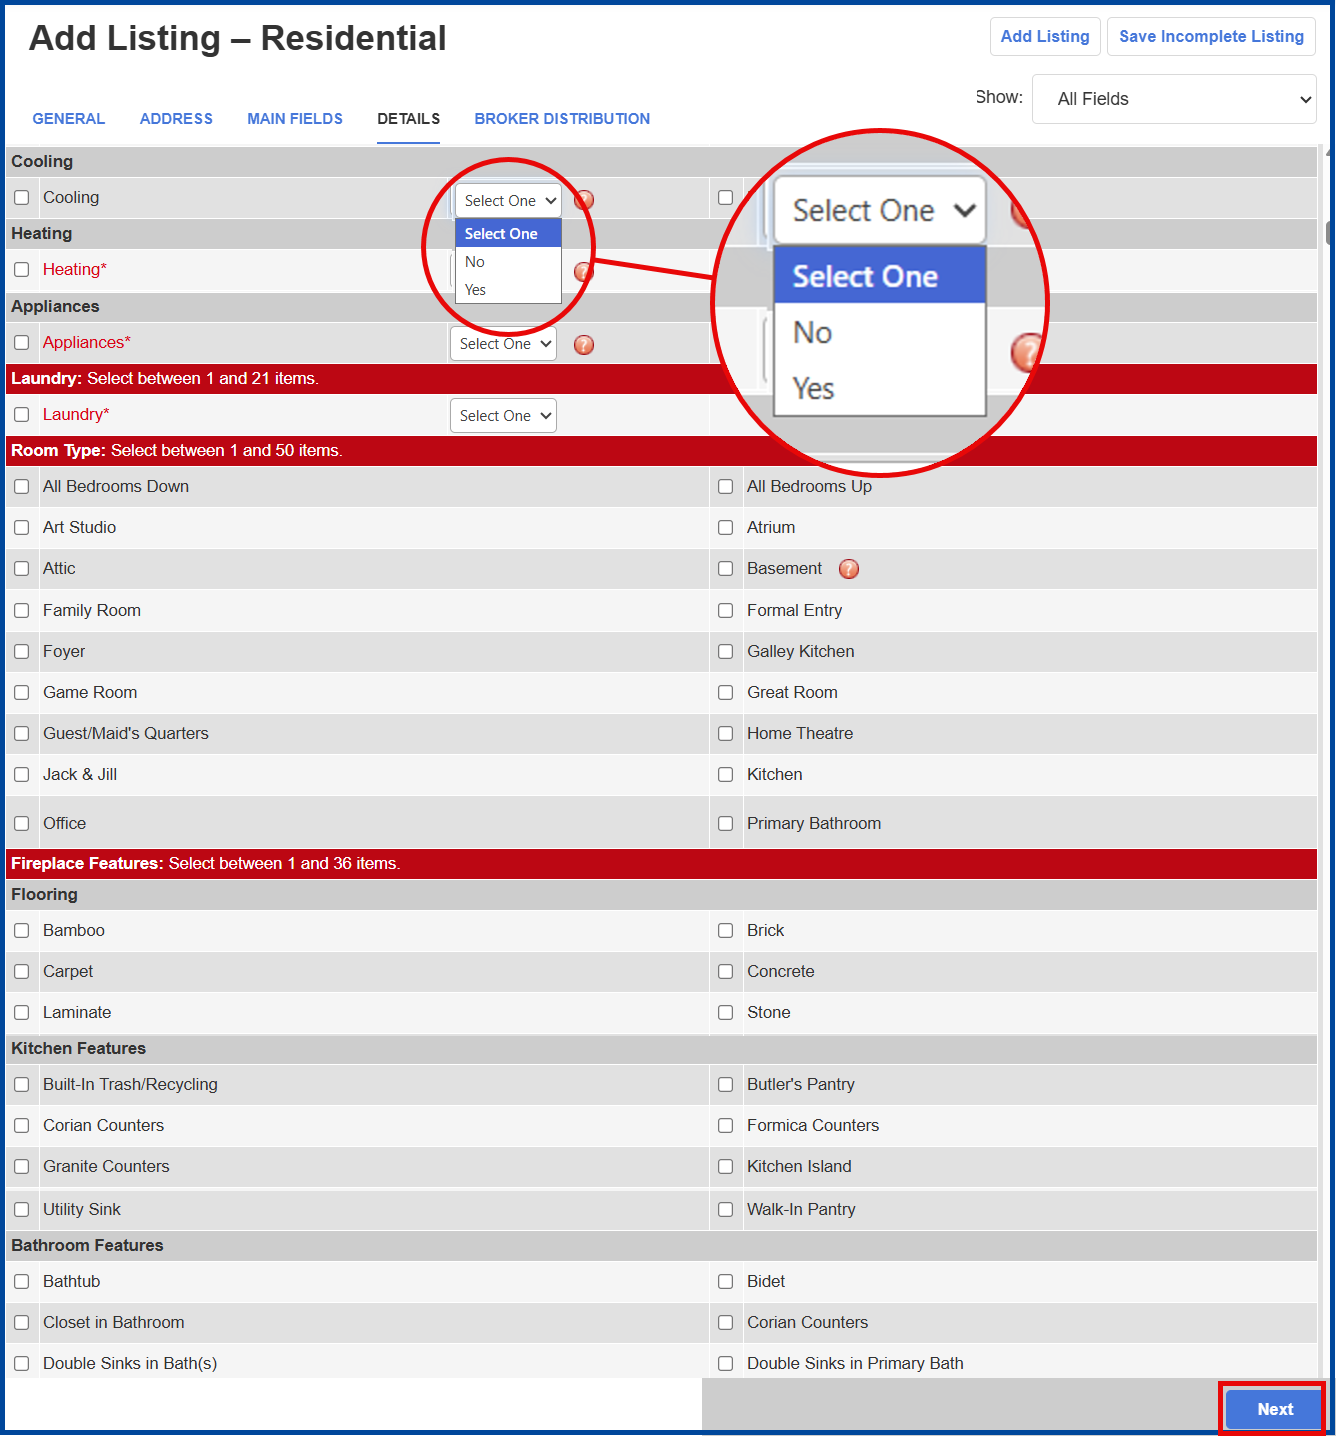
Details Tab
This section has specific data fields where you can add more information, such as features, amenities, and appliances; certain fields allow you to select multiple options.
If you are finished in the Details tab, click Next to continue.
Note: certain fields include a Yes/No option. Depending on which one you select, further information will be required.
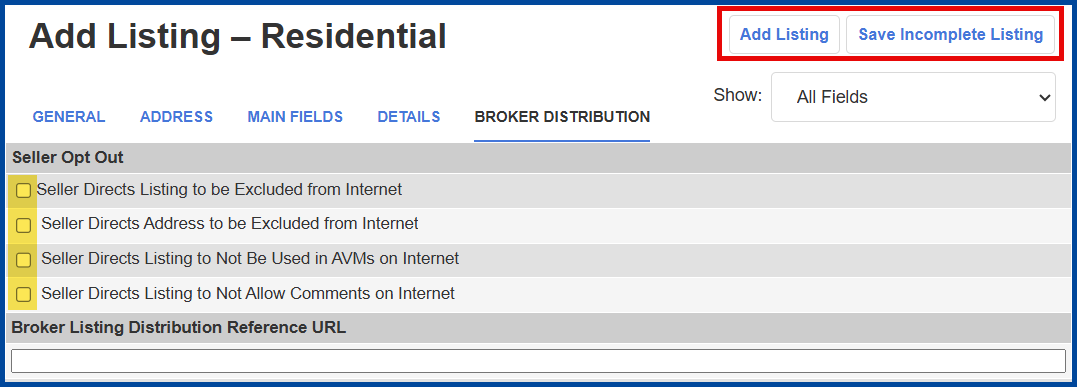
Broker Distribution Tab
Disclaimer: distribution options may vary by brokerage, refer to your broker or office manager for distribution guidelines.
This section displays listing distribution options. Check the corresponding boxes to choose distribution limitations.
- “Seller Directs Listing to be Excluded from Internet” = The seller requests that the listing be excluded from all internet sites, including Realtor.com and IDX sites.
- “Seller Directs Address to be Excluded from Internet” = The seller requests that the listing address be excluded from all internet sites.
- “Seller Directs Listing to Not Be Used in AVMs on the Internet” refers to automated valuation models on virtual office websites (VOWs).
- “Seller Directs Listing to Not Allow Comments on the Internet” also refers to VOWs only.
If you are finished entering the listing information, you can submit the listing by clicking Add Listing at the top of the page.
If you are not finished, click Save Incomplete Listing to save your entries and complete the listing later.