This guide will show you how to copy a listing in the CRMLS Flexmls system.
You can use the copy function to enter multiple listings that have similar information, or to re-list an expired listing.
Note: Agents can only copy their listings if they are still with the same brokerage as when they originally input the listing. The Office Broker can copy any listing that originated from their office.
Before starting, have the MLS number to copy at hand.
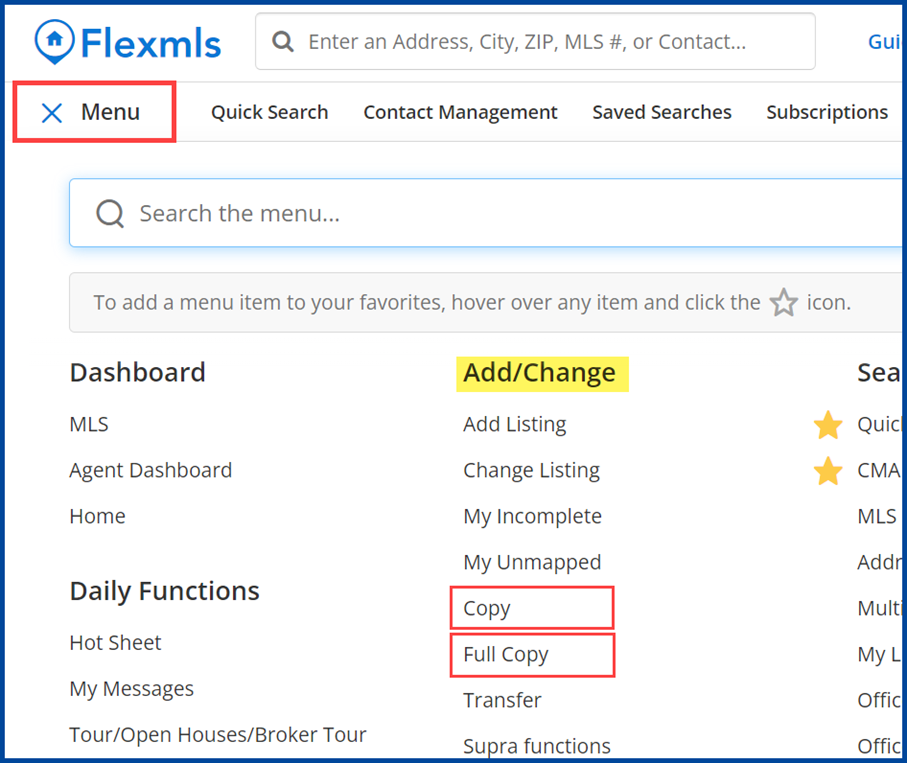
Click on the Menu in the top left corner. Under the “Add/Change” menu, select Copy or Full Copy. In this example we selected Full Copy.
- Copy – Makes a copy of basic listing information, but add information specific to this listing.
- Full Copy – Makes an exact copy of the entire listing, including dates and contract details.
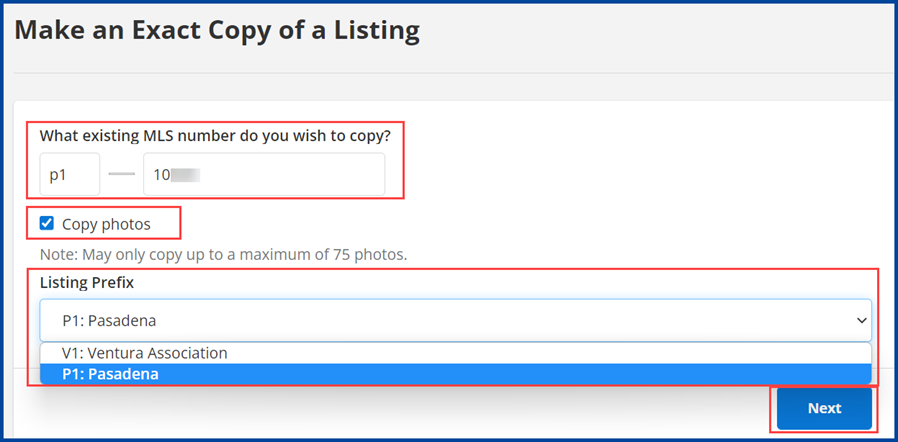
Enter the MLS number.
Select the Copy photos checkbox to copy photos.
From the drop-down arrow, select the listing prefix (your Association) for the new listing, and click Next.
Note: You can copy private photos, but they will not automatically become private photos on the new listing.
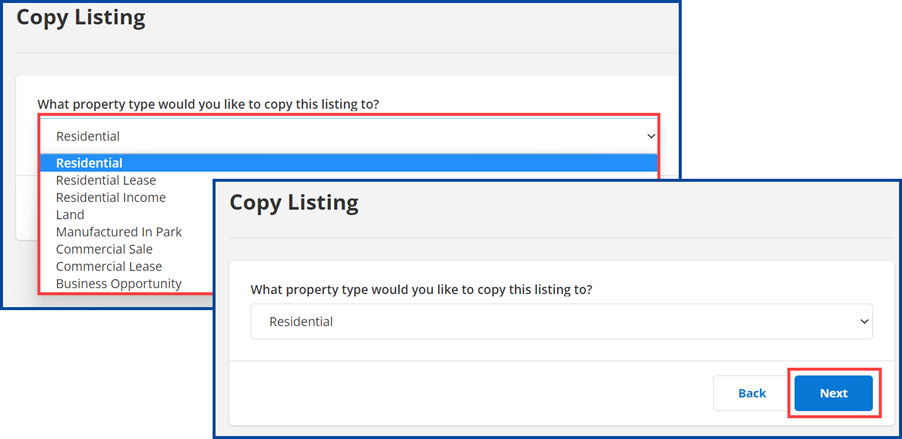
From the drop-down arrow, select the applicable property type. For this example, we selected Residential. Click Next to continue.
Note: You will not be able to change the property type once you have saved or added the listing.
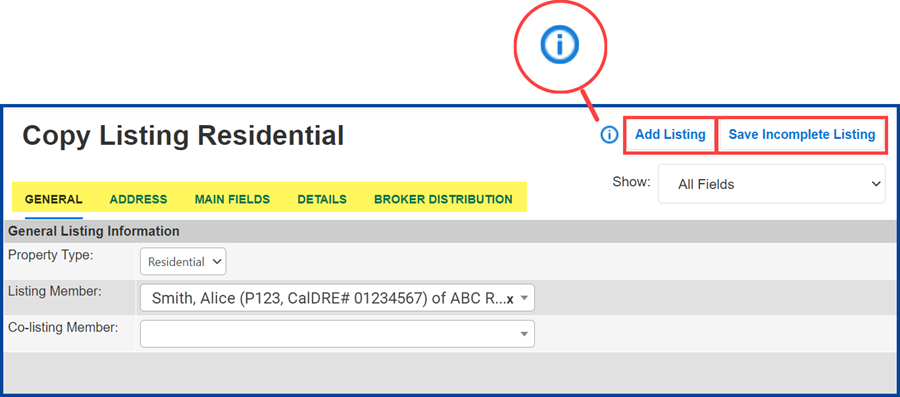
Most of the original data will copy over. Verify that all required and relevant fields are complete. Update information such as List Price and Contract start and end dates, and verify the map location.
Tip: Click the blue “i” to start a guided tour of the “Copy Listing” process in Flexmls.
Select Add Listing or Save Incomplete Listing. For this example, we have selected Save Incomplete Listing.
Tip: Save the listing as incomplete to manage your listing photos, documents, and other media, then add the listing to the MLS.
If any required fields are missing information, a red box will appear. You must correct all errors before you can submit the listing.
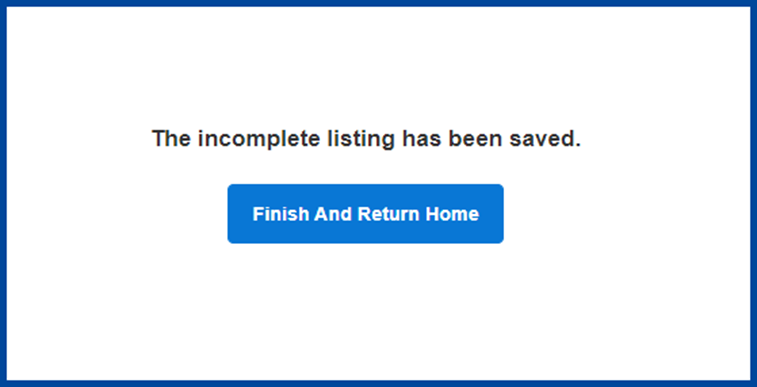
From the confirmation page, select Finish and Return Home.
Manage photos, documents, and other media
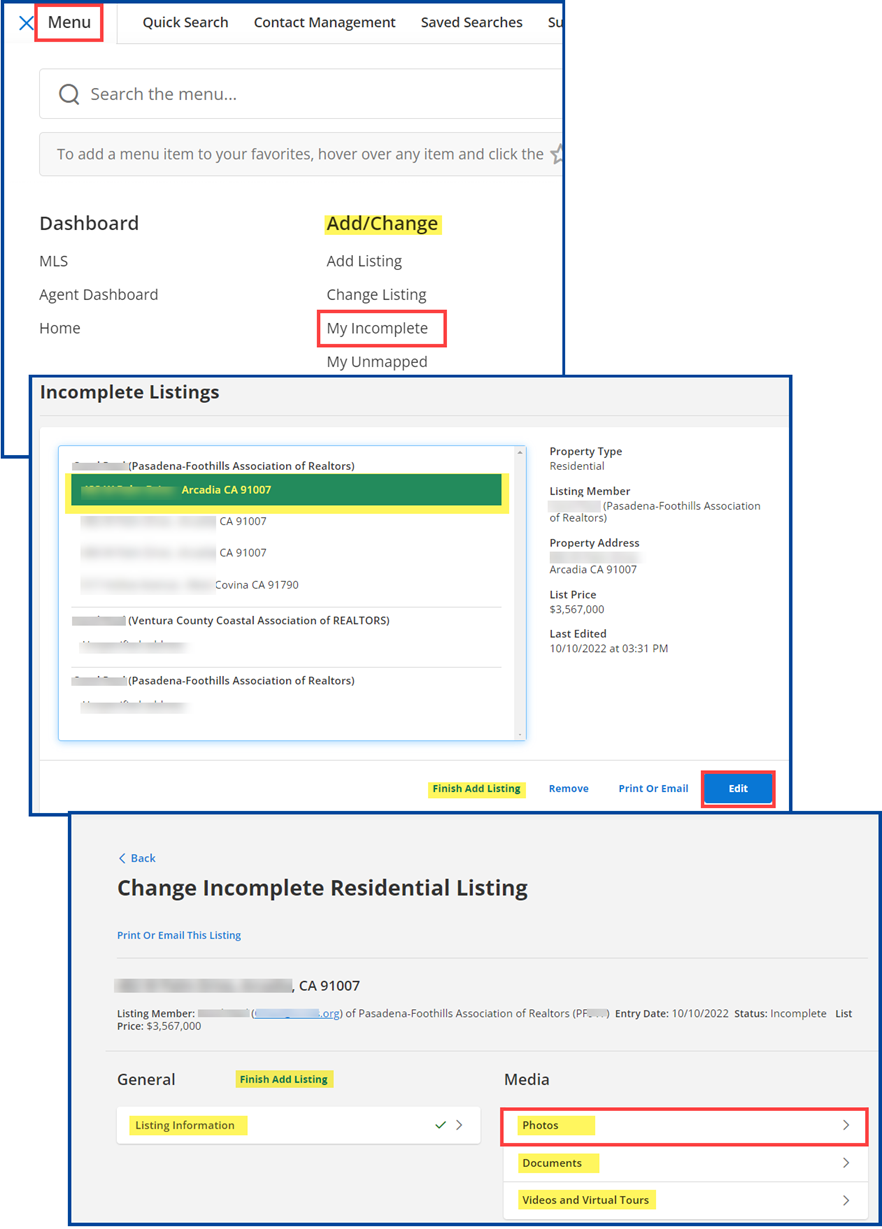
Click on the Menu, then select My Incomplete to manage photos, documents, videos, and virtual tours.
Click to highlight the incomplete listing and select Edit.
Select the media to manage. In this example, we have selected photos.
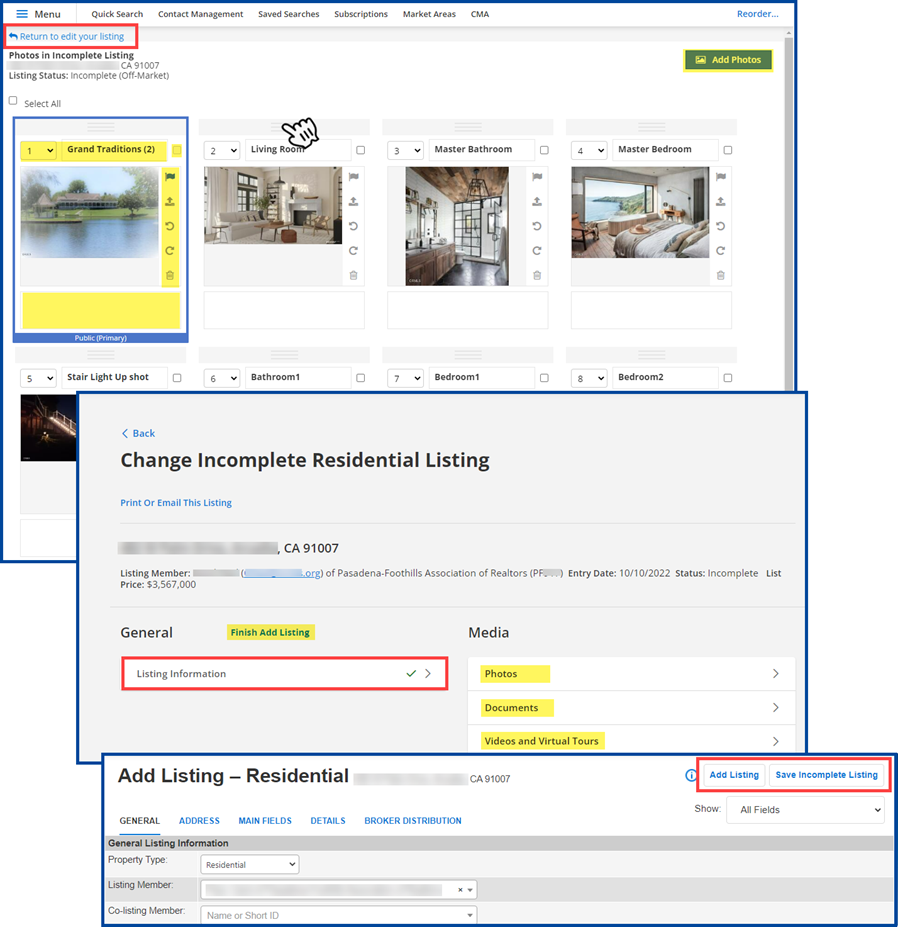
Make any necessary changes, additions or re-organize the photos. Select Return to edit your listing in the upper left corner when finished.
Tip: Clicking Finish Add Listing will start the guided tour option if you want to use it again.
Select Listing Information to return to the main listing page and select Add Listing or Save Incomplete Listing.
For more information on adding a listing or managing listing photos, click on the links below:
