This guide will show you how to display an image of your choice in the Collab Center.
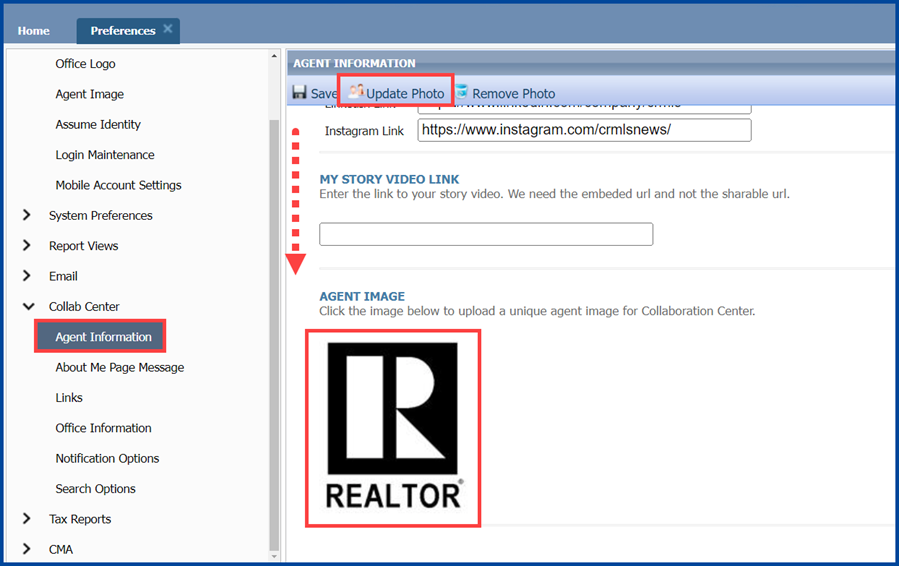
In Preferences, there are two paths to add an agent photo: User > Agent Image, and Collab Center > Agent Information.
Photos added in User > Agent Image will automatically appear in the Collab Center, but photos added to the Collab Center will only appear in the Collab Center.
Note: The only acceptable image formats are .JPG, .PNG, and .GIF.
Start by clicking on the Preferences icon and select Collab Center from the drop-down list.
The Agent Information section on the left will open. Click either Update Photo or the placeholder image under Agent Image found at the bottom of the page.
From the “My Images” tab, click Upload Image.
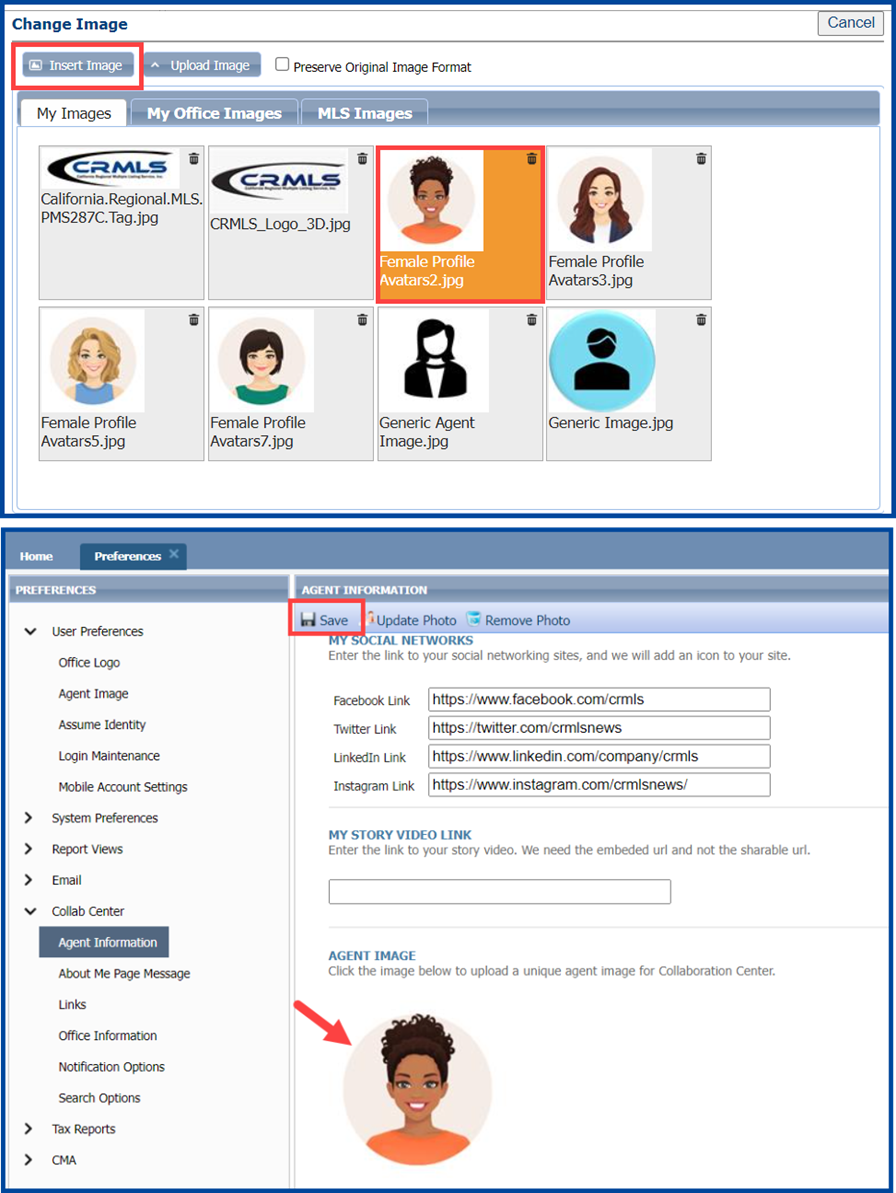
Note: if you have previously uploaded an image and want to use it as your new agent image click the Insert Image button.
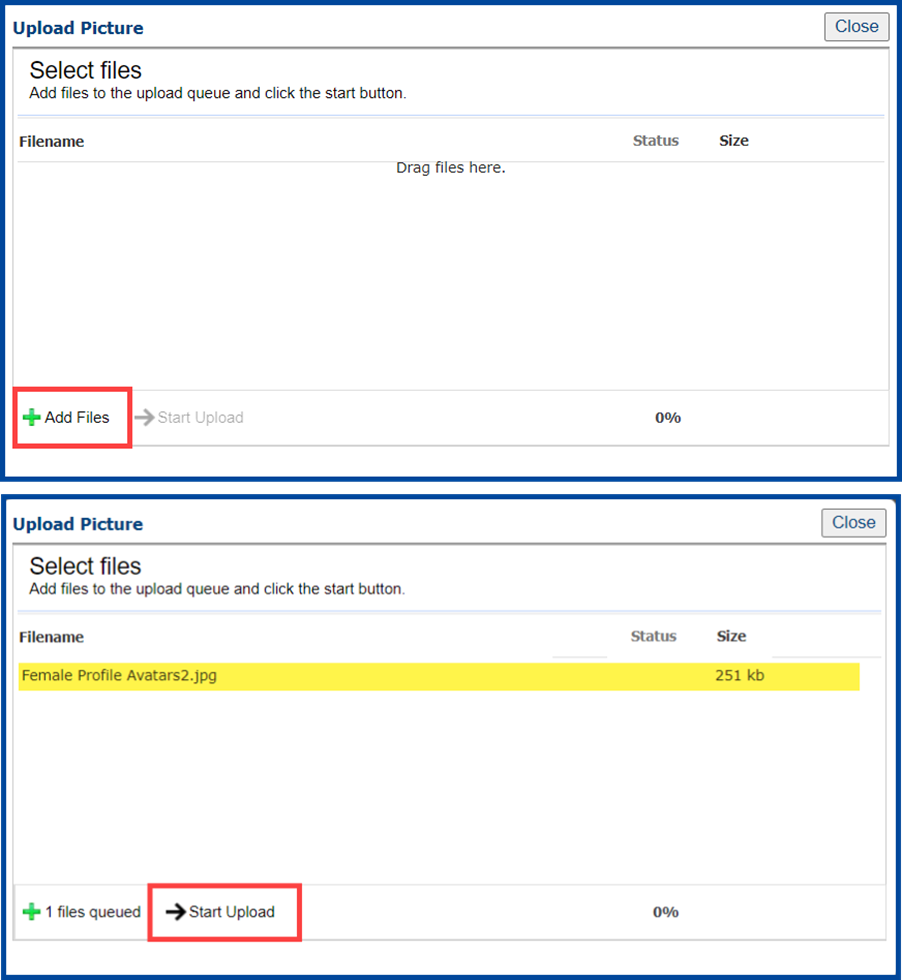
- Click +Add Files
- Select the image file from your computer.
- The “Select files” dialog box will display your file. Click Start Upload. Repeat these steps to add additional agent images and/or logos.
Note: Square images work best in the Collab Center. Consider cropping your image into a square prior to uploading it.
- Select your preferred image and click Insert Image.
- Click Save when finished.
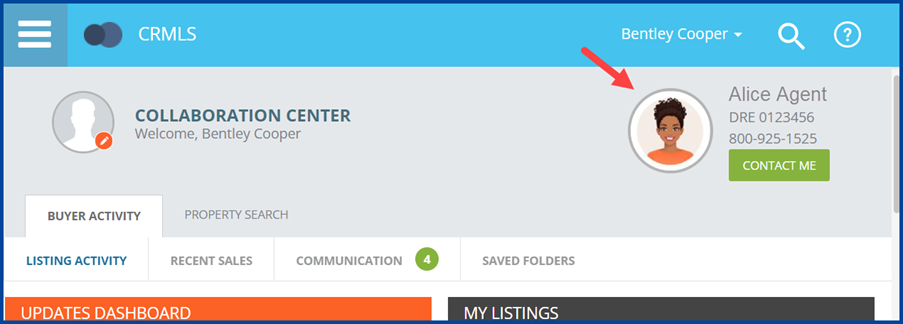
Collab Center Example:
For more information on adding logos and images in Paragon, please see our reference guide here.


