In the QRG, you will learn how to Schedule a Meeting in ZOOM
Schedule a Meeting in ZOOM
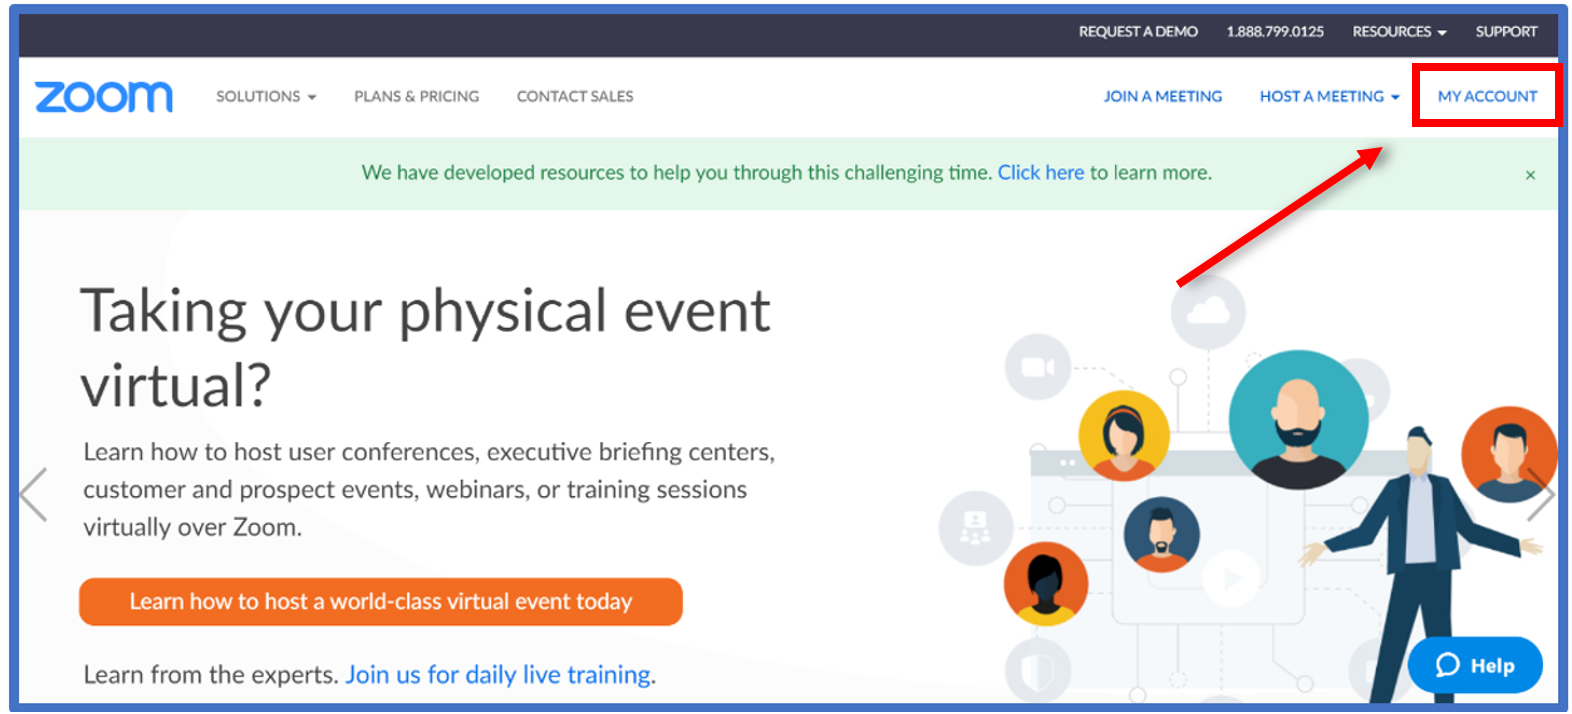
- Go to Zoom.com and click on My Account
- Go to Schedule A Meeting
- Enter a Topic (Name/Title) for your meeting. You may add a description if desired. Now select the date/time for the meeting and set the duration of your meeting. You may also set this as a recurring meeting (and change how often it will occur).
- Select Registration if you require audience to register (for example, if you require attendance numbers). If you would like a meeting password, select that option. You are also able to change the video default settings for both the host and participants (Zoom automatically has this option set to off).
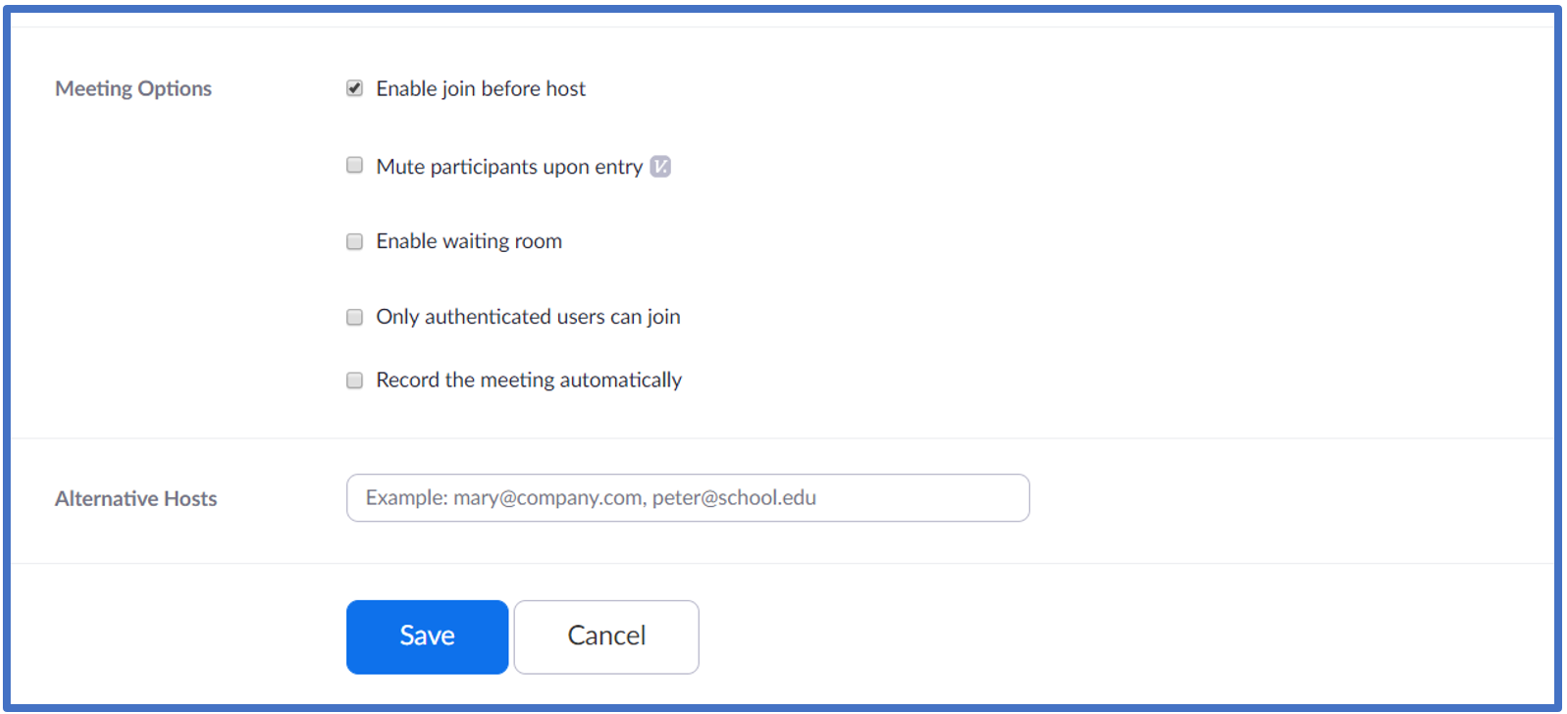
- Meeting Options
- Enable join before host – If you would like others to be able to join the Zoom before you are on, select this option
- Mute participants upon entry – Select this if you would like all participants’ audio turned off
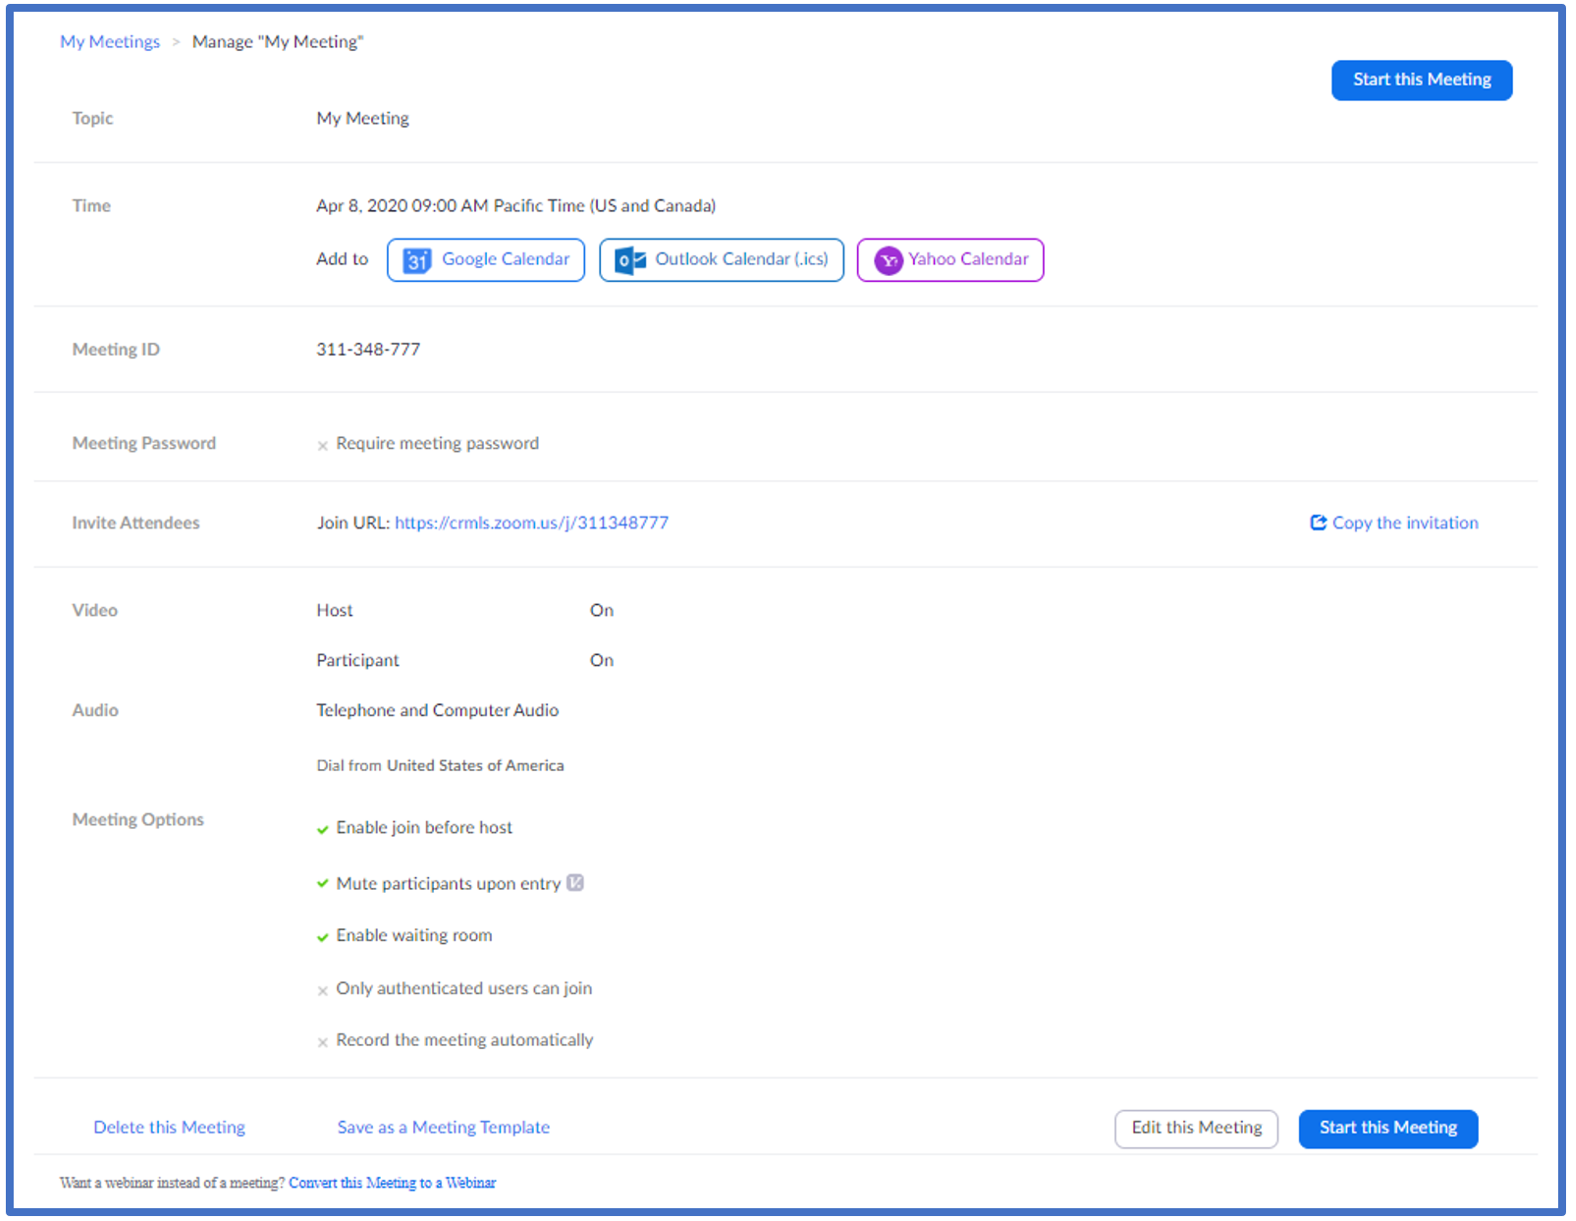
- Once you click Save, you will be directed to your meeting confirmation. Here you can save this meeting to your Google, Outlook, or Yahoo Calendar.
- You also have the ability to copy the URL to send out to your participants (see invite attendees section).
- If you would like to edit some of your meeting criteria, hit the Edit this Meeting button.
Hosting a Zoom Meeting
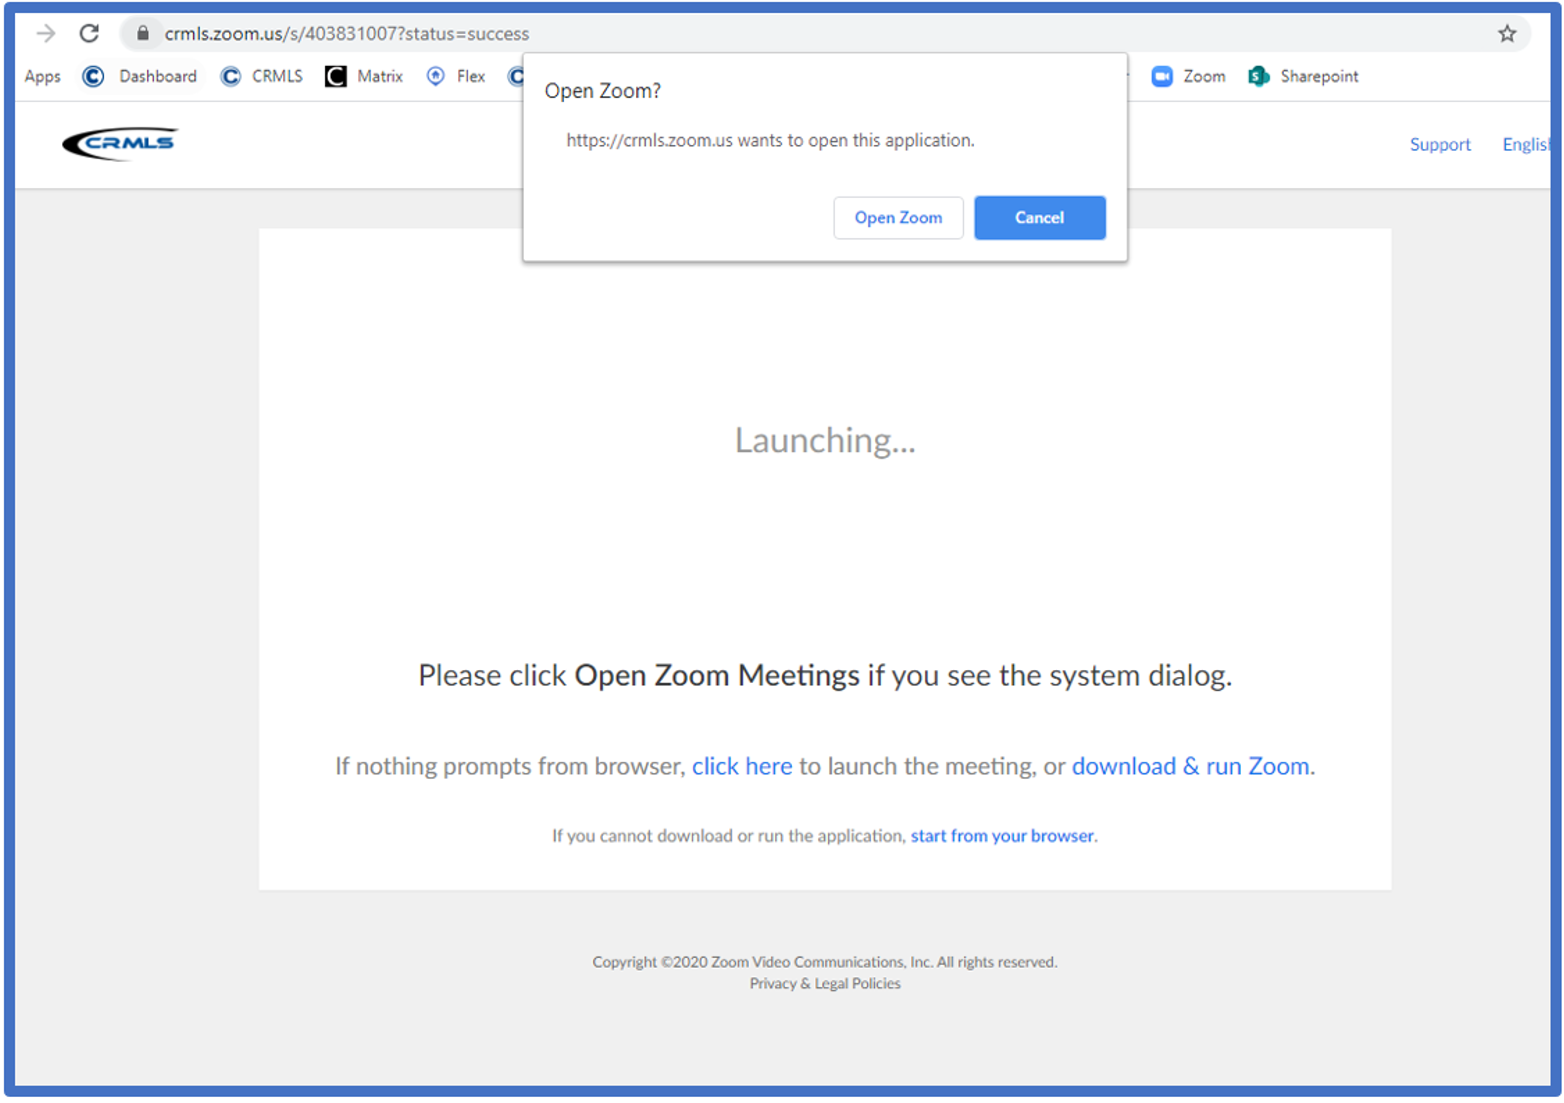
- When clicking on the meeting URL, you will be prompted to this screen. Click on Open Zoom.
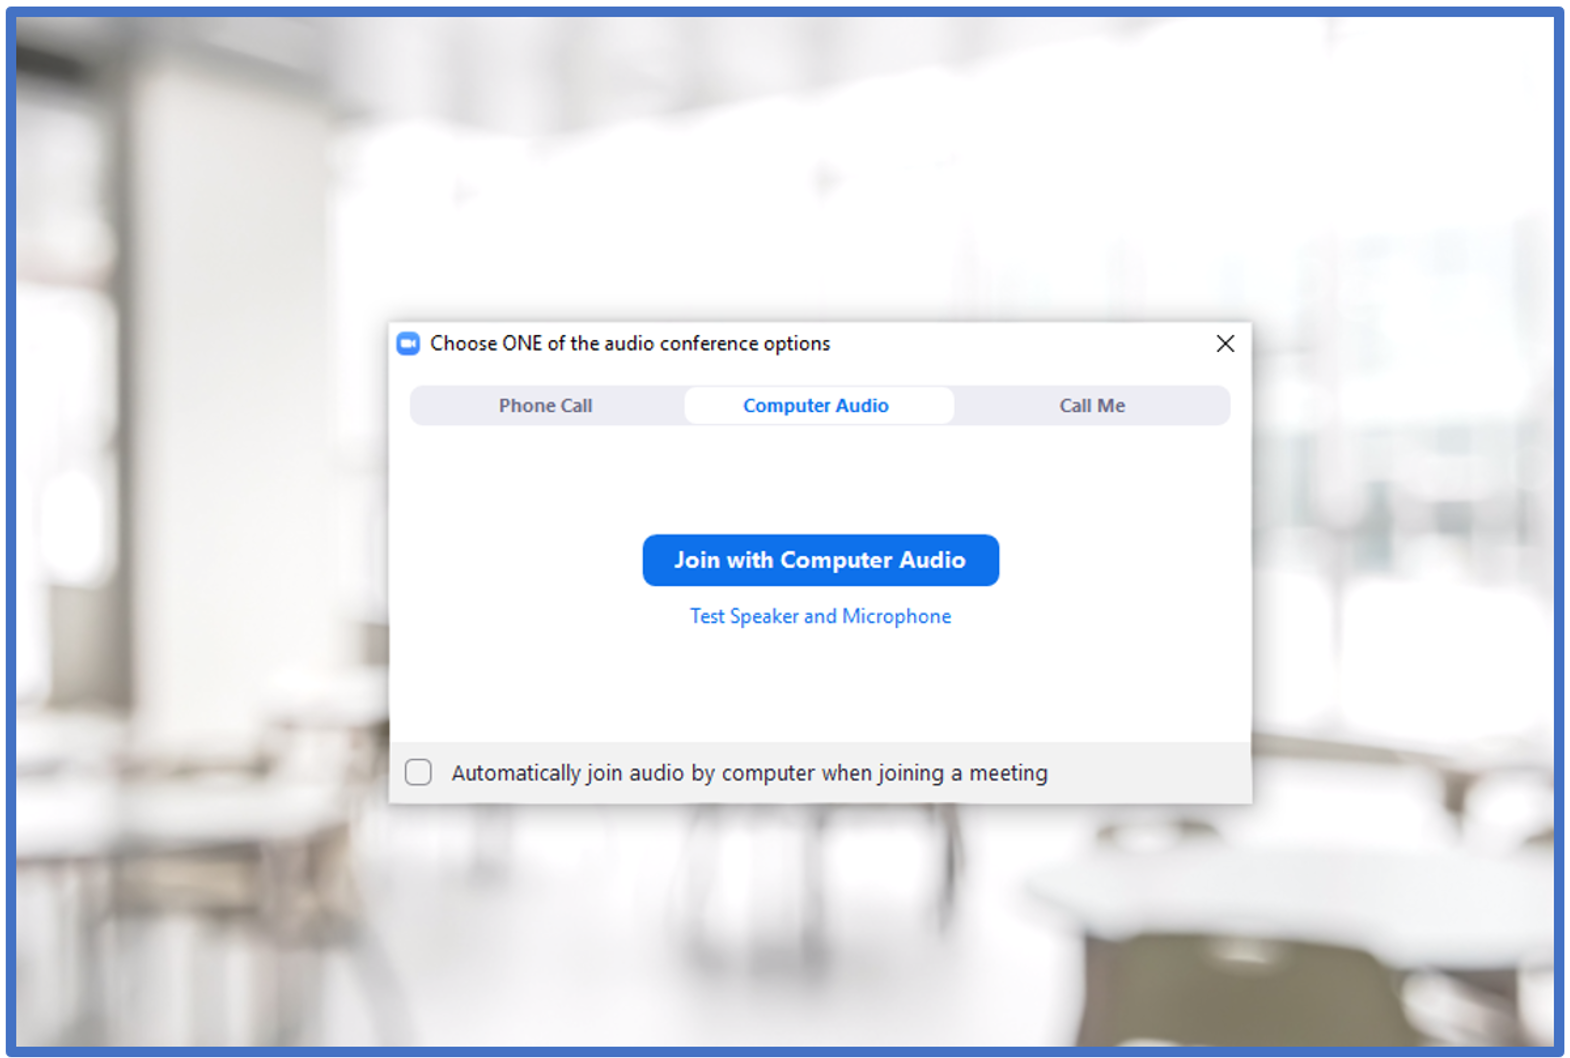
- When choosing audio conference options, choose the option that best works for you. Typically, users will select “Join with Computer Audio.”
- Once in the Zoom meeting, you have several buttons to change your settings.
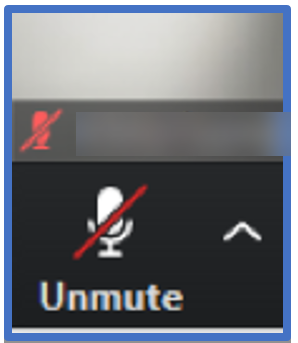
- Mute Button – When clicking on the mute button, you can mute yourself within the Zoom meeting. The red line will indicate when you are muted. You can click it once to mute, and then click again to unmute yourself.
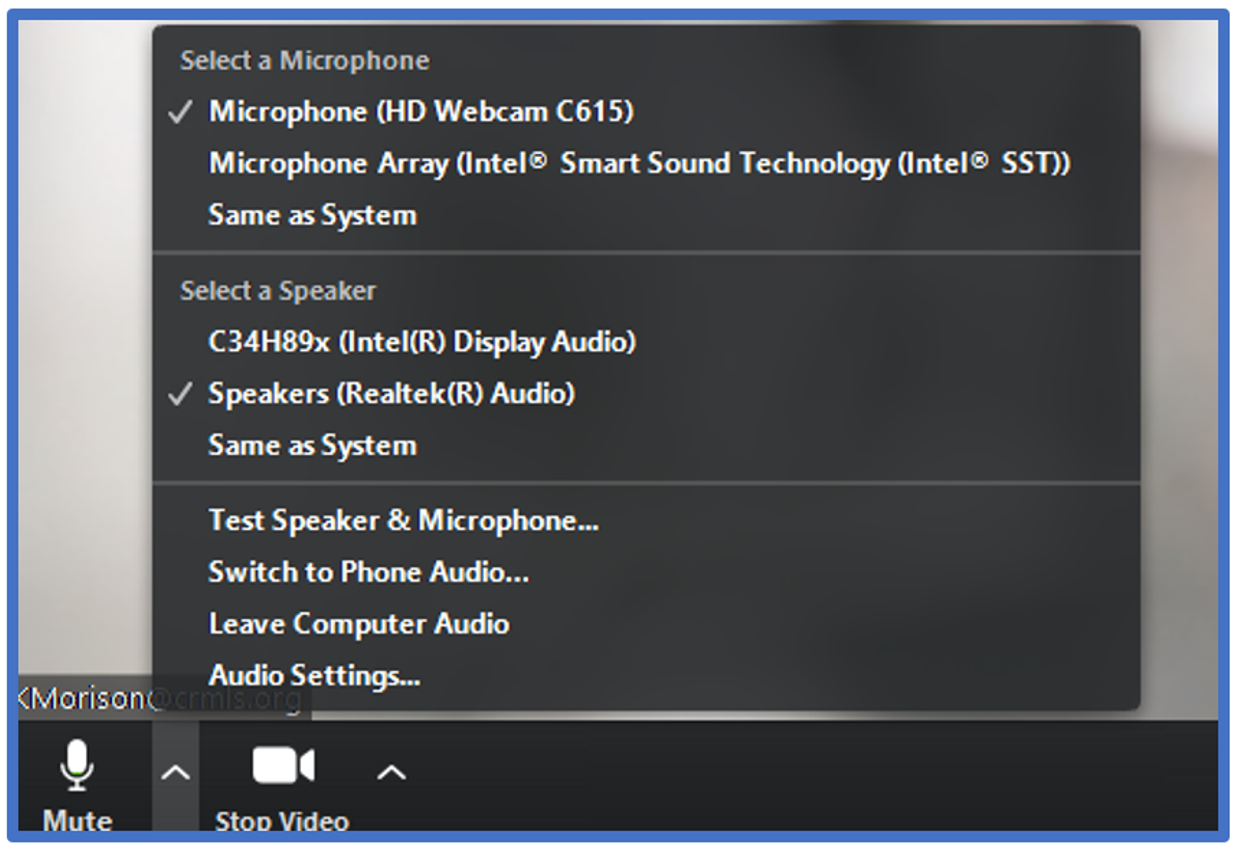
- Clicking the arrow next to the mute button will give you audio options and allow you to choose your microphone and speaker (if you have more than one).
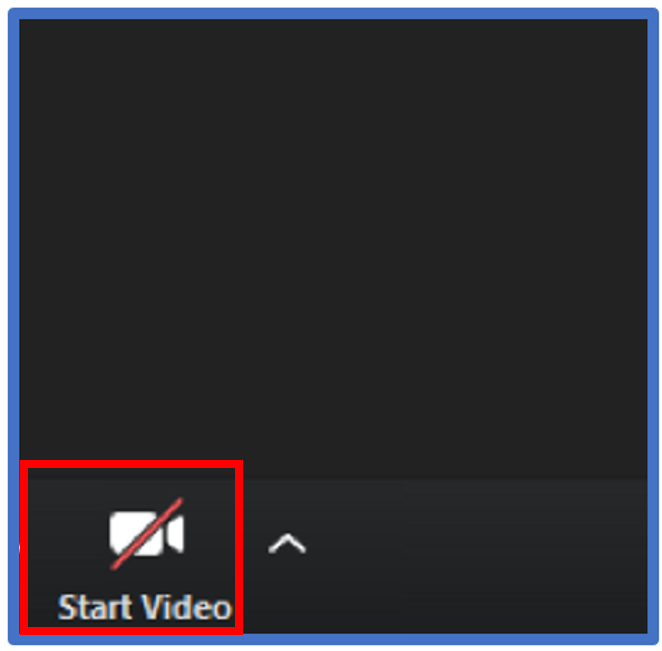
- Stop Video – If at any time you wish not to be seen by other participants, click on the Stop Video icon. This will turn off your camera and display a black screen with your login name. Re-click on the video icon if you wish to be seen on camera again.
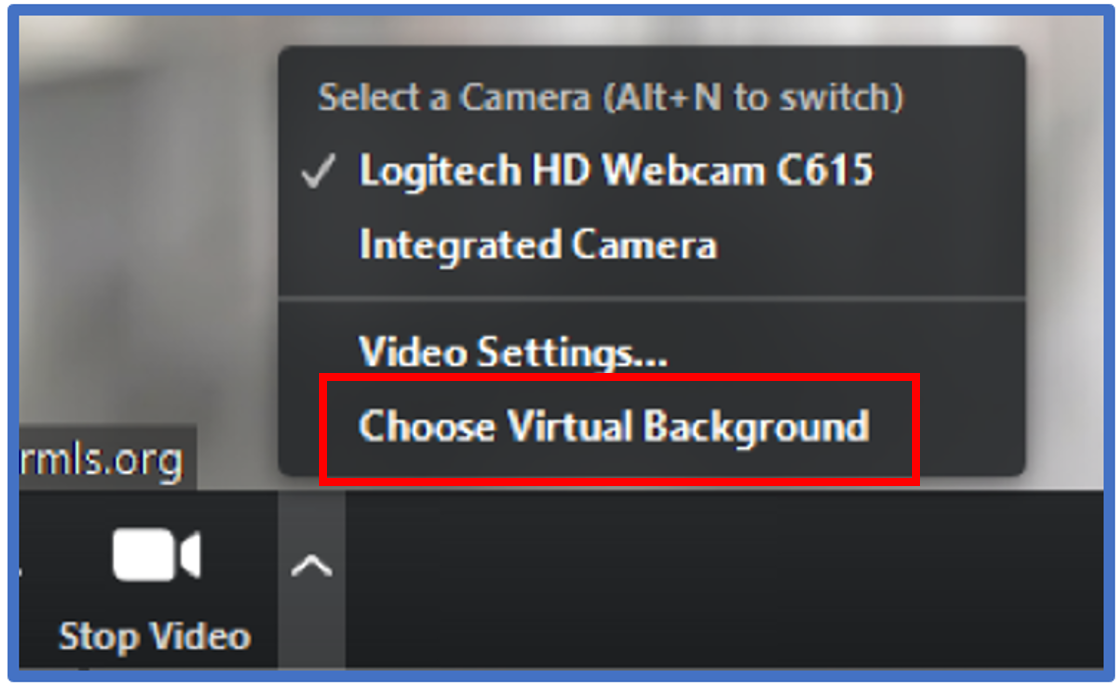
- Clicking the arrow next to the Stop Video button will give you video options and allow you to choose your camera (if you have more than one).
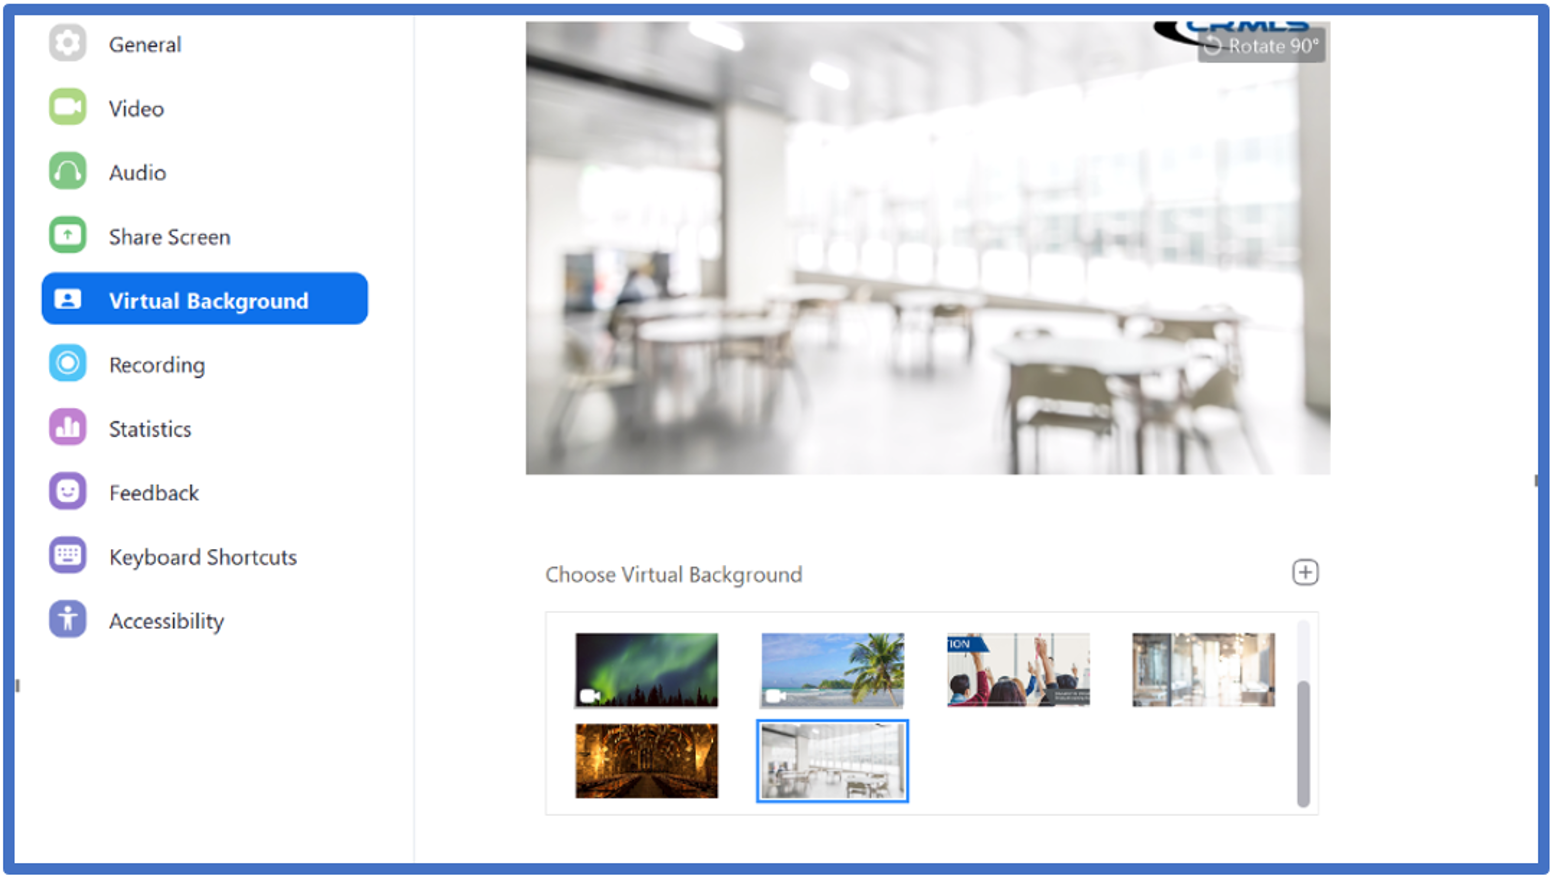
- To change to a virtual background of your choosing, select Choose Virtual Background.
- Here you can choose from preselected Zoom backgrounds or you can upload a photo yourself (click on the + icon).
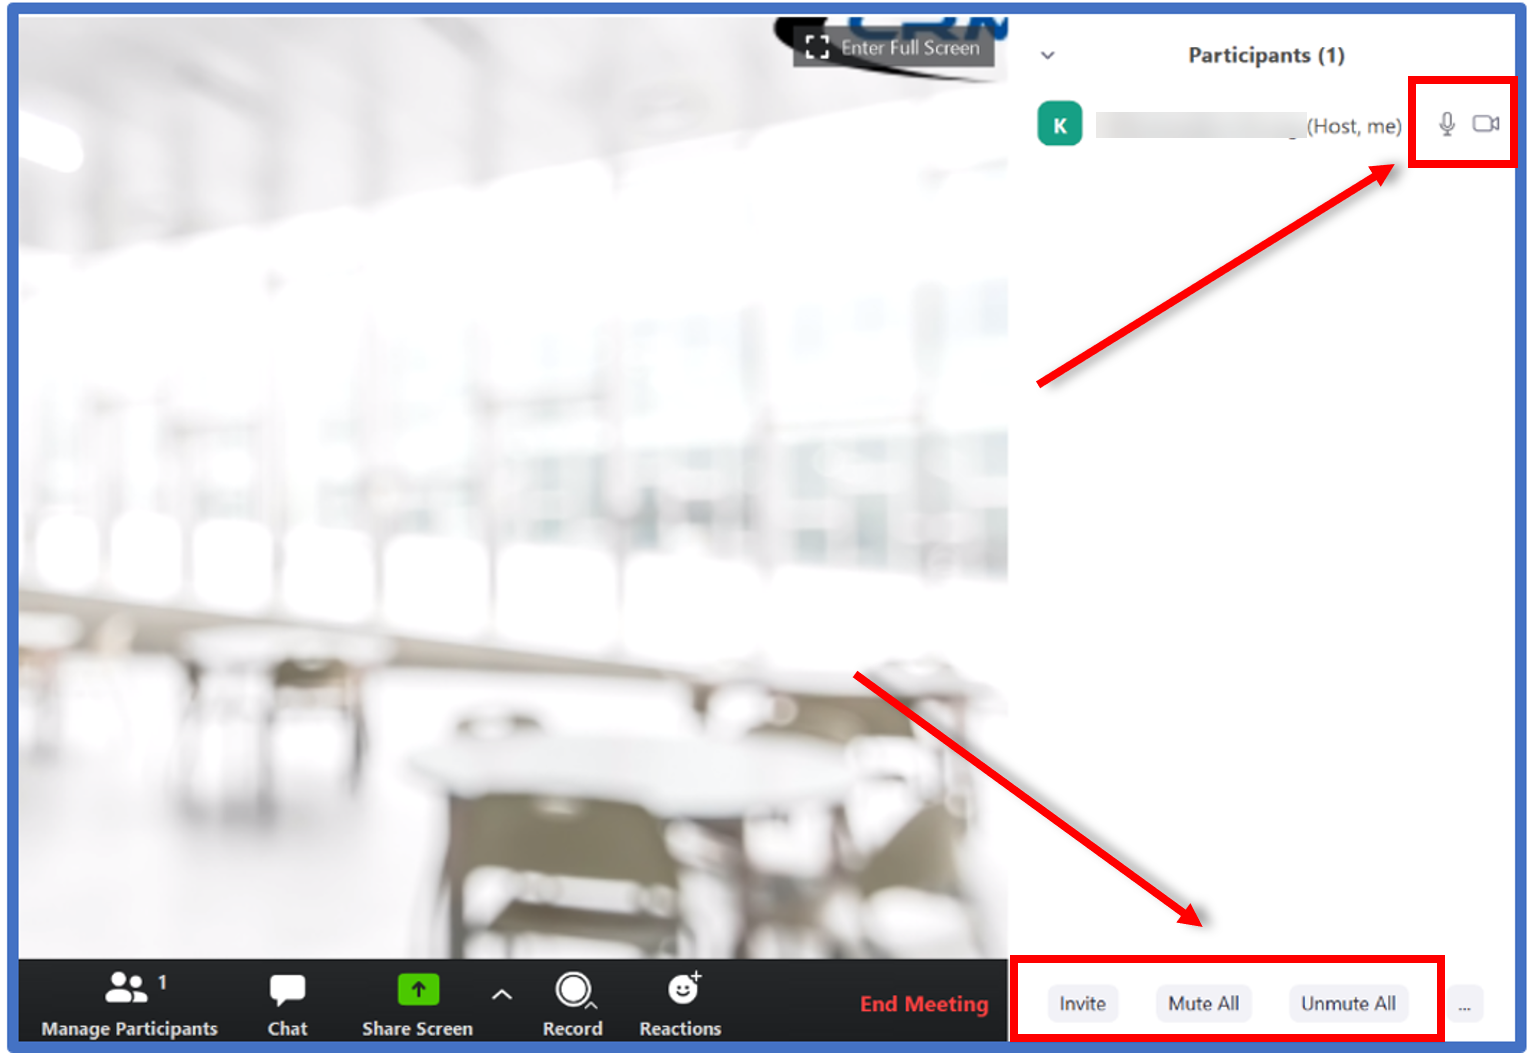
- Below you have the option to Manage Participants. By clicking on this, you may view all who have joined the Zoom meeting. Here you can mute or unmute all participants at once, or you can do so individually by clicking next to the participant’s name.
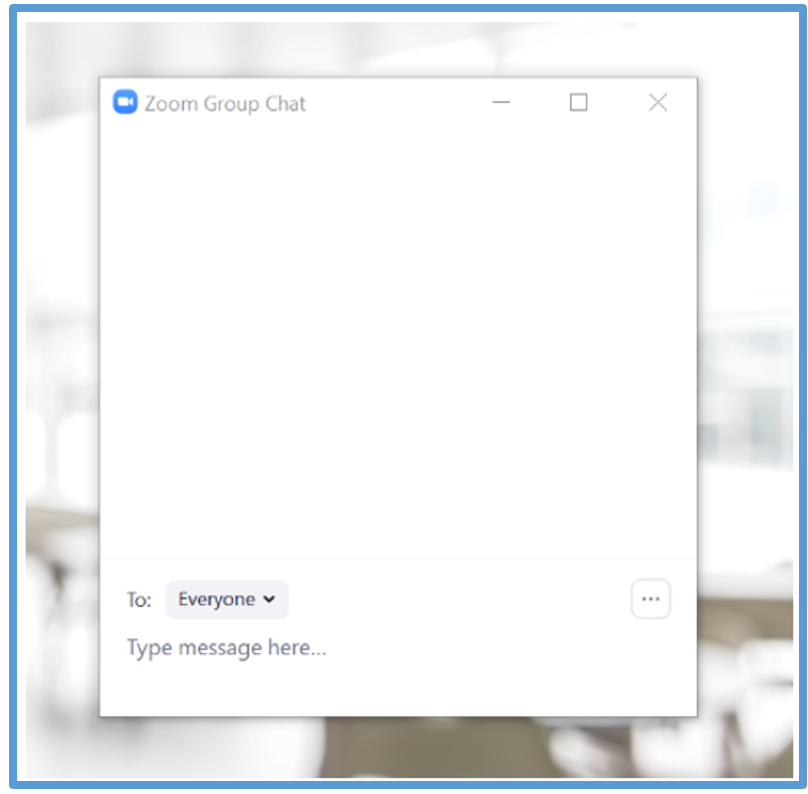
- Chat Icon – Clicking on the chat icon will pop up a chat window that will allow all participants to communicate via chat during the meeting or webinar. Participants have the option to chat with everyone in the Zoom meeting, or they can select a specific participant to chat with.
- Share Screen – If you would like all the participants to view your screen, click on the share screen icon.
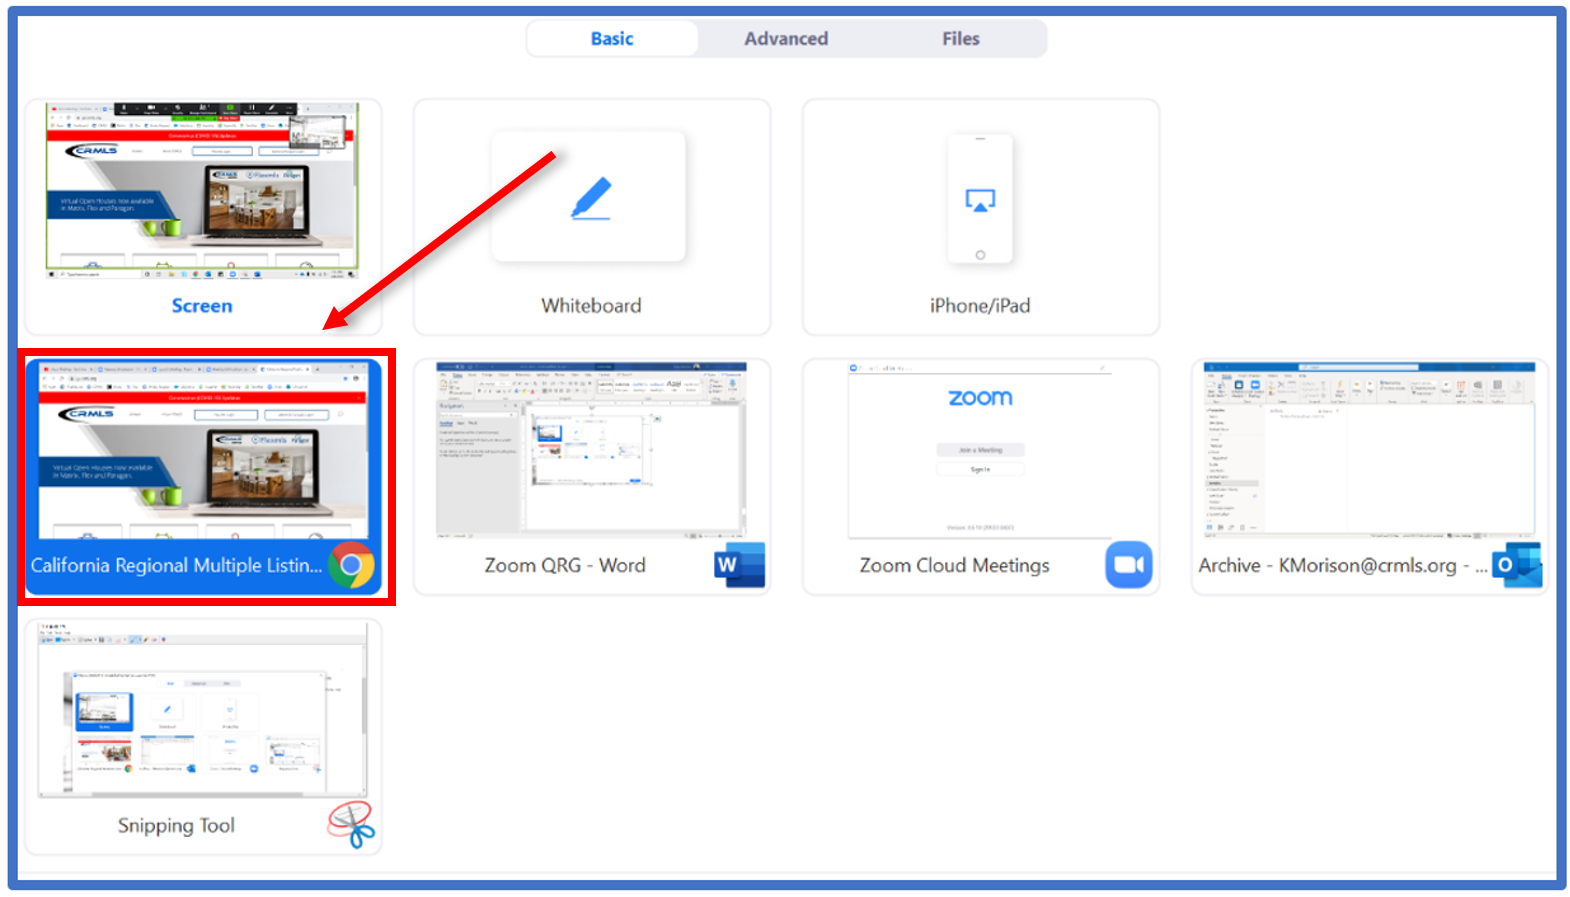
- A share screen window will pop up. Click on the screen that you would like to share with others. Only the highlighted screen of your choosing will be displayed. Once you are ready, click Share.
- To switch your screen at any point during the meeting, click on New Share. If you want to pause your screen on the current shared screen, select Pause Share. If you want to stop sharing your screen altogether, click on Stop Share.
- Record – This will give you the option to either save the recording to your device or to the cloud.
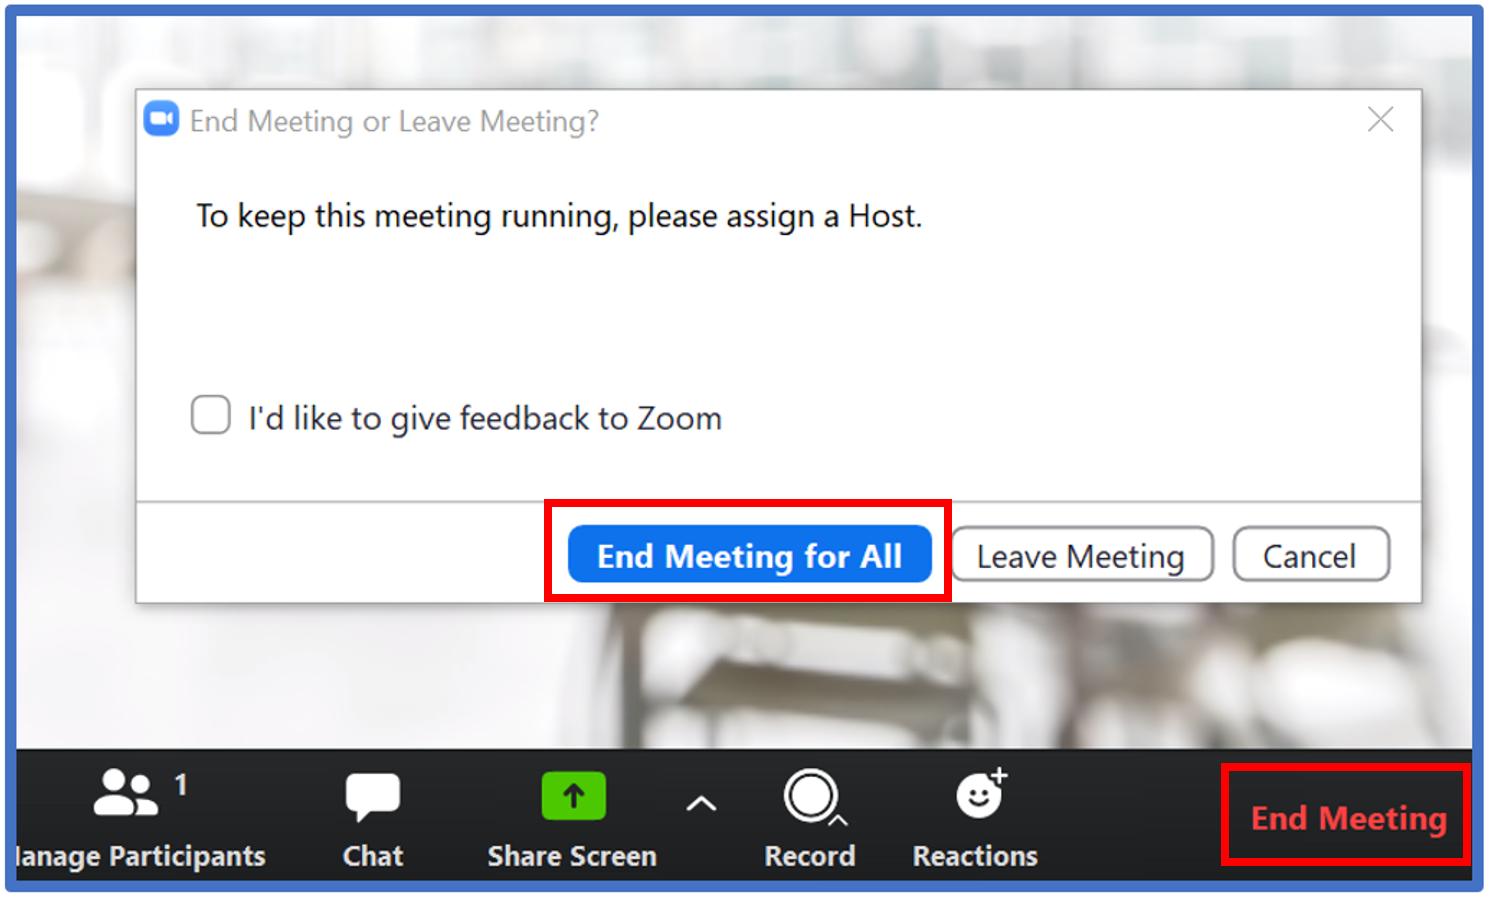
- If at any time you would like to leave the Meeting, click on End Meeting. You will then be given the ability to either End Meeting for All, or you can leave the meeting yourself and assign another host to have the meeting continue.
April 2020
