A custom display defines the layout that you see when any search results are displayed. The following instructions will help you create your own Custom Display.
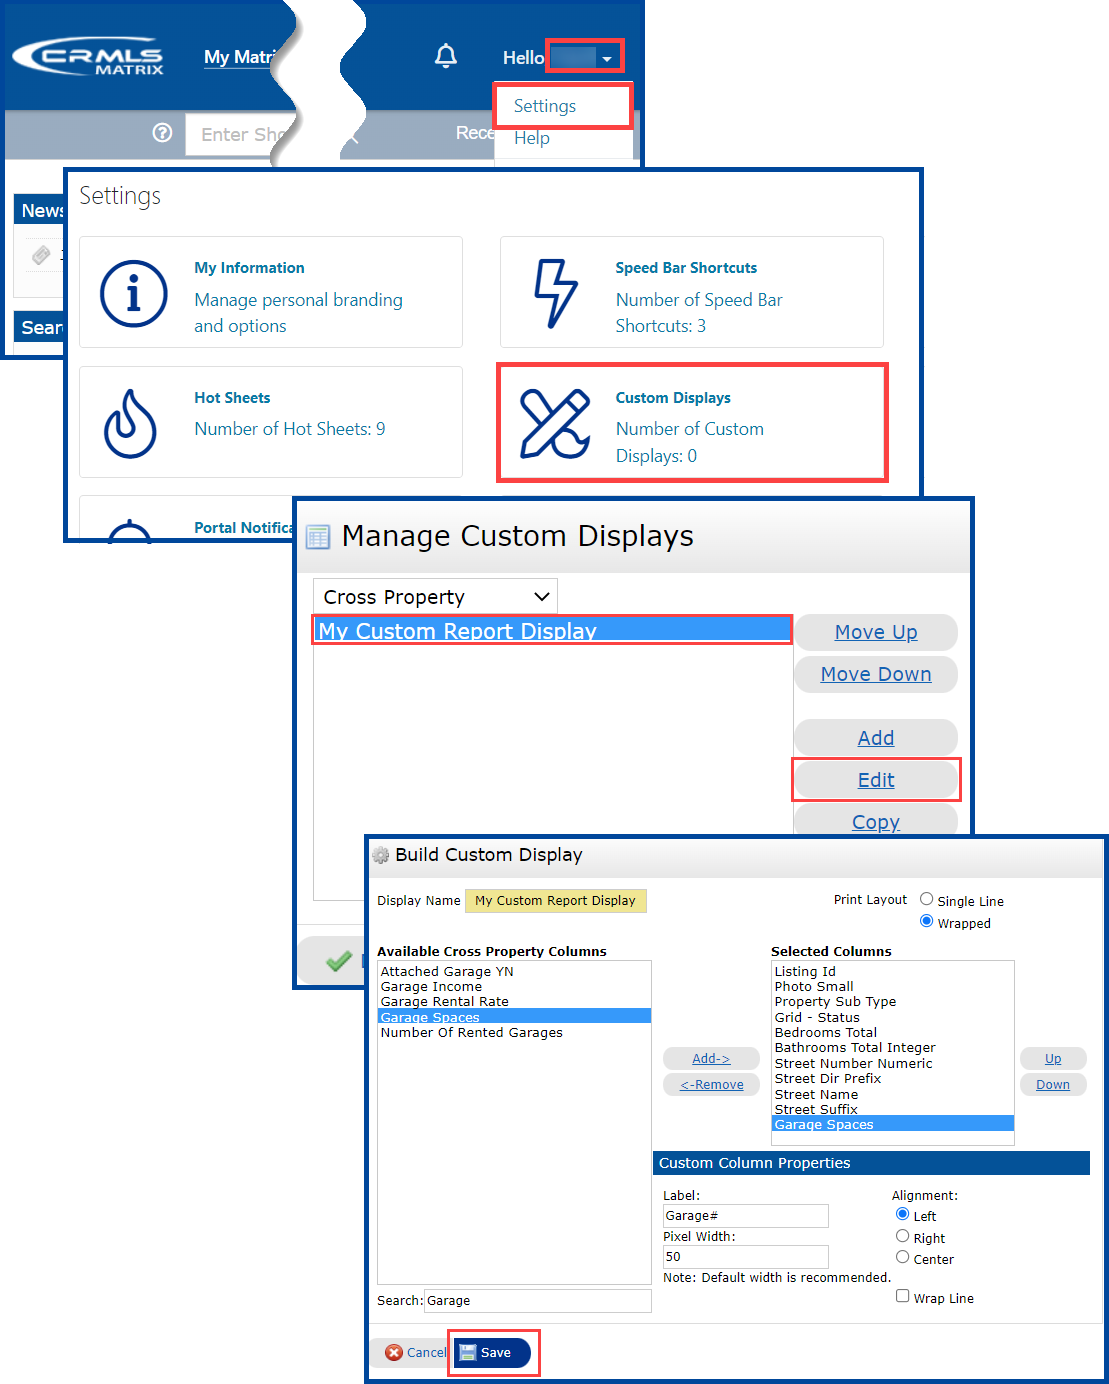
Step 1: Click on the Utility Menu (your name) in the upper right corner, and then click on Settings.
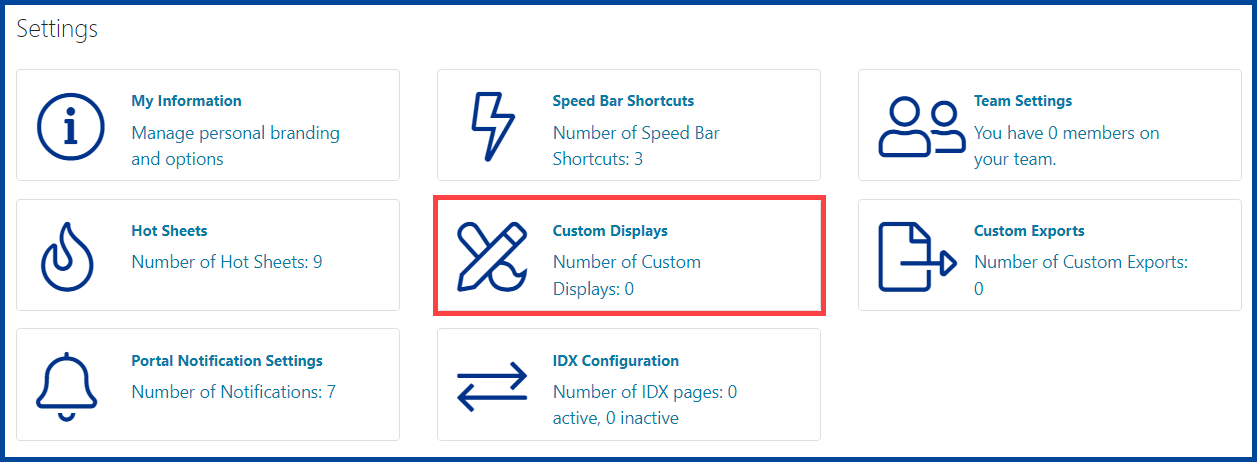
Step 2: Click on Custom Displays.
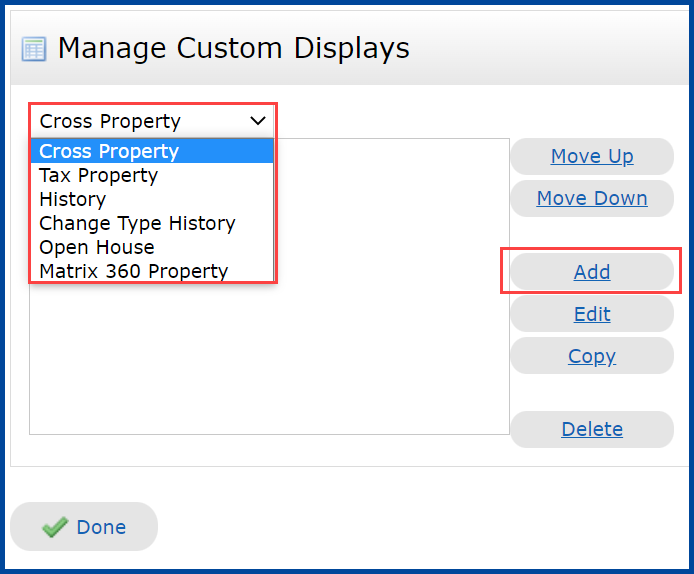
Step 3: Select Cross Property from the drop-down list, then click the Add button.
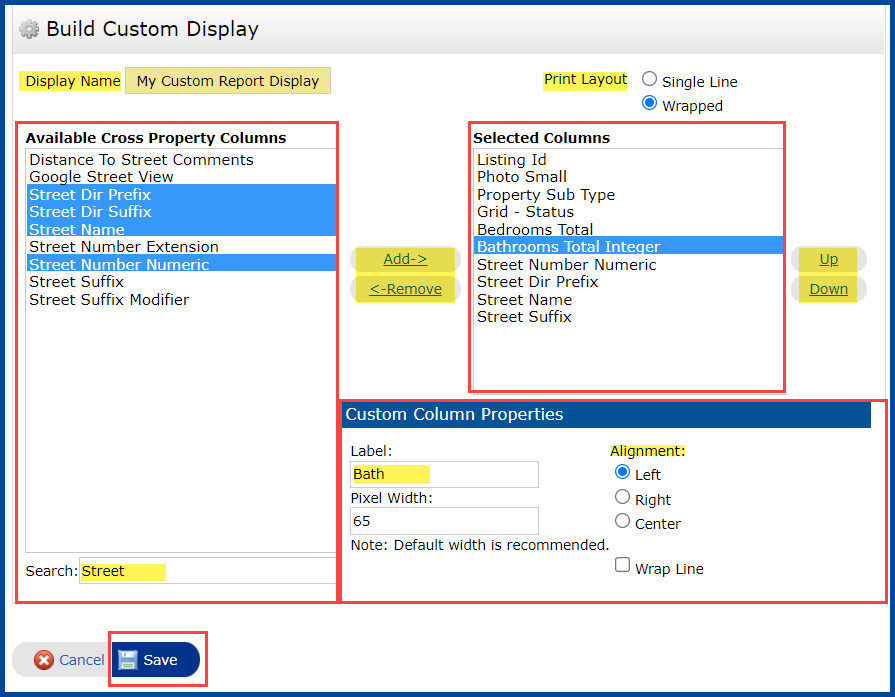
Step 4: Enter the Display Name of your choice.
Step 5: From the Available Residential Columns, select the columns you would like in your custom display and click the Add button. To select and add more than one column at the same time, hold the Ctrl key while selecting.
- Use the Up or Down button to change the order of your selected columns.
- Each Column label (the label that appears at the top of the column in your display) default is the field name. You can change this on the label field. Example: “Bedrooms” can be shortened to “Beds”.
- Adjust column width in pixels. 50 pixels equals approximately 1 inch.
- Adjust column alignment; Left, Right or Center.
- When done making your selections, click on the Save button.
Step 6: To view the custom display, first run a search. In the results page, select your custom display from the drop-down display menu located just below the criteria tab.
From the results page you can edit your custom display, such as re-arrange, insert/remove columns, adjust the width and text alignment. Then click on the Manage Display icon to save those changes.
For full editing capabilities, return to Settings, click on Custom Displays, select your custom display, and then select Edit. Make the needed changes and then click Save.
Updated Jan 2022


