CRMLS is improving the process for registering or excluding listings by making listings withheld from the MLS more easily accessible and manageable from your REcore dashboard.
Registered listings will not appear in the MLS, nor will they be distributed anywhere.
The Registered listing process lets agents and brokers submit listing contracts to the MLS in compliance with CRMLS Rule 7.8, without needing to file an exclusion/waiver form (such as the C.A.R. SELM).
Main features of Registered listings:
- Ineligible for public marketing
- Days Active in MLS (DAM) are not counted
- Showings are only accessible to clients of the listing broker and their agents
Click here to access our Clear Cooperation Policy homepage.
Click here to review our Registered FAQs.
How to Create a New Registered Listing
Select Registered Listings on the left side of the REcore dashboard.
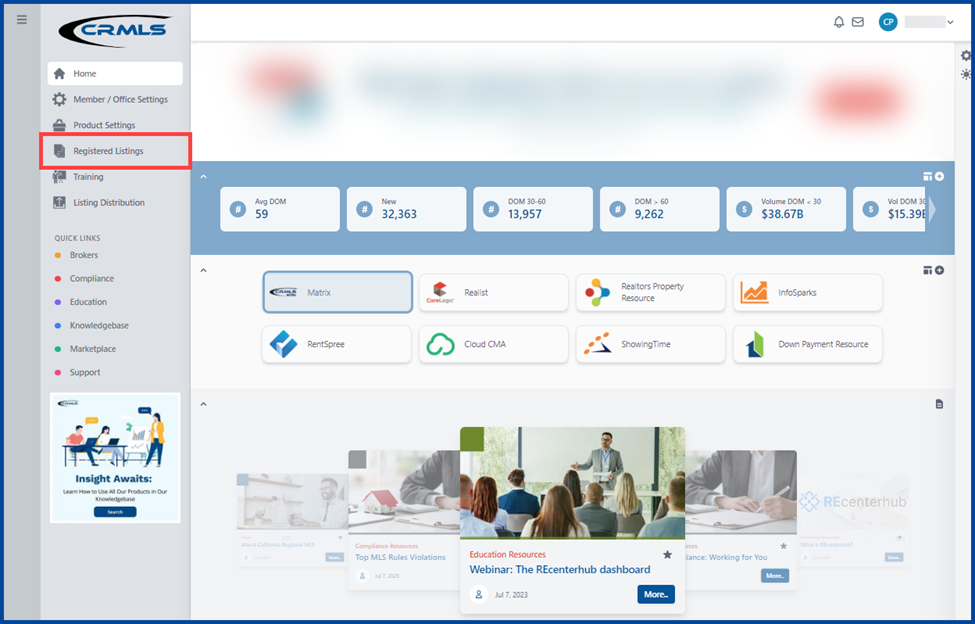
If applicable, there will be a display of your previously registered listings. Clicking the New button in the top left corner will create a new Registered listing.

Note: Agents will only see their own Registered listings. Brokers and office managers will have access to their entire office or firm’s Registered listings.
There are four tabs to complete: Location, Listing Info, List/Co-List Agent, and Confirmation.
Enter the required information for each of the following tabs, then click Next to proceed.
- Location
Fill in the required fields (indicated with an asterisk*) and any other pertinent fields.
- Enter the property address in the Search for Listing field
- Either select the address from the results list, or manually enter the Street #, Street (name), Unit # (if applicable), City, County/Parish, State/Province and Postal Code
- Click Next to continue

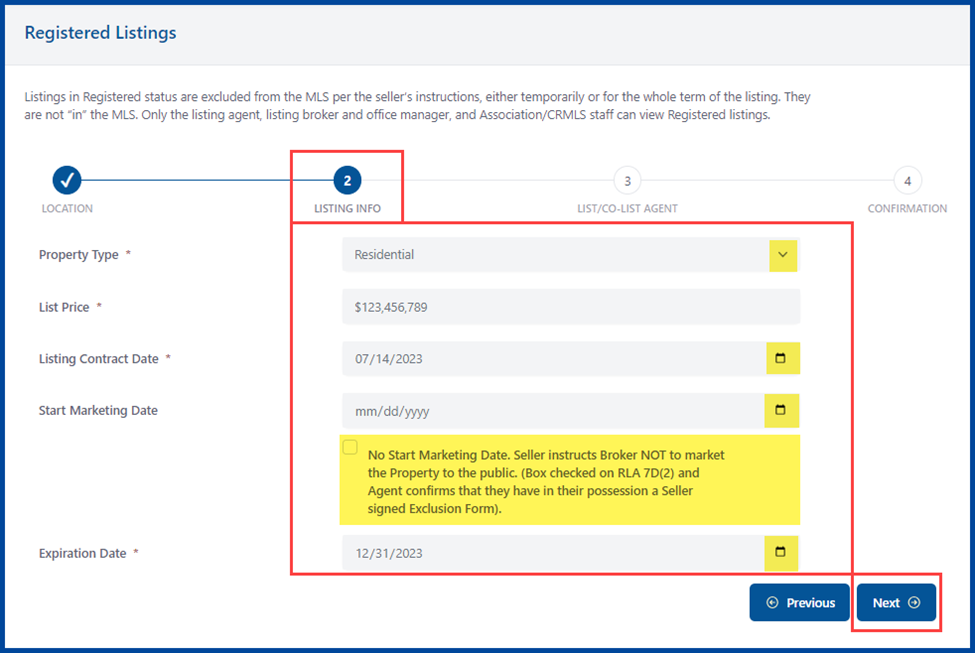
- Listing Info
Fill in the required fields (indicated with an asterisk*) and any other pertinent fields.
- Use the dropdown arrow to choose the Property Type: Residential, Land, Residential Income, or Residential Lease
- Enter the List Price
- Enter the Listing Contract Date, Start Marketing Date (if applicable), and Expiration Date
- Click Next to continue
Note: Listings excluded from the MLS will not have a Start Marketing Date. Check the relevant box to confirm that the property should not be publicly marketed and is also compliant with MLS rules (i.e., the seller has checked the box on RLA 7D(2) and the agent has confirmed they have a seller-signed Exclusion Form in their possession).
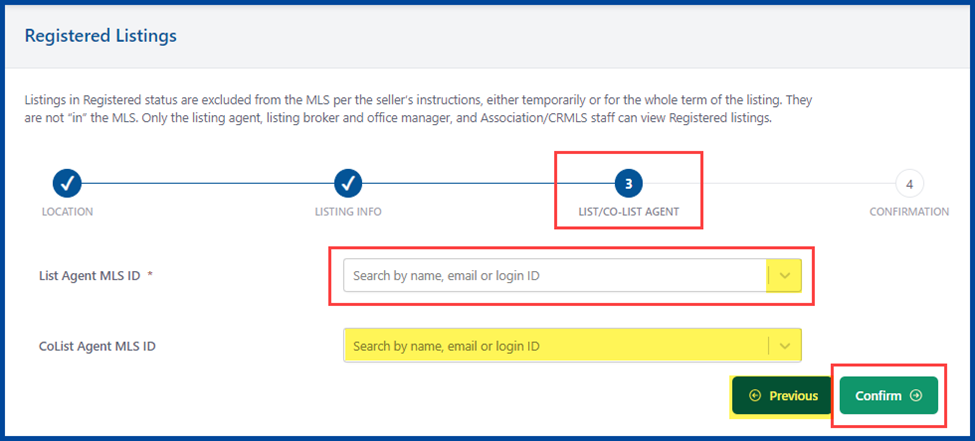
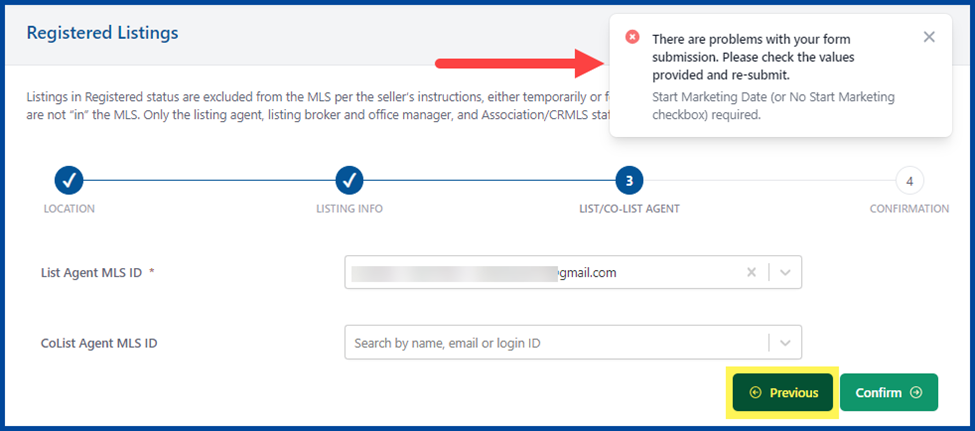
- List/Co-List Agent
Fill in the required fields (indicated with an asterisk*) and any other pertinent fields.
- Enter the required List Agent MLS ID or select one from the dropdown arrow
- Enter the CoList Agent MLS ID (if applicable)
- Click Confirm to continue
To review and update the listing details, click the on a tab or use the Previous button.
Click Confirm to check your submission for errors. If there are any issues with your form, a pop-up message will appear in the top right corner.
Correct the errors to proceed.
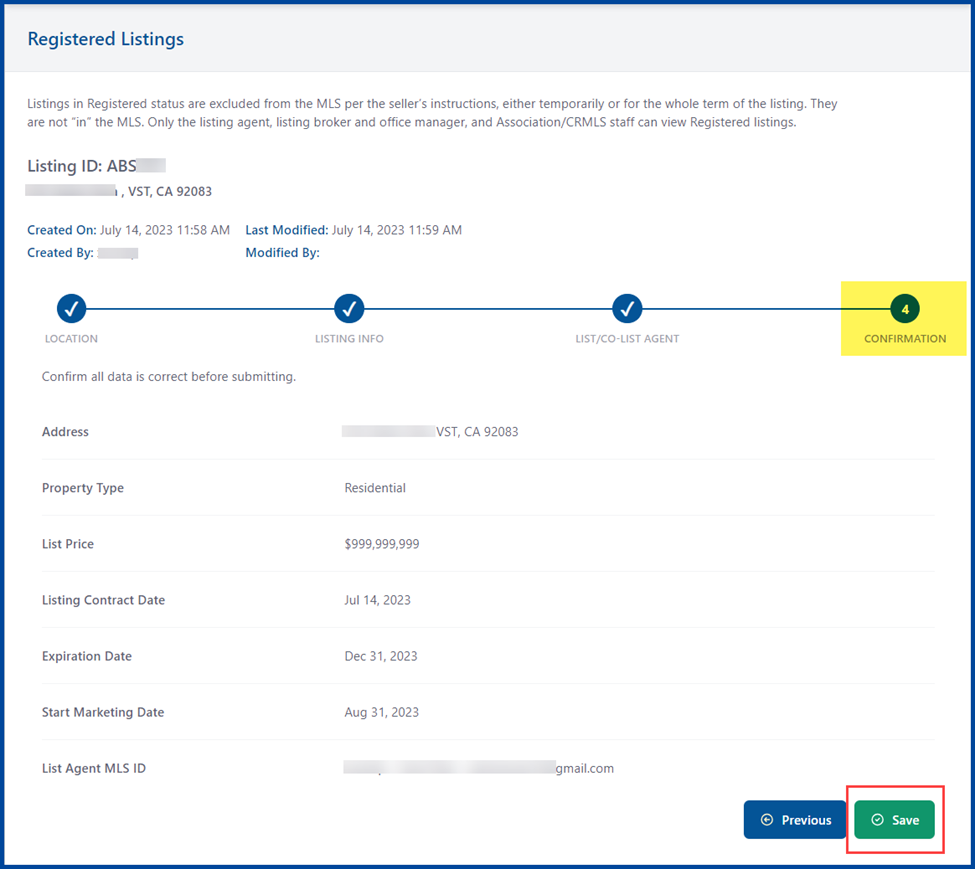
- Confirmation
Update the listing details and then click Save.

A pop-up message with your new Registered Listing ID will appear in the top left corner. This verifies that the Registered listing has been successfully created.

Organize your list of Registered listings by clicking on any column header except for Actions. Click once to sort a column in ascending order, and twice for descending order.
Use the Filter option or the Search / Filter box on the right of the page to refine your list.
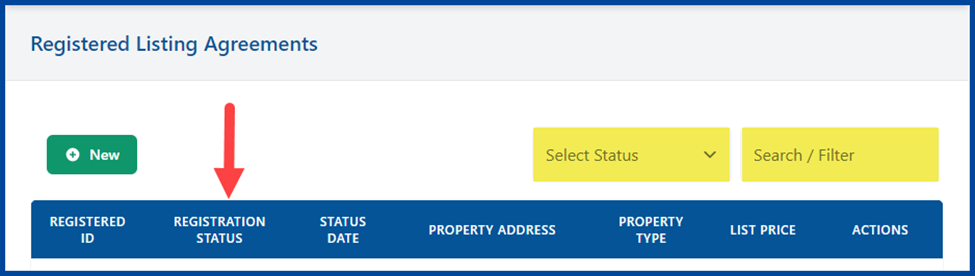
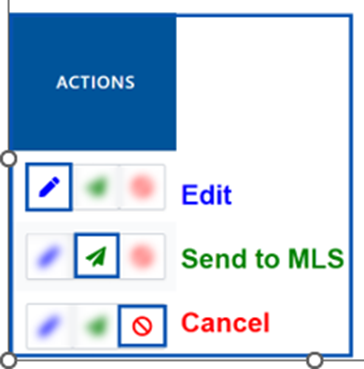
To update a specific listing, select Edit, Send to MLS, or Cancel.
Note: Only the listing agent, co-listing agent, office manager, co-listing office manager, listing broker, co-listing broker, association/board staff, and CRMLS staff have access to view and edit listings in Registered status.
How to Edit the Registered Listing
To edit your listing, click the blue pencil icon under the Actions column.

Change any outdated or incorrect information, then click Save to proceed.
A pop-up message will appear to confirm the update is complete.
Note: Once a listing has been sent to the MLS the Edit feature will no longer be usable, please edit the listing within the MLS itself.

How to Cancel a Registered Listing
To cancel a listing, click the red crossed out circle icon under the Actions column.
Once the cancel date is entered, click the Cancel Listing button to remove it.
Note: A listing cannot be cancelled via this menu after submitting to the MLS

Note: If the Property Type is inaccurate, a new Registered listing must be created. The listing agent, co-listing agent, office manager, co-listing office manager, listing broker, and co-listing broker can extend or shorten the On Market Date after creation of the Registered listing but before submission to the MLS.
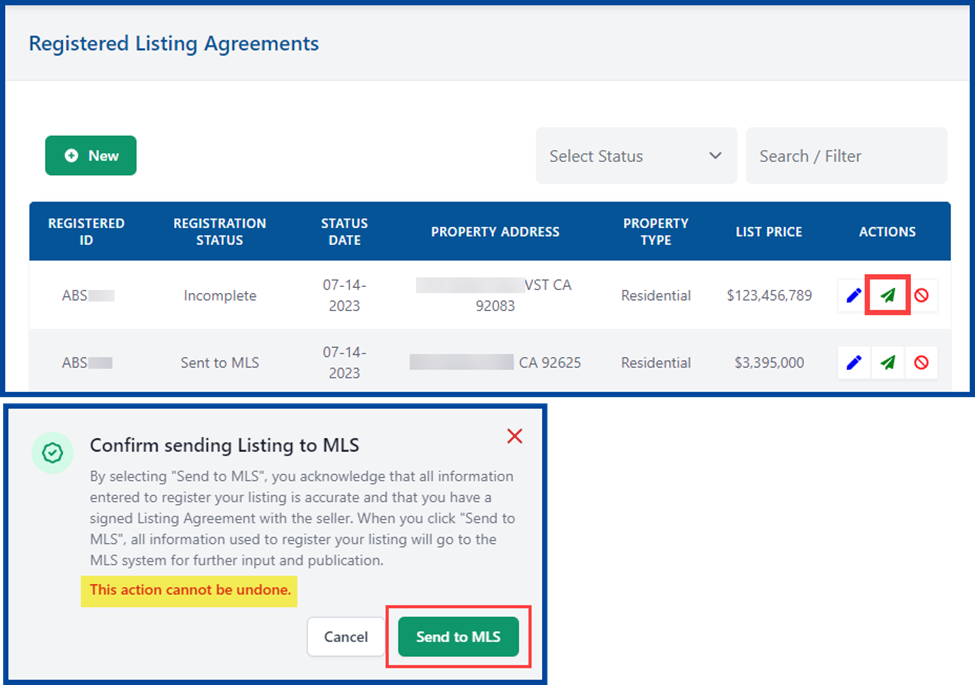
How to Send to the MLS
To send a Registered listing to the MLS and create an Incomplete listing, follow these steps:
- Click the green arrow button to the right of your listing
- View the pop-up message confirming your submission
- Click the Send to MLS button to complete the process
Note: Once a listing is sent the MLS, this action cannot be undone.
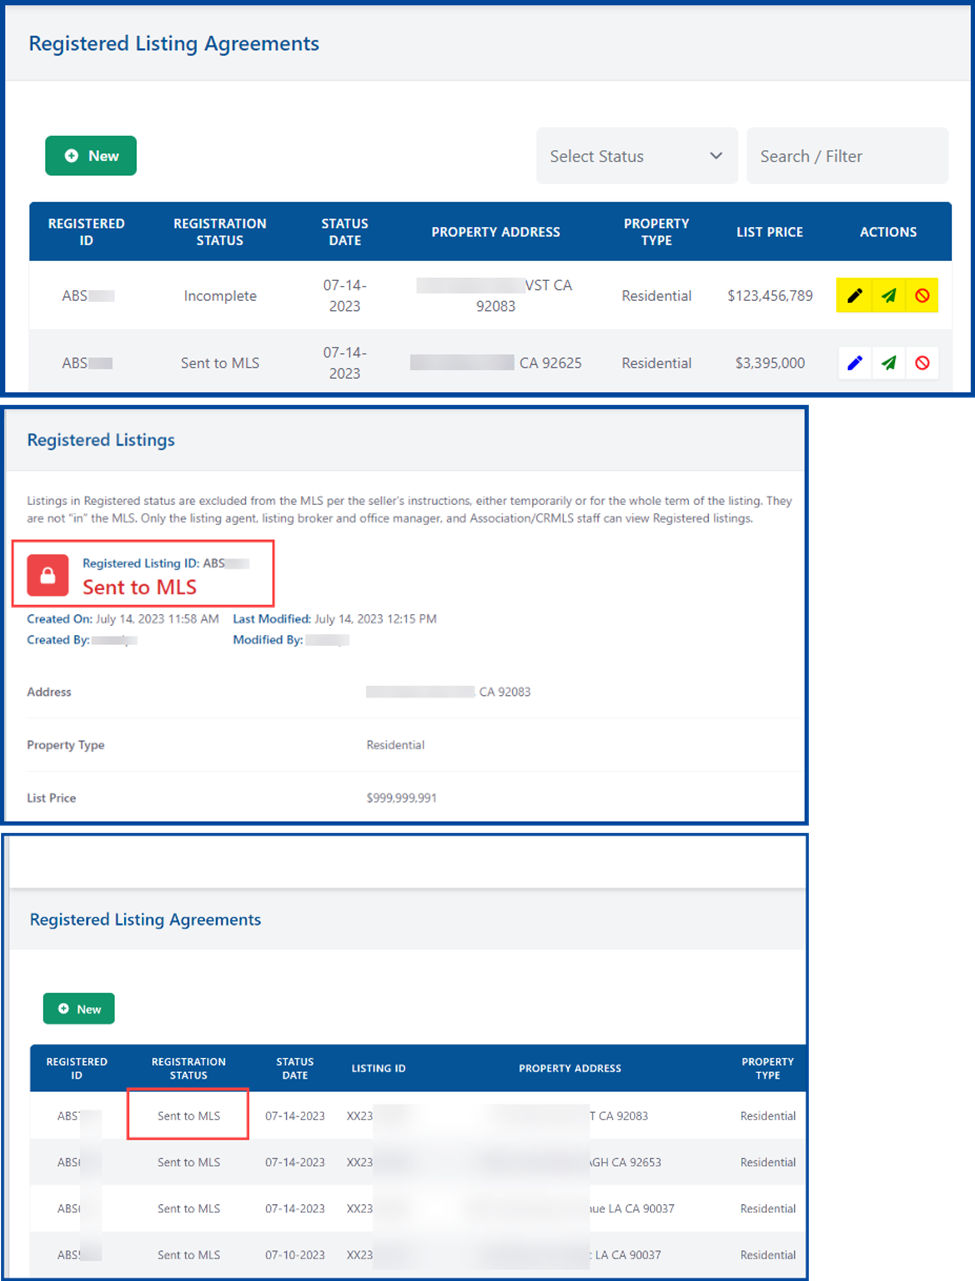
A pop-up message will appear to confirm that the listing has been sent to the MLS.

Note: There may be a 20-30 minute processing window for the listing info to transfer from the Listing Toolbox to the MLS. During that time, the status will appear in the Listing Toolbox as “Processing.”
Once Registered listings are submitted to the MLS, they must be updated within your MLS system (e.g., Matrix, Paragon, or Flexmls).
How to Edit an Incomplete Listing
Once a listing is sent to the MLS, it automatically generates an Incomplete listing in your designated MLS platform. Follow these steps to locate the listing:
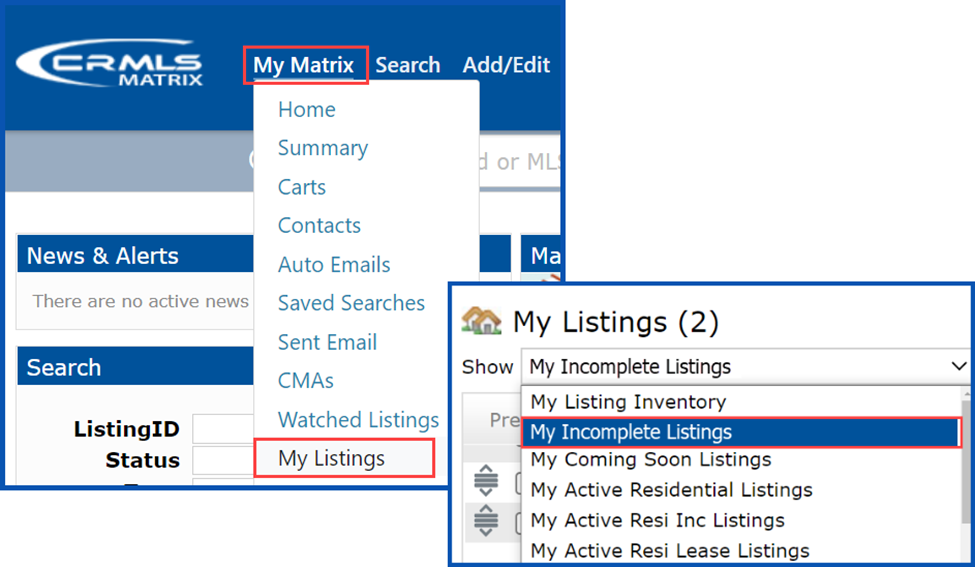
Matrix
There are two ways to locate listings within the Matrix system:
(1) Locate the My Listings widget on the home page, then click on My Incomplete Listings.

(2) Hover your mouse over the My Matrix tab and click on My Listings. Scroll through the drop-down menu in the Show section and select My Incomplete Listings.
Once you’ve located your listing, check the box to the left of the Listing ID and click the Edit button.
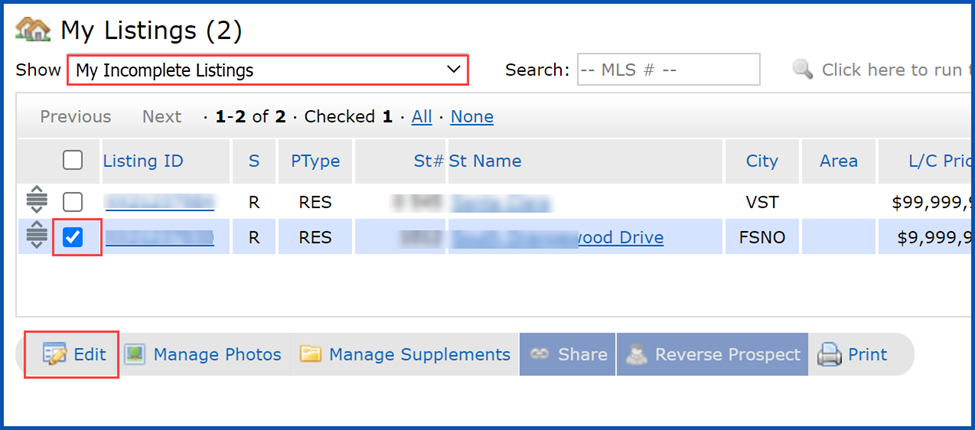
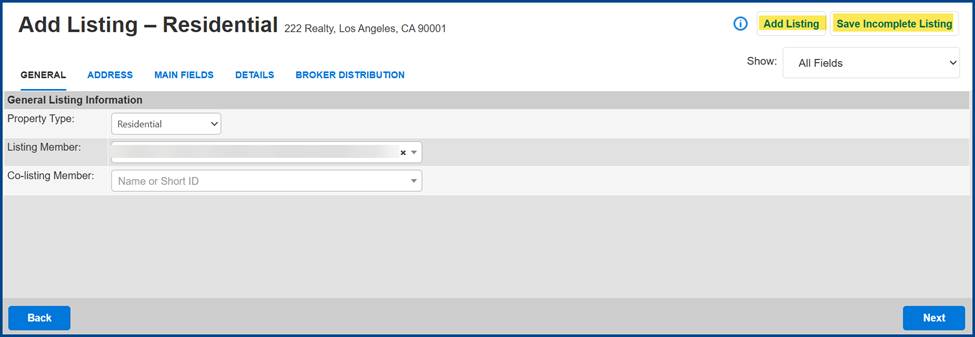
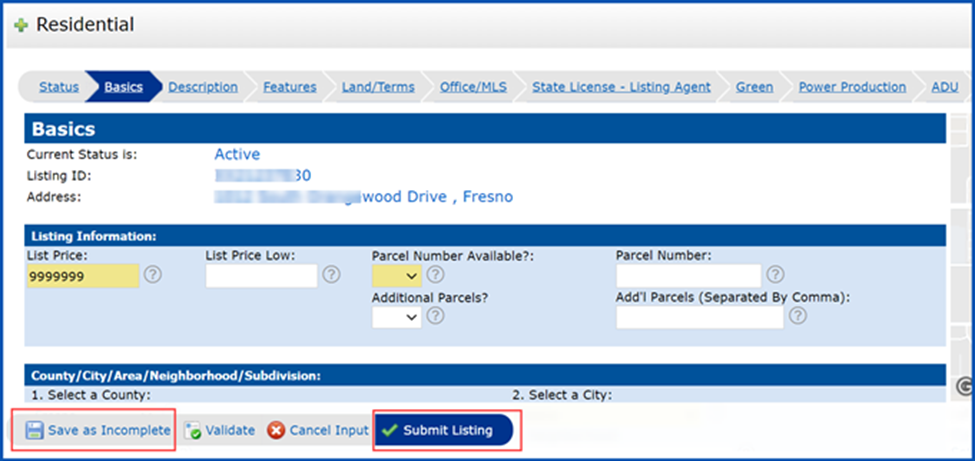
In the Modify Listing menu, click Residential under the Select Form section.

Enter your listing details to continue, including all required and relevant fields. Select Save as Incomplete to complete later or Submit Listing to publish the listing onto the MLS.
If you wish to remove the listing from the MLS, select Delete Incomplete Listing. Under “Status Information-Delete YN,” click the drop-down arrow and select Yes to confirm its removal, then click Submit Listing.
Watch this helpful video to learn more about entering a listing in Matrix.
Paragon
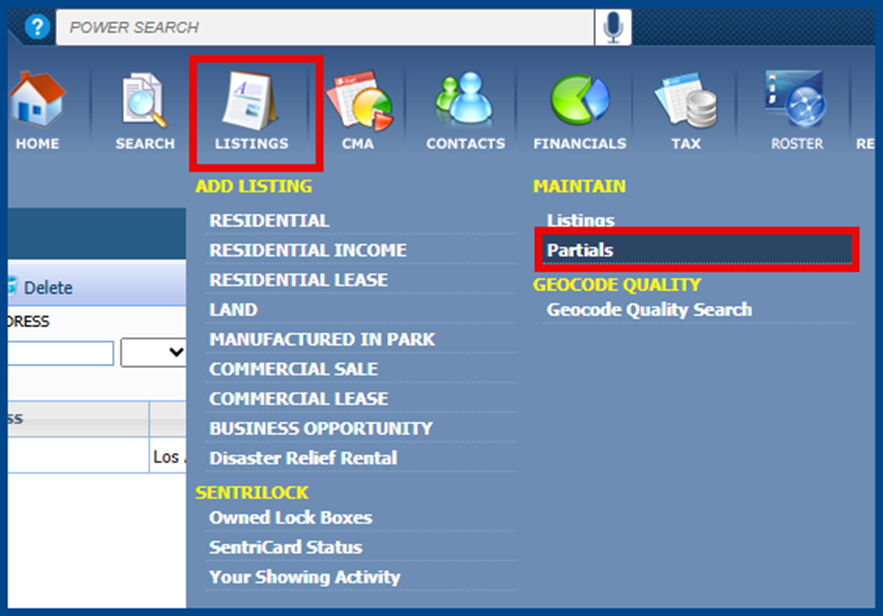
To locate the listing, under Listings click Partials in the Maintain Section.
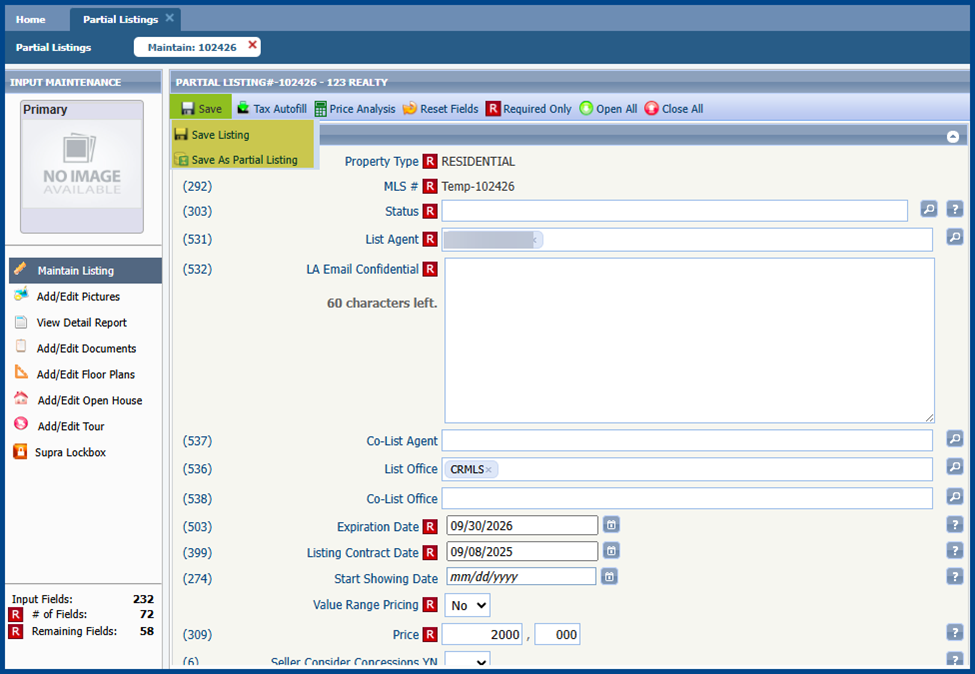
Click on the temporary MLS number assigned to your Partial listing.

Continue to enter your listing details, including all required and relevant fields. Select Save as Partial Listing to complete later or Submit Listing to publish the listing onto the MLS.
Click here for more details on entering a listing in Paragon.
Flexmls
Once a listing is sent to the MLS, it creates an Incomplete listing in Flexmls.
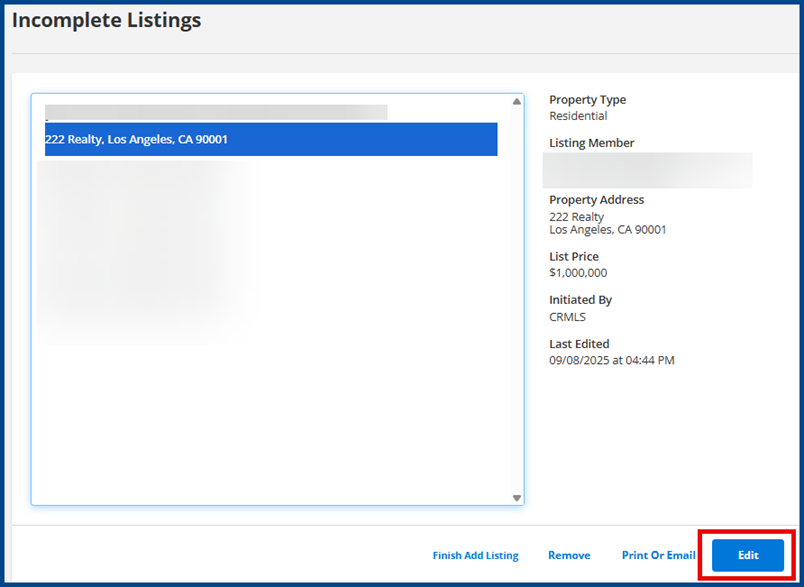
To locate the listing, click on Menu, then select My Incomplete under Add/Change.

Select the address of the Registered listing, then click the Edit button.
On the next page, go to Listing Information.
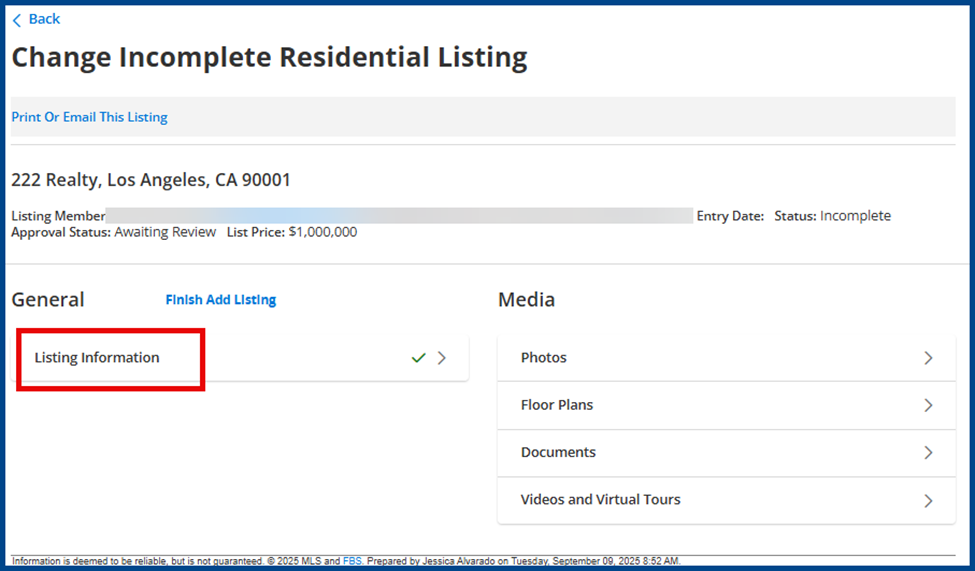
Continue entering your listing details, completing all required and relevant fields. Select Save Incomplete Listing to complete later or Add Listing to publish the listing on the MLS.