Follow the steps below to add a contact into Flexmls’s contact management menu.
Step 1:
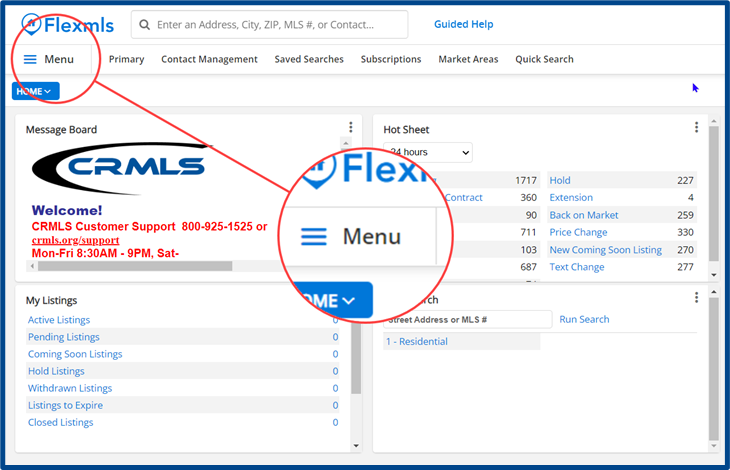
From the Flexmls homepage, locate and access the Menu tab at the top left.
Note: the Flexmls homepage display is customizable and may vary from the provided examples.
Step 2:
From the dropdown menu, locate the Contact Management submenu beneath “Contacts” (you can also use the search bar to locate it).
Note: you can “Favorite” a menu item by selecting the star icon. This will add that specific menu to the top “Favorites Bar” so you can easily find it again.

Step 3:
In the Contact Management submenu, select the Add Contact tab at the top right to open a new contact input form.
Note: You can also mass-import multiple contacts through the “Advanced” tab.

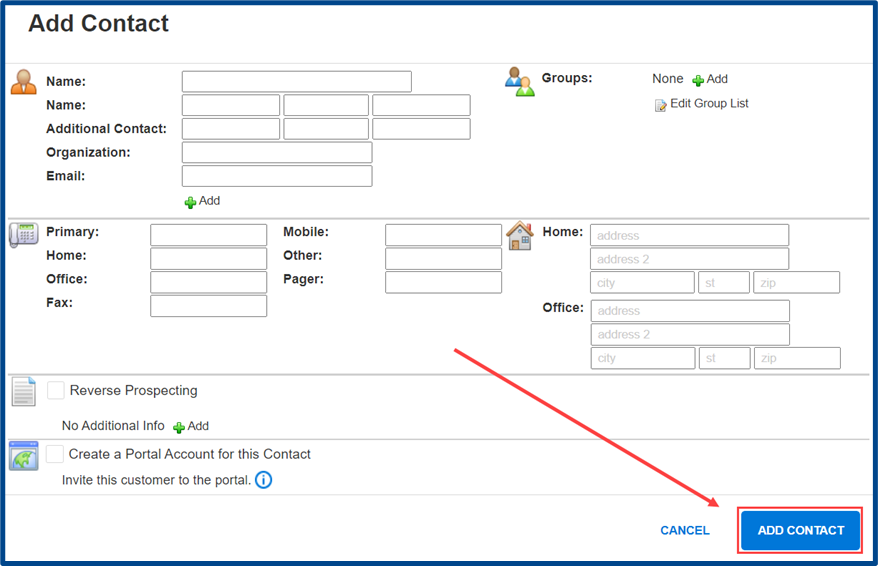
Step 4:
Enter the necessary contact information. When you have finished, select Add Contact to enter the new contact into the Flexmls system.
After adding the new contact, you can choose to create a portal account for the new client. If you do not, you’ll have another chance when you set up their subscription.