The Contacts gadget provides quick access to client information and portal activity directly on the homepage. Use this guide to learn how to add and customize the Contacts gadget.
Adding The Contacts Gadget
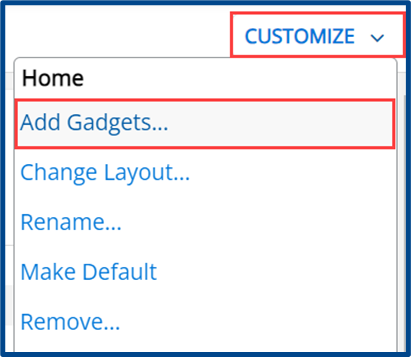
Click Customize at the top right of the homepage. From the drop-down, select Add Gadgets.
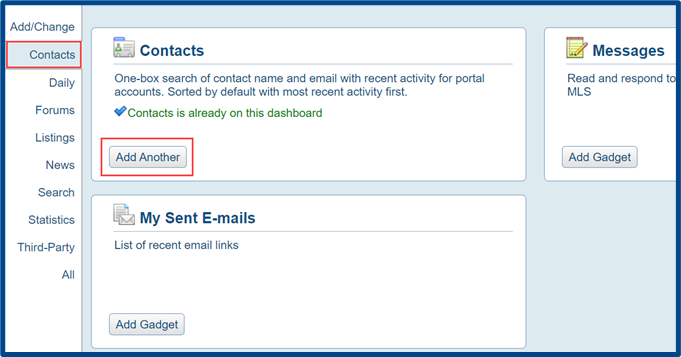
Find the Contacts tab in the left sidebar. This page will contain several gadgets to help monitor and manage Contact information. Click Add Gadget (or Add Another, if applicable) to add any of these gadgets to your Flexmls homepage.
Return to your homepage to view the Contacts gadget(s).
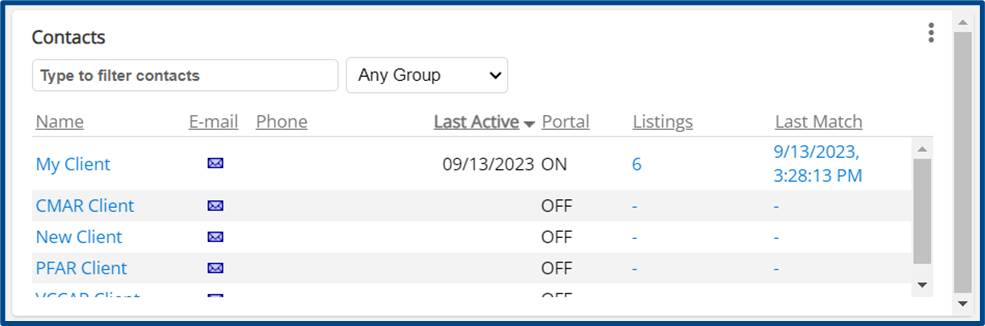
Note: You can filter by name and by group within the Contacts gadget.
Customizing The Contacts Gadget
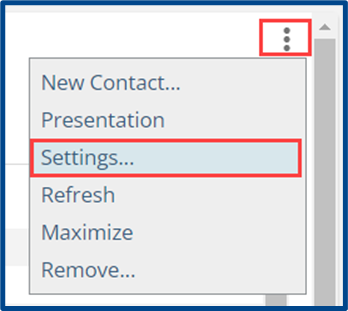
To customize the Contacts gadget and its fields, click the 3-dot menu at the top right of the gadget and select Settings.
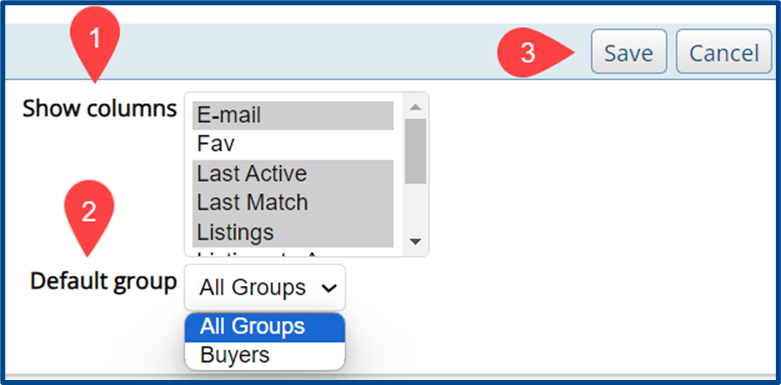
- Use Show Columns to select which information will appear in the gadget.
- You can also choose to filter based on predefined Groups. You have the option to enter group names when adding a new contact.
- Click Save to apply the changes.